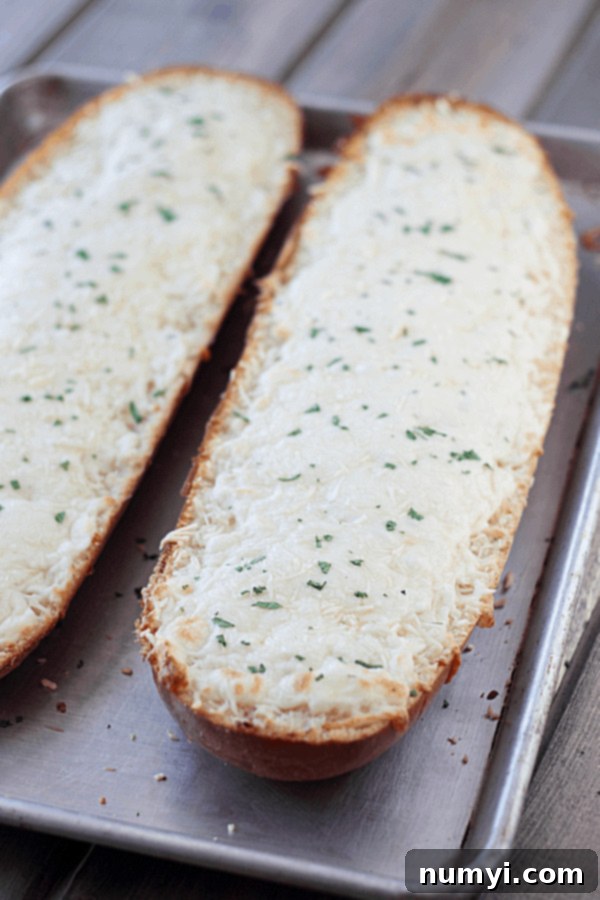
The Ultimate Cheesy Garlic Bread Recipe: Easy, Irresistible, and Homemade!
This cheesy garlic bread is more than just a side dish; it’s a culinary experience that elevates any meal from good to absolutely unforgettable. Imagine the aroma of toasted garlic butter filling your kitchen, the sight of golden-brown cheese bubbling on a perfectly crusty French loaf, and the satisfying crunch with every bite, followed by a soft, warm interior. It’s a simple pleasure that delivers immense flavor and comfort, making it an indispensable addition to your dinner table. Whether you’re serving it alongside a hearty pasta dish, using it to sop up the last drops of a rich soup, or enjoying it as a delightful appetizer, this homemade cheesy garlic bread is guaranteed to be a crowd-pleaser. With minimal effort and just a few staple ingredients, you can create a truly sensational accompaniment that will have everyone asking for more.
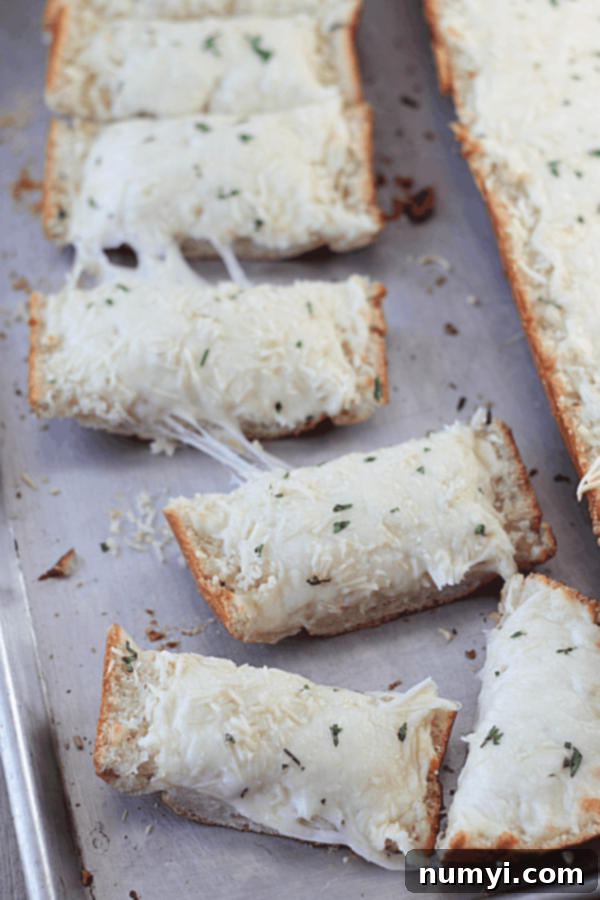
Why You’ll Fall in Love with This Cheesy Garlic French Bread Recipe
There’s an undeniable magic that happens when you combine the robust flavor of garlic, the comforting richness of cheese, and the satisfying texture of warm bread. This recipe isn’t just a way to make garlic bread; it’s the ultimate way, consistently delivering a side dish that pairs beautifully with virtually any meal. Its popularity stems from its incredible simplicity and the profound impact it has on a dining experience.
One of the primary reasons this recipe is a cherished favorite is its quick preparation time. In just a few minutes, you can transform a plain loaf of French bread into a golden, aromatic masterpiece. The process is straightforward: whip up a fragrant garlic butter, generously spread it onto your chosen bread, sprinkle with a delightful blend of cheeses, and slide it into the oven. Before you know it, your kitchen will be filled with an enticing aroma, and you’ll have a perfect side ready to serve.
While many might consider making their own bread, for this recipe, I find that a good quality store-bought French bread works wonders and saves significant time. The key is its inherent characteristics: a wide surface area perfect for maximum butter and cheese coverage, and a crust that achieves an exquisite crispness in the oven without becoming too hard. This combination ensures that every slice boasts a wonderfully crunchy exterior, perfectly contrasting with a soft, warm, and delightfully chewy interior. This textural symphony is what sets truly great cheesy garlic bread apart.
Its versatility is another huge draw. This cheesy garlic bread isn’t picky about its companions. It’s the perfect match for a wide array of dishes. Imagine dipping a warm piece into the rich sauce of a three-cheese pasta bake, or using it to complement the creamy texture of spaghetti carbonara. Beyond pasta, it’s equally at home with savory main courses like juicy pork chops in mushroom gravy or providing a comforting accompaniment to a bowl of Instant Pot whole chicken soup. Its ability to enhance, rather than overpower, other flavors makes it a culinary chameleon, always ready to shine.
Key Ingredients for the Best Cheesy Garlic Bread
Achieving extraordinary cheesy garlic bread doesn’t require an extensive list of ingredients. In fact, with just four core components, you can elevate your dinner from ordinary to exceptional. The magic lies in the quality and synergy of these simple staples. After all, who could resist the timeless appeal of cheese, the pungent kick of garlic, and the comforting foundation of good bread?
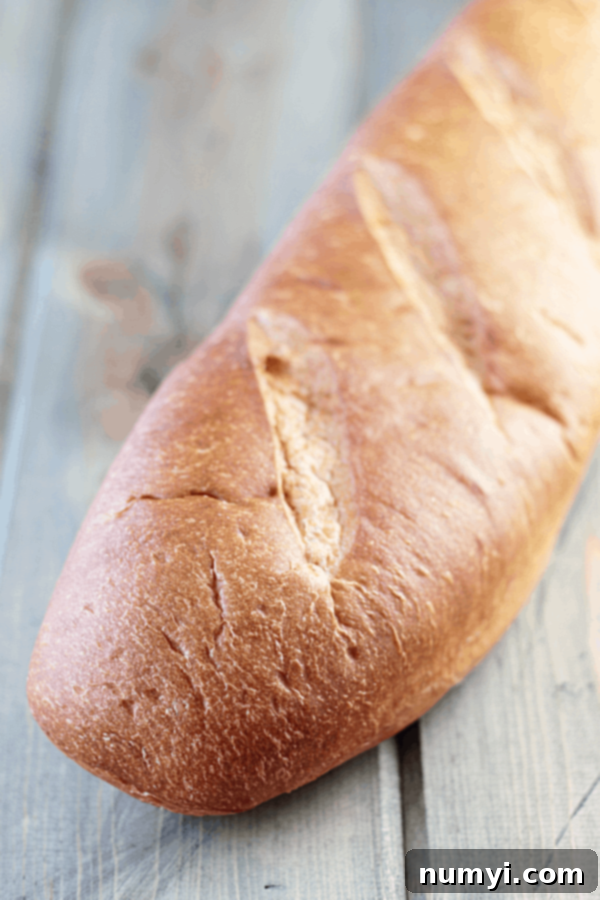
Here’s a closer look at what you’ll need and why these choices matter:
- French Bread: The foundation of our garlic bread. A traditional French loaf is ideal for this recipe due to its wide, flat surface when halved, providing ample real estate for the garlic butter and cheese. Its crust also crisps up beautifully in the oven, creating that satisfying crunch while the interior remains soft. While French bread is preferred, a sturdy Italian loaf can also be used as a fantastic alternative. Look for a loaf that feels substantial, not too airy, for the best results.
- Butter (Softened): Unsalted butter is generally recommended as it gives you control over the final saltiness of your dish. Ensuring it’s softened to room temperature is crucial for easily mixing with the minced garlic and spreading smoothly across the bread without tearing it. If your butter is too hard, microwave it in short 10-second bursts until just soft, not melted.
- Garlic (Minced): Fresh garlic is non-negotiable for the best flavor. While pre-minced garlic in a jar can be a convenient shortcut, nothing compares to the aromatic intensity of freshly minced cloves. Aim for 2-3 cloves, but feel free to adjust to your personal preference – some might even add more for an extra garlic punch! Finely mincing or even grating the garlic will ensure it distributes evenly and infuses the butter with maximum flavor.
- Cheese (Shredded Mozzarella and Parmesan): This combination offers the best of both worlds. Mozzarella provides that glorious, gooey, stretchy melt that everyone loves, creating pockets of creamy indulgence. Parmesan, on the other hand, adds a sharp, salty, and nutty depth of flavor, along with a slightly crispier texture when baked. Shredding your own cheese from a block often melts better and tastes fresher than pre-shredded varieties, which sometimes contain anti-caking agents. However, store-bought shredded cheese works perfectly well for convenience. You can also experiment with other cheeses, as detailed in our variations section.
With these high-quality yet simple ingredients, you’re well on your way to crafting a garlic bread that will be the star of any meal.
How to Make Homemade Cheesy Garlic Bread: Step-by-Step Guide
Making homemade cheesy garlic bread is a straightforward process that yields incredibly rewarding results. Follow these simple steps to create a crispy, golden, and utterly delicious side dish that everyone will adore.
Preparation is Key: Get Ready to Bake!
Before you even touch the bread, a little preparation goes a long way to ensure a smooth baking experience.
- Gather Your Tools: You’ll need a baking sheet (preferably rimmed to catch any potential drips), a small mixing bowl, and a spreading utensil (like a butter knife or spatula).
- Ingredient Prep: Make sure your butter is properly softened. If it’s rock-hard from the fridge, you can cube it and let it sit on the counter for 30-60 minutes, or gently warm it in the microwave for a few seconds until pliable. Mince your fresh garlic finely for the best distribution of flavor. Have your shredded cheeses ready to go!
Step 1: Preheat Your Oven
Begin by preheating your oven to a consistent 425 degrees F (approximately 220 degrees C). This high temperature is crucial for achieving that perfectly golden, crispy crust and quickly melting the cheese without over-drying the bread. Give your oven ample time to fully preheat before placing the bread inside.
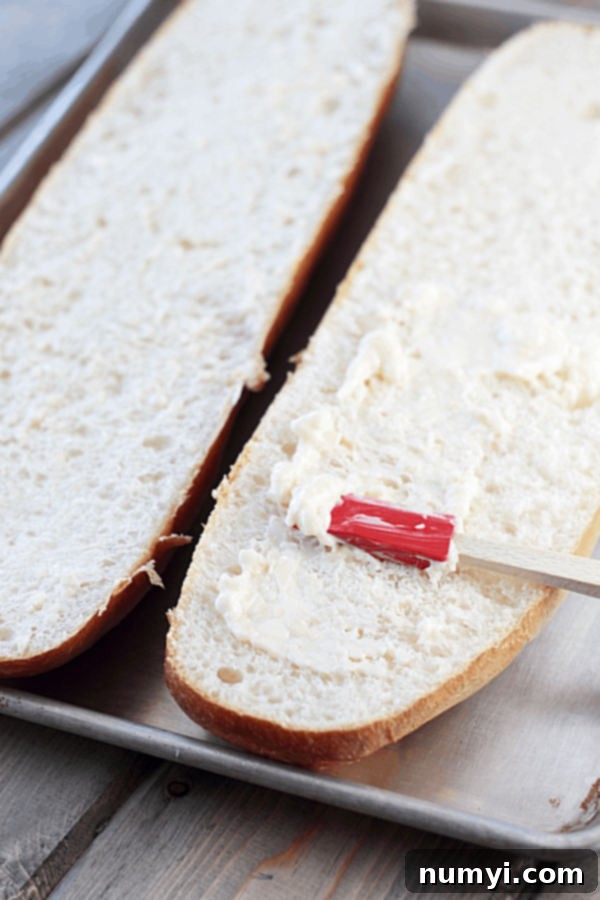
Step 2: Prepare Your French Bread
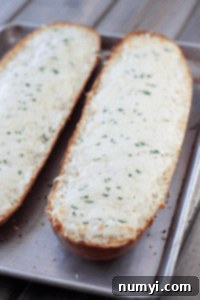
Carefully take your French loaf and slice it in half horizontally. The goal is to create two long, flat halves that will serve as the canvas for your delicious toppings. Place these two cut halves onto your baking sheet with the cut side facing upwards. This ensures maximum exposure to the heat, allowing the garlic butter to infuse and the cheese to bubble and brown beautifully.
Step 3: Craft the Garlic Butter Mixture
In your small mixing bowl, combine the softened butter with the finely minced garlic. Using a fork or spatula, mix them together thoroughly until the garlic is evenly distributed throughout the butter. You want a fragrant, spreadable paste. If desired, you can add a pinch of salt (especially if using unsalted butter) and a dash of black pepper to this mixture for extra flavor.
Step 4: Assemble and Bake Your Garlic Bread
Generously smear the garlic butter mixture evenly over the entire cut surface of both bread halves. Don’t be shy – a good layer of garlic butter is essential for flavor and moisture! Next, evenly sprinkle both shredded mozzarella and Parmesan cheeses over the buttered bread. Ensure a good coating from edge to edge.
Once assembled, slide your baking sheet into the preheated oven. Bake for approximately 10 minutes, or until the cheeses are gloriously melted, bubbly, and beginning to turn a beautiful golden brown at the edges. Keep an eye on it during the last few minutes, as ovens can vary, and you want that perfect melt without burning.
Step 5: Serve Immediately and Enjoy!
As soon as it comes out of the oven, the cheesy garlic bread will be intensely aromatic and at its peak deliciousness. Let it cool for just a minute or two before slicing into individual portions (often diagonally for a more appealing presentation) and serving. Enjoy every warm, crispy, garlicky, and cheesy bite!
Frequently Asked Questions About Cheesy Garlic Bread
While often associated with Italian cuisine in the United States, garlic bread actually has complex roots with strong Italian influences. Traditional Italian cuisine features “bruschetta,” which is typically toasted bread rubbed with garlic and drizzled with olive oil. The cheesy, butter-laden garlic bread we commonly enjoy today is largely considered an Italian-American invention, evolving from these rustic Italian traditions to become a beloved dish in its own right.
No, not typically in the same way. In Italy, you’re more likely to find “bruschetta al pomodoro” (toasted bread with garlic, olive oil, and fresh tomatoes) or simply toasted bread rubbed with a fresh garlic clove and drizzled with good quality olive oil. The generous butter and cheese application, common in American garlic bread, is less prevalent in traditional Italian cooking.
Both French bread and baguettes are iconic French loaves, but they differ slightly. French bread, as used in this recipe, typically has a softer, less dense crust compared to a traditional baguette. Its wider shape also makes it perfect for slicing horizontally and loading up with toppings. Baguettes tend to have a much crispier, thinner crust and a chewier interior, and are usually thinner in diameter. For cheesy garlic bread, the slightly softer crust of French bread becomes wonderfully toasty and crusty when baked, providing the ideal counterpoint to the soft, gooey, cheesy inside.
You can prepare the garlic butter mixture a day or two in advance and store it in an airtight container in the refrigerator. You can also slice the bread ahead of time. However, for the best texture and flavor, it’s recommended to assemble and bake the cheesy garlic bread just before serving. If you must prepare it partially ahead, you can spread the garlic butter and cheese on the bread up to a few hours in advance, but be aware the bread might absorb some moisture. Store it loosely covered at room temperature and bake as directed.
Leftovers are best stored wrapped tightly in aluminum foil or in an airtight container in the refrigerator for up to 2-3 days. While it won’t be as crispy as fresh, it will still be delicious. For optimal results, reheat in the oven.
To bring leftover cheesy garlic bread back to life, place it on a baking sheet and heat in a preheated oven at 350°F (175°C) for about 10-15 minutes, or until warmed through and the cheese is re-melted and bubbly. You can also use a toaster oven for smaller portions. Avoid the microwave, as it will make the bread soft and chewy rather than crispy.
Delicious Variations for Your Cheesy Garlic Bread
This cheesy garlic bread recipe is fantastic as is, but it also serves as an excellent canvas for culinary creativity. It’s one of those delightful dishes that you can easily customize to suit your tastebuds or whatever ingredients you happen to have on hand. Here are some ideas to inspire your next batch:
- Spice It Up: For those who love a bit of heat, sprinkle a generous pinch of red pepper flakes over the cheese before baking. This adds a subtle warmth and a delightful kick.
- Herbaceous Delight: Elevate the flavor profile with fresh herbs. Finely chopped chives, dill, rosemary, or parsley mixed into the garlic butter, or sprinkled over the cheese before baking, will add an extra layer of freshness and aromatic complexity. A combination of Italian herbs (oregano, basil, thyme) also works wonders.
- Pesto Perfection: For a vibrant twist, mix a tablespoon or two of your favorite basil pesto into the garlic butter mixture before spreading it on the bread. Then, proceed with sprinkling the cheese on top. The pesto adds a rich, savory, and slightly nutty flavor.
- Cheese Lover’s Dream: Don’t limit yourself to just mozzarella and Parmesan! Experiment with your favorite cheeses. Try sharp cheddar for a more robust flavor, creamy goat cheese for tang, smoked gouda for a deeper note, or a blend of provolone and fontina for an extra gooey texture. A sprinkle of crumbled blue cheese can add a bold, pungent dimension for adventurous palates.
- Roasted Garlic Twist: Instead of raw minced garlic, use roasted garlic for a sweeter, milder, and more complex garlic flavor. Simply roast a head of garlic, squeeze out the softened cloves, mash them into the softened butter, and proceed with the recipe.
- Everything Bagel Seasoning: For a trendy and flavorful crunch, sprinkle some everything bagel seasoning over the cheese before baking. It adds sesame seeds, poppy seeds, dried garlic, and onion flakes, providing an extra layer of texture and savory goodness.
- Sun-Dried Tomato & Feta: For a Mediterranean-inspired twist, finely chop some oil-packed sun-dried tomatoes and sprinkle them over the cheese, along with a crumble of feta cheese.
These variations allow you to keep your cheesy garlic bread exciting and tailor it to any meal or craving.
More Delicious Bread Recipes to Explore
- Cheese Breadsticks
- French Bread Pizza
- Rosemary Parmesan Bread
- Garlic Cheddar Biscuits
- Homemade Italian Bread Bowls
Cheesy Garlic Bread Recipe Card
Cheesy Garlic Bread
This cheesy garlic bread recipe is an easy, irresistible, and homemade delight that will elevate any meal. Perfectly crusty on the outside and soft, gooey, and garlicky on the inside, it’s the ultimate crowd-pleasing side dish.
Author: Countryside Cravings
Yields: 8-10 servings
Prep Time: 5 minutes
Cook Time: 10 minutes
Total Time: 15 minutes
Print Recipe
Ingredients
- 1 french loaf (can also use Italian bread)
- 4 tablespoons butter, softened
- 2-3 cloves garlic, minced (freshly minced preferred)
- 2 cups shredded mozzarella cheese
- 1/2 cup shredded Parmesan cheese
Instructions
- Preheat oven to 425°F (220°C).
- Slice the French loaf in half horizontally. Place the halves, cut-side up, on a baking sheet.
- In a small bowl, combine the softened butter and minced garlic. Spread this mixture evenly over the cut surfaces of both bread halves.
- Generously sprinkle both shredded mozzarella and Parmesan cheeses over the garlic-buttered bread.
- Bake for 10 minutes, or until the cheeses are melted, bubbly, and lightly golden brown.
- Remove from oven, slice into desired portions, and serve immediately for the best experience.
Notes
This cheesy garlic bread is best enjoyed fresh. If you have any leftovers, wrap them tightly in aluminum foil or place them in an airtight container and store in the refrigerator for up to 2 days. To reheat, place on a baking sheet and warm in an oven preheated to 350°F (175°C) for about 10-15 minutes, or until heated through and cheese is melted again.
HUNGRY FOR MORE? Subscribe to my newsletter and follow along on Pinterest, Facebook, and Instagram for all my latest updates!
Did you make this? Let me know by sharing a picture and tagging @countryside_cravings on Instagram
