The Ultimate No-Bake Lemon Lush (Lemon Lasagna) Recipe: Bright, Refreshing, and Irresistibly Easy
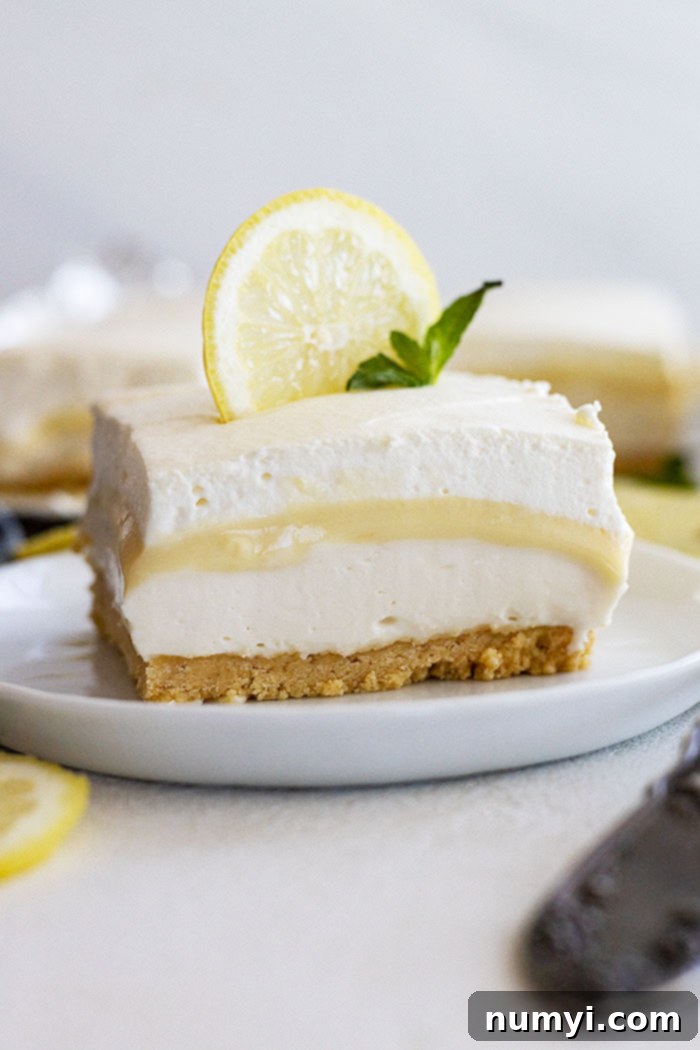
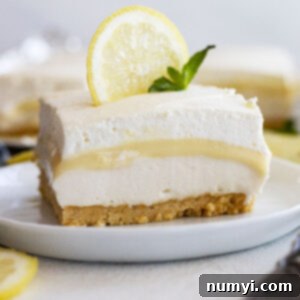
This Lemon Lush or Lemon Lasagna is a dream come true for all lemon lovers! It’s a sensational layered dessert bursting with bright, zesty, and refreshing lemon flavor from its unique lemon crust and luscious lemon layers. This incredible no-bake treat is not only easy to prepare but also perfect for any occasion, offering a delightful escape to citrus bliss.
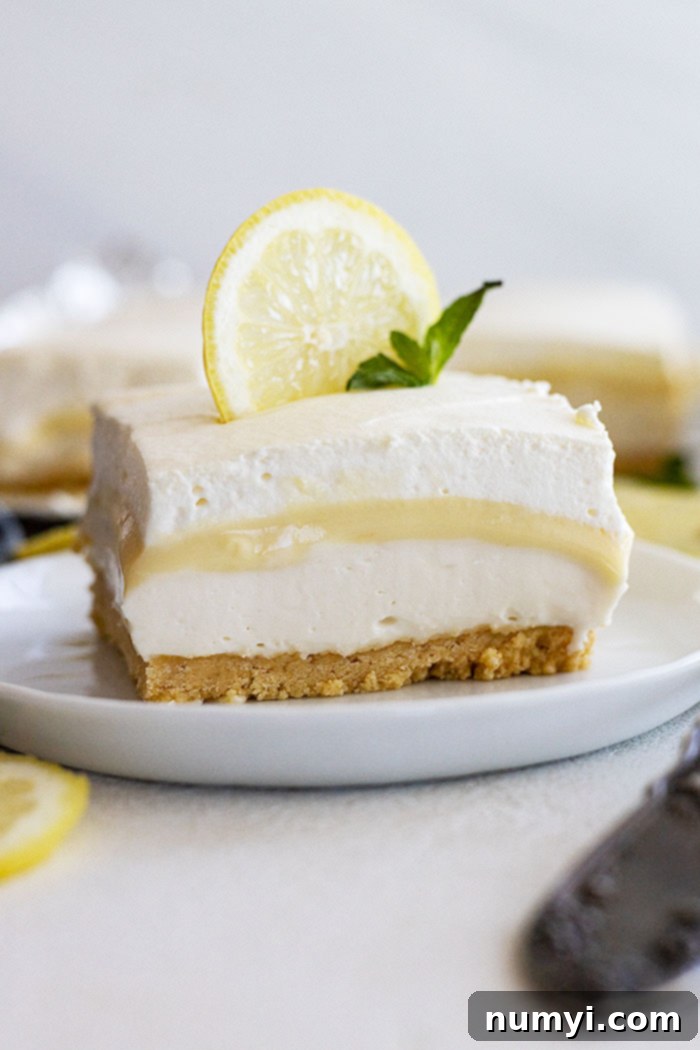
If you’re a devout lemon enthusiast, much like myself, then this no-bake layered dessert is about to become your new obsession. It’s not just a hint of lemon; it’s truly PACKED with an exhilarating lemon flavor that will awaken your taste buds. This dessert stands out with its vibrant citrus notes, making it a perfect choice for brightening any day or celebration.
I genuinely adore all types of lemon desserts, from a classic lemon bar to a refreshing Lemon Blueberry Poke Cake. The bright, tangy citrus flavor of lemon is simply unbeatable and lends itself beautifully to so many culinary creations. This Lemon Lush, with its multiple lemon-infused layers, captures that essence perfectly and is incredibly versatile for countless occasions, from casual family dinners to elegant gatherings.
Why You’ll Fall in Love with This Lemon Lush (Lemon Lasagna):
- A Timeless Classic: This isn’t just any dessert; it’s a beloved classic, a recipe that has charmed generations. Its enduring popularity is a testament to its perfect balance of flavors and textures, making it a reliable choice for any dessert spread. You know it’s good because it has stood the test of time, delighting taste buds for decades with its simple yet profound deliciousness.
- Double the Cheesecake Delight: Our recipe takes indulgence up a notch by doubling the rich, creamy cheesecake layer. This extra thick, velvety smooth layer provides a luxurious contrast to the zesty lemon, ensuring every bite is a symphony of sweet and tangy perfection. It’s a truly satisfying element that elevates this Lemon Lush, making it feel extra special and decadent.
- Effortlessly No-Bake: Say goodbye to turning on your oven, especially during warm weather or when you’re short on time! This dessert is entirely no-bake, making it incredibly convenient and stress-free. All you need is your refrigerator to chill and set these delightful layers, leaving you more time to enjoy your day and your guests.
- Wholly Homemade Goodness: While many recipes might call for store-bought pudding or whipped topping, ours celebrates the superior taste and texture of scratch-made components. From the rich lemon pudding to the fresh whipped cream, every layer is crafted with care using simple, wholesome ingredients for an unparalleled flavor that truly shines and tastes authentically homemade.
- Infinitely Adaptable: One of the best things about this Lemon Lush is how easily it can be customized to suit your preferences. Whether you prefer a different type of crust, want to experiment with unique toppings, or adjust the intensity of the lemon, this recipe serves as a fantastic canvas for your culinary creativity. Make it truly “yours” with a few simple tweaks and personal touches.
- Flexible Pudding Options: We understand that sometimes life gets busy, and you might need a shortcut. While we strongly recommend the homemade lemon pudding for its incredible depth of flavor and smooth texture, we also provide easy substitutions for those moments when you need a simpler approach. You can still achieve a fantastic, crowd-pleasing dessert with store-bought alternatives – just scroll down to our “Tips and Substitutions” section for helpful suggestions!
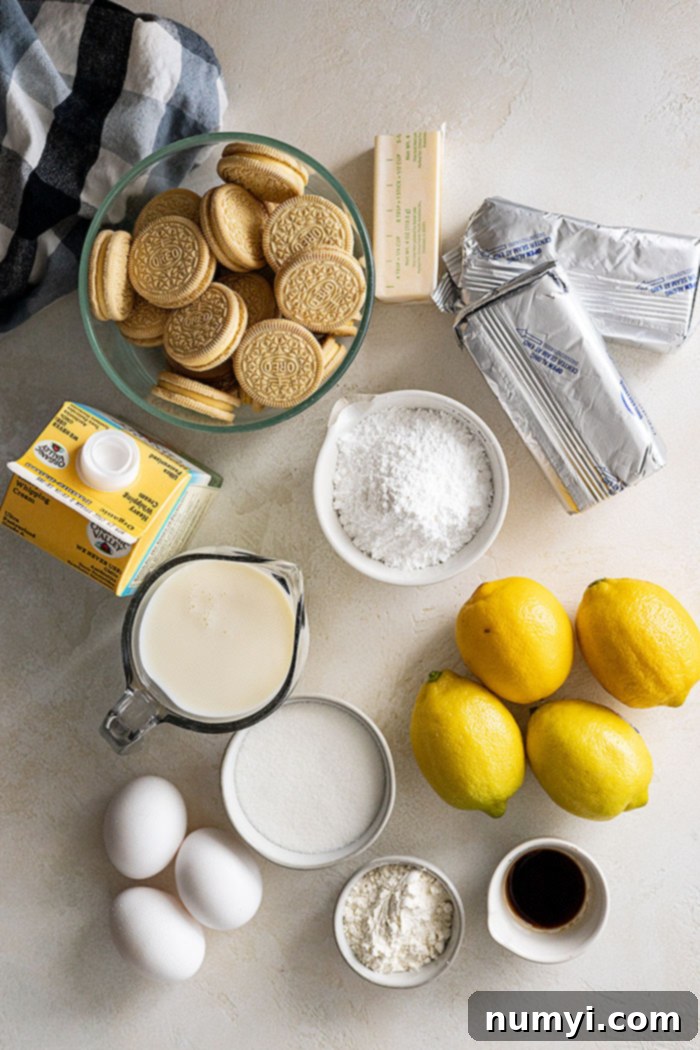
Let’s Talk About The Essential Ingredients for This Lemon Lush:
Crafting the perfect Lemon Lush begins with understanding the role of each carefully selected ingredient. Here’s a deeper dive into what makes each layer spectacular:
- BASE LAYER: Lemon Oreos and Butter. The foundation of our Lemon Lush starts with a crisp, intensely flavorful crust. We choose **lemon Oreos**, finely ground, for an extra boost of bright lemon flavor right from the bottom up. These are combined with rich, melted butter, which binds the crumbs together to form a perfectly firm and buttery base. For those who prefer a more classic or neutral base, golden Oreos or graham crackers also make excellent choices, offering a delightful crunch and sweetness.
- CREAM CHEESE LAYER: Cream Cheese, Powdered Sugar, and Fresh Lemon Juice. This is the indulgent, creamy heart of the dessert. We use **softened cream cheese** to ensure an incredibly smooth, lump-free texture. This is then sweetened with powdered sugar and infused with a generous amount of **fresh lemon juice**, creating a tangy, rich, and velvety layer that perfectly balances the sweetness of the crust and pudding. Softened cream cheese is non-negotiable for that luxurious, spreadable consistency.
- LEMON PUDDING LAYER: Sugar, Flour, Whole Milk, Heavy Whipping Cream, Eggs, Fresh Lemon Juice, Lemon Zest, Salt, and Vanilla. This homemade lemon pudding is the vibrant star of the show.
- **Granulated Sugar** provides the primary sweetness.
- **All-Purpose Flour** acts as the thickening agent, giving the pudding its custardy texture.
- **Whole Milk and Heavy Whipping Cream** contribute to a rich, luscious, and truly decadent pudding base.
- **Egg Yolks** enrich the pudding, adding to its creaminess and giving it a beautiful, natural golden hue. The exact color of your lemon layer will naturally depend on the intensity of your egg yolks. If you desire a more vivid yellow, a few drops of food coloring can be added.
- **FRESH Lemon Juice and Lemon Zest** are absolutely critical. We strongly urge you to use freshly squeezed lemon juice for the best, most authentic, and brightest lemon flavor imaginable. The zest adds an aromatic punch that enhances the overall citrus profile.
- A pinch of **Salt** balances and enhances all the flavors, while **Vanilla Extract** adds a subtle depth and warmth.
- WHIPPED CREAM LAYER: Heavy Whipping Cream, Powdered Sugar, and Vanilla. Crowning this magnificent dessert is a light, airy, and delicately sweet homemade whipped cream. Made simply with very cold heavy whipping cream, powdered sugar, and vanilla extract, it’s whipped to perfection until stiff peaks form. This cloud-like topping provides a refreshing finish and a beautiful visual contrast, making each bite feel light and heavenly.

How To Craft the Perfect Base Layer:
Creating the perfect base for your Lemon Lush is a simple yet essential first step to building this delicious dessert.
Begin by taking your lemon Oreos – or your chosen alternative – and grinding them down to fine, uniform crumbs. A food processor works wonders for this, achieving fine crumbs in mere seconds. Alternatively, you can place the cookies in a sturdy Ziploc bag and crush them thoroughly with a rolling pin until they are finely ground. Once you have your fine crumbs, transfer them to a medium bowl.
Pour in the melted butter and mix thoroughly with a spoon or spatula until all the crumbs are evenly moistened and resemble wet sand. This ensures your crust will hold together beautifully and won’t be dry or crumbly when you slice into the finished dessert.
Next, press this buttery crumb mixture firmly and evenly into the bottom of a 9×13 inch baking pan. You can use the back of a spoon, the bottom of a flat glass, or even your clean hands to achieve a compact and level layer across the entire base of the pan. The firmer you press, the more stable your crust will be.
Once pressed, place the pan in the refrigerator to chill while you prepare the next layer. This chilling step is crucial as it helps the butter solidify and the crust set, preventing it from crumbling or becoming messy when sliced later.
How To Prepare the Silky Cream Cheese Layer:
The cream cheese layer is where the “lush” truly begins to take shape, offering a rich, tangy, and incredibly smooth counterpoint to the crispy crust.
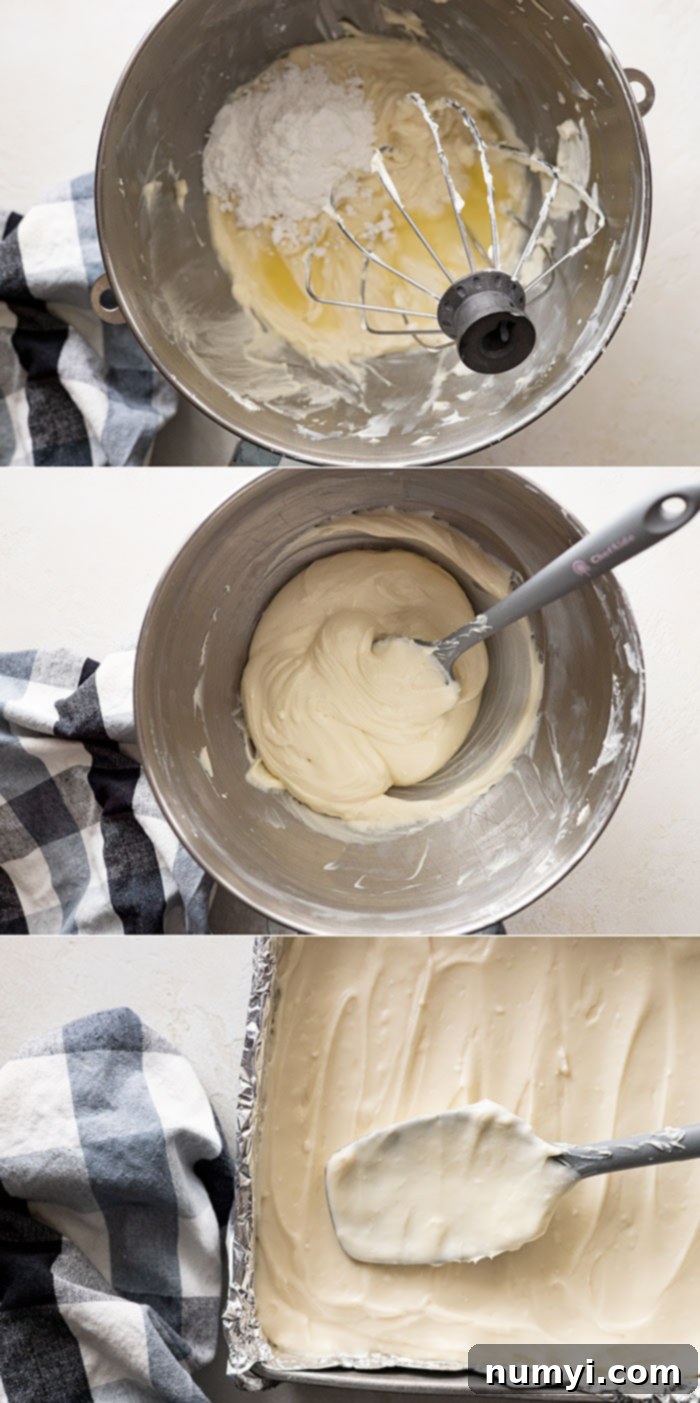
Begin by placing your softened cream cheese in a medium-sized mixing bowl. It is absolutely crucial that the cream cheese is at room temperature. This allows it to beat smoothly without any lumps, resulting in a perfectly creamy and homogenous texture. Beat the cream cheese with an electric mixer (either a handheld mixer or a stand mixer fitted with a paddle attachment) until it is light, fluffy, and completely smooth, usually for about 2 to 3 minutes.
Next, gradually add the powdered sugar, beating until it is fully incorporated into the cream cheese and the mixture is once again smooth. Finally, pour in the fresh lemon juice. Continue beating until the mixture is completely silky, creamy, and thoroughly combined. Remember to scrape down the sides and bottom of the bowl frequently with a spatula during this process. This ensures that all ingredients are evenly mixed and there are no unmixed bits lurking at the bottom.
Once the cream cheese mixture is perfectly smooth and luscious, carefully spread it in an even layer over your chilled cookie base. Take your time to spread it gently to avoid disturbing the crust below. Return the pan to the refrigerator to allow this layer to firm up and chill while you move on to preparing the star of the show: the homemade lemon pudding.
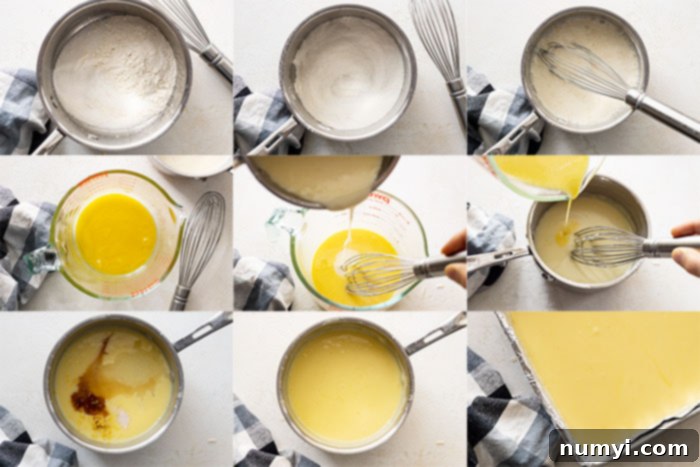
How To Create the Vibrant Lemon Pudding Layer from Scratch:
This homemade lemon pudding is the heart and soul of the Lemon Lush, providing an intense burst of fresh lemon flavor and a wonderfully smooth, custardy texture that truly sets this dessert apart.
- Prepare Dry Ingredients: In a large saucepan, whisk together the granulated sugar and all-purpose flour until they are completely smooth and free of any lumps. This initial step is vital to prevent a lumpy pudding later on.
- Combine with Liquids: Gradually stir in the whole milk and heavy whipping cream into the dry mixture. Whisk thoroughly until all ingredients are well combined and the mixture is smooth. Set this saucepan aside for a moment.
- Prepare Egg Yolks: In a separate medium-sized bowl, gently beat the three large egg yolks until they are just combined. You don’t need to whip them vigorously; simply break them up and mix them slightly until uniform in color. Set these aside.
- Heat Pudding Base: Place the saucepan with the milk and sugar mixture on the stove and begin to cook over medium to medium-low heat. While cooking, it is absolutely essential to whisk constantly. Constant whisking prevents the mixture from sticking to the bottom of the pan, scorching, or forming undesirable lumps. Continue to cook and whisk until the mixture just starts to thicken. You’ll notice it beginning to coat the back of your spoon slightly. Remove the saucepan from the heat immediately at this point.
- Temper the Egg Yolks: This is a critical step to ensure a smooth, uncurdled pudding. Slowly pour at least half of the warm milk mixture into the beaten egg yolks in a steady, thin stream. As you pour, *crucially, whisk the egg yolks constantly and vigorously.* This process, known as tempering, slowly brings the temperature of the egg yolks up. By gradually warming them, you prevent the eggs from scrambling when they are eventually combined with the hot pudding base. If you add cold eggs directly to a hot liquid, you would end up with cooked egg bits, not smooth pudding. Once about half the warm mixture is incorporated into the yolks, you can pour the now-tempered egg mixture back into the saucepan with the remaining milk mixture.
- Thicken the Pudding: Return the saucepan to the heat and continue to cook over medium-low heat, whisking constantly. The pudding will continue to thicken significantly as it cooks. You’ll know it’s ready when it has reached a rich, custard-like consistency and thickly coats the back of a spoon, leaving a clear trail when you run your finger across it. Be patient, but be careful not to overcook it, as it can become too thick or scorch.
- Add Flavorings: Once thickened to perfection, remove the pudding from the heat. Stir in the fresh lemon zest, fresh lemon juice, vanilla extract, and a pinch of salt. The zest and juice are added at this stage to preserve their bright, volatile flavors, ensuring maximum impact.
- Cool and Set: Allow the pudding to cool slightly at room temperature for about 10-15 minutes. This preliminary cooling prevents the warm pudding from melting the chilled cream cheese layer. Then, carefully spread the slightly cooled lemon pudding evenly over the firm cream cheese layer in your pan. Return the entire pan to the refrigerator and allow it to cool completely and set. This will take at least 2-3 hours, but preferably longer, to ensure all layers are perfectly firm and chilled before the final whipped cream topping.
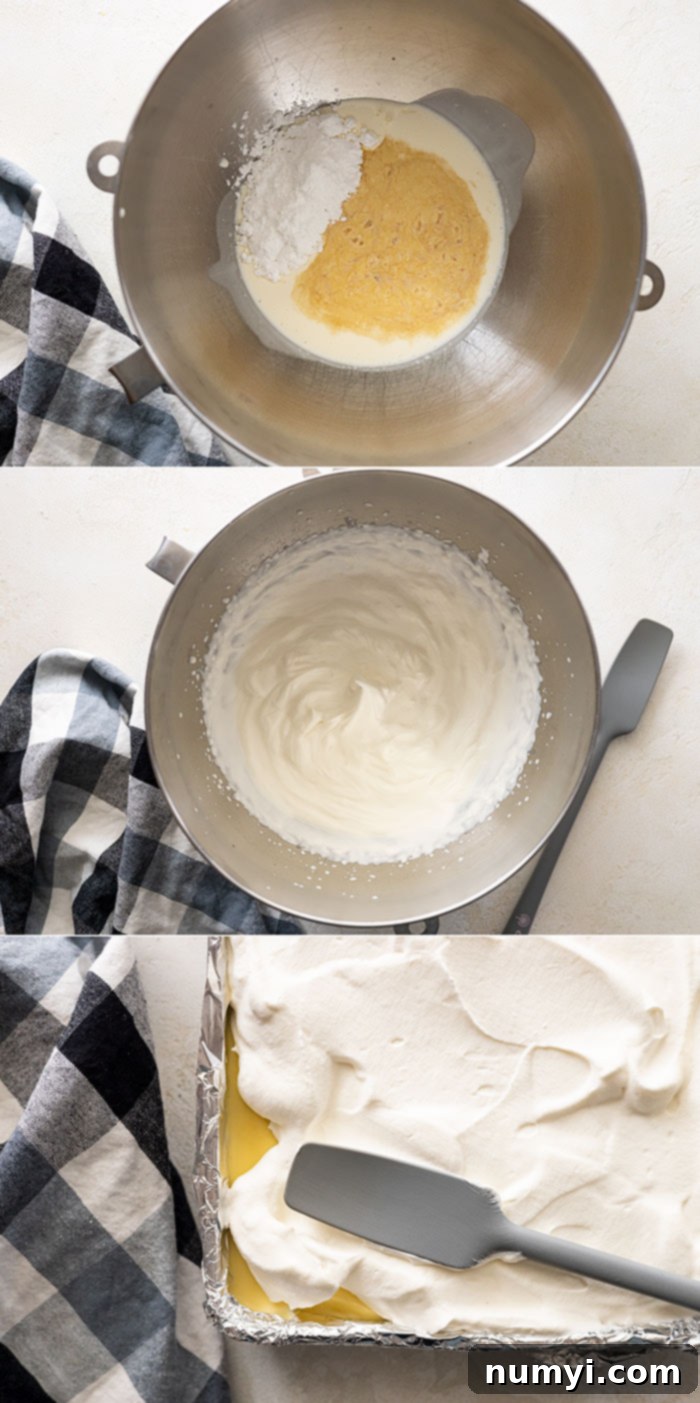
How To Create the Light & Airy Whipped Cream Layer:
The final touch to this incredible Lemon Lush is a light and fluffy homemade whipped cream layer, adding a perfect airy and refreshing finish that balances the richness of the layers below.
In a medium-sized mixing bowl, combine the very cold heavy whipping cream, powdered sugar, and vanilla extract. For optimal results, consider chilling your mixing bowl and whisk attachments in the freezer for about 10-15 minutes before you begin. Using cold cream and chilled equipment is vital for achieving stiff peaks quickly and effectively, preventing the cream from becoming runny.
With an electric mixer (either handheld or stand mixer with a whisk attachment), begin whipping the ingredients on high speed. Continue to whip until stiff peaks form. Stiff peaks mean that when you lift the beaters from the cream, the peaks hold their shape firmly and do not droop. Be careful not to over-whip the cream, as you risk turning it into butter! Stop as soon as the desired consistency is achieved.
Once your whipped cream is perfectly fluffy and ready, gently and evenly spread this cloud-like topping over the completely cooled and set lemon pudding layer. Take care to cover the entire surface for a beautiful presentation.
For the best flavor and texture, refrigerate the entire dessert, covered tightly, until you are ready to serve. This final chilling period allows all the flavors to meld beautifully and ensures the whipped cream holds its structure perfectly, delivering a truly delightful experience with every spoonful.
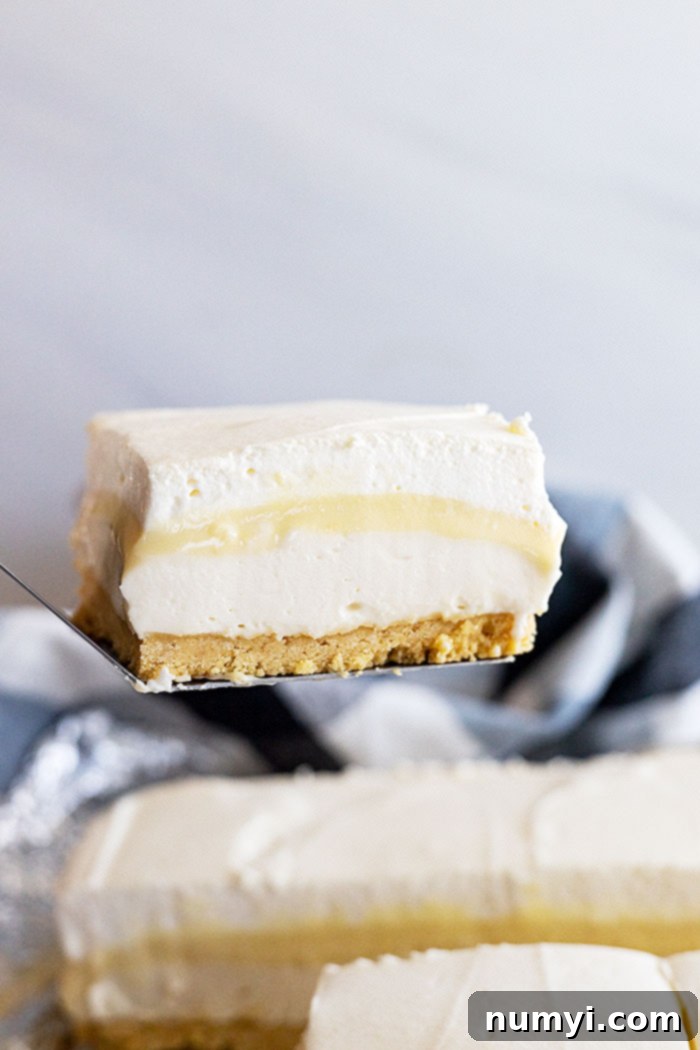
Tips for Success & Creative Variations:
Making Lemon Lush is a rewarding experience, and with these tips and substitutions, you can ensure your dessert is a showstopper every time, perfectly tailored to your taste and schedule.
- Please Use Fresh Lemon Juice: Seriously, skip the bottled stuff! Freshly squeezed lemon juice provides a bright, natural, and complex flavor that bottled juice simply cannot replicate. It’s the secret ingredient to a truly outstanding and vibrant lemon dessert. The difference in taste is remarkable and worth the effort.
- Milk Matters for Pudding: We recommend using whole milk for the richest, creamiest pudding texture. While 2% milk can work in a pinch, we strongly advise against fat-free milk or most non-dairy alternatives, as they may significantly alter the texture and consistency of the pudding, making it less stable or creamy.
- Crust Customization: While lemon Oreos add an fantastic extra citrus punch and a beautiful visual, feel free to use golden Oreos for a more classic vanilla-wafer like base. Both provide a delightful crunch and a wonderful foundation.
Base Layer Substitutions for Every Preference:
- Homemade Shortbread Crust: For a more elegant and buttery base with a delicate crumble, try a homemade shortbread crust. Combine 2 cups of all-purpose flour and 1/3 cup powdered sugar in a bowl. Cut in 1 cup of cold, cubed butter using a pastry blender or your fingertips until the mixture resembles coarse crumbs. Press this mixture firmly into a 9×13 inch baking pan and bake at 350°F (175°C) for 10-12 minutes, or until it’s lightly golden around the edges. Allow it to cool completely before adding the next layers to maintain its crispness.
- Classic Graham Cracker Crust: A timeless and universally loved choice, a graham cracker crust offers a familiar sweet and slightly spiced flavor. In a medium bowl, combine 2 cups of graham cracker crumbs, 1/3 cup of granulated sugar, and 8 tablespoons (1 stick) of melted butter. Mix well until all ingredients are evenly moistened. Press firmly and evenly into a 9×13 inch baking pan. Refrigerate until firm, typically 30 minutes, before proceeding with the next layers.
- Decadent Nut Crust: For a sophisticated twist and added texture, consider a nut crust. In a medium bowl, combine 2 cups of all-purpose flour and 1/2 cup of powdered sugar. Cut in 1 cup of cold, cubed butter until coarse crumbs form. Stir in 1 cup of finely chopped pecans or walnuts. Press this mixture into an even layer in the bottom of a 9×13 inch pan and bake at 350°F (175°C) for 20-25 minutes, or until golden brown and wonderfully fragrant. Ensure it cools completely before layering to prevent melting.
Elevate Your Lemon Lush with Creative Toppings:
- Fresh Berries: Brighten your dessert with a colorful and fresh array of sliced strawberries, fresh blueberries, or tangy raspberries. They add a beautiful visual appeal, a burst of complementary fresh flavor, and a healthy touch.
- Crushed Cookies: A sprinkle of extra crushed lemon or golden Oreos on top provides a delightful textural contrast and playfully reinforces the base flavor.
- Toasted Coconut: For a tropical and aromatic note, lightly toast some shredded coconut in a dry pan until golden brown and fragrant, then sprinkle it generously over the whipped cream layer just before serving.
- Crushed Nuts: A scattering of finely crushed pecans, almonds, or pistachios can add a subtle crunch and nutty depth, complementing the creamy layers.
- Lemon Zest Curls: For a simple yet elegant garnish, use a vegetable peeler or microplane to create delicate lemon zest curls or fine zest over the top.
Lemon Pudding Shortcuts (When Time is Tight):
While our homemade lemon pudding is unmatched for flavor and texture, we understand that convenience sometimes takes priority. Here are some excellent alternatives if you’re short on time:
- Instant Lemon Pudding Mix: You can use two (3.4oz) boxes of instant lemon pudding mix. Prepare them according to the package directions, but use only 3 cups of cold milk for both boxes (instead of 4 cups) to ensure a firmer set that holds up well in layers. For an extra pop of flavor, stir in the zest of one fresh lemon to enhance the artificial taste.
- Lemon Pie Filling: A ready-made, good-quality lemon pie filling can be a quick and easy substitute. Ensure the filling is thick enough to hold its shape when spread; if it’s too thin, it may seep into the cream cheese layer.
- Lemon Curd: For an intensely tart and luxurious layer, store-bought or homemade lemon curd is a fantastic option. Be mindful not to make the layer too thick, as its richness and tartness are quite potent. This will add a sophisticated, gourmet touch to your Lemon Lush.
Frequently Asked Questions (FAQs):
Absolutely, and in fact, we highly recommend it! Making your Lemon Lush the day before serving allows all the incredible layers and vibrant flavors to meld and deepen beautifully. The textures also have ample time to set perfectly, resulting in a more cohesive and delicious dessert. In our experience, it often tastes even better on the second day and remains wonderfully fresh and delightful for 3 to 5 days, making it an ideal make-ahead option for gatherings or meal prep.
To keep your Lemon Lush at its absolute best, store it covered tightly in the refrigerator. An airtight container is ideal, or you can press plastic wrap directly onto the surface of the whipped cream to prevent it from drying out, forming a skin, or absorbing other odors from your fridge. When stored properly, it will maintain its delicious flavor and creamy texture for up to 5 days.
While technically possible, we generally do not recommend freezing Lemon Lush. The delicate textures of the cream cheese and pudding layers can be altered by freezing and thawing, potentially becoming grainy, watery, or losing their smooth consistency. The whipped cream layer might also lose its airy consistency and separate upon thawing. For the best experience, we advise enjoying this dessert fresh from the refrigerator within the recommended storage time.
Yes, absolutely! While lemon Oreos are fantastic for an intensified lemon flavor, you can certainly experiment with other cookie varieties. Golden Oreos provide a classic vanilla-like base that complements the lemon beautifully. For a unique flavor contrast, some people even enjoy using chocolate Oreos, which can offer a delightful pairing of chocolate and lemon. Feel free to get creative with your crust choice to match your preferences!
Looking For More Great Desserts?
If you’ve enjoyed this delightful Lemon Lush, you’re in for a treat with more of our irresistible dessert recipes. Explore our collection for your next sweet adventure:
- Tres Leches Cake: A rich and moist milk-soaked cake that’s incredibly satisfying.
- Fudge Banana Cake: A decadent combination of moist banana cake topped with luscious fudge.
- S’more Cookie Bars: All the campfire deliciousness of s’mores, but in an easy-to-eat bar form.
- No Bake Chocolate Peanut Butter Bars: An ultimate favorite, these bars are rich, creamy, and require no oven!
- No Chill Soft Chocolate Chip Cookies: Perfect soft and chewy cookies you can make without the wait.
HUNGRY FOR MORE? Don’t miss out on our latest delicious creations! Subscribe to my newsletter and follow along on Pinterest, Facebook, and Instagram for all my latest updates, recipes, and culinary inspirations!
Lemon Lush (Lemon Lasagna)
Ingredients
BASE LAYER:
- 1 (1lb4oz) (566g) package lemon oreos, ground to fine crumbs
- 6 tablespoons butter, melted
CREAM CHEESE LAYER:
- 4 (8oz) (250g) packages cream cheese, softened
- 2 cups (220g) powdered sugar
- 3 tablespoons fresh lemon juice
LEMON PUDDING LAYER:
- ¾ cup (160g) granulated sugar
- ⅓ cup (45g) all purpose flour
- 1 cup (235ml) whole milk
- 1 cup (235ml) heavy whipping cream
- 3 large egg yolks
- zest from 1 lemon
- ½ cup (120ml) fresh lemon juice
- 1 teaspoon vanilla extract
- ¼ teaspoon salt
WHIPPED CREAM LAYER:
- 2 cups (475ml) heavy whipping cream, cold
- ¼ cup (27g) powdered sugar
- 1 teaspoon vanilla extract
Instructions
BASE LAYER:
-
In a medium bowl combine the oreo crumbs and melted butter. Mix well. Press into an even layer in the bottom of a 9×13 baking pan. Place in the refrigerator.
CREAM CHEESE LAYER:
-
In a medium bowl beat the cream cheese until smooth. Add powdered sugar, and lemon juice. Beat until smooth.
-
Spread in an even layer on top of the base layer. Place in the refrigerator.
LEMON PUDDING LAYER:
-
In a large saucepan combine the sugar and flour until smooth and has no lumps. Stir in the milk and cream until well combined. Set aside.
-
In a medium sized bowl gently beat the egg yolks until combined. Set aside.
-
Place the saucepan of milk and sugar on the stove and cook over medium to medium low heat. While cooking whisk constantly to prevent any lumps. Cook while whisking until it starts to thicken and remove from heat. Pour at least half of this mixture in a steady SMALL stream into the beaten yolks. While you are pouring whisk constantly to prevent your yolks from scrambling. This process is called tempering. Now you may pour the egg mixture back into the saucepan.
-
Return this to the heat and cook until it has thickened to coat the back of a spoon. It will also thicken more as it cools. Remove from heat and stir in the lemon zest, juice, vanilla, and salt. Cool slightly and spread over the cream cheese layer. Place in the refrigerator to cool completely.
WHIPPED CREAM LAYER:
-
In a medium sized bowl whip, the heavy whipping cream, powdered sugar, and vanilla on high speed until stiff peaks form. Spread over the cooled lemon pudding layer. Refrigerate, covered, until ready to serve.
Notes
- STORAGE: Store covered in the refrigerator for up to 5 days.
- The color of the lemon pudding layer will depend on how dark the egg yolks are. If you would like it darker add a few drops of yellow food coloring.
