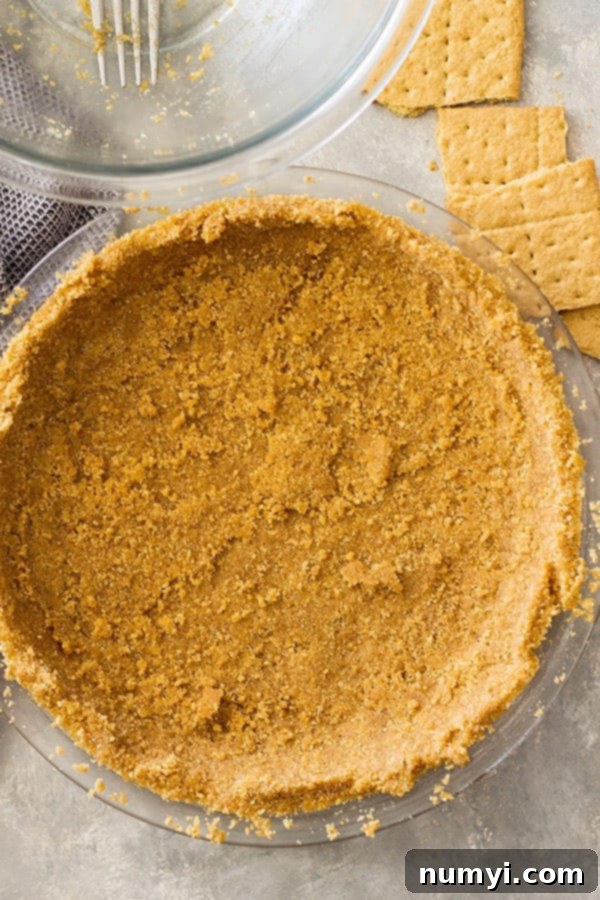
The Best Homemade Graham Cracker Pie Crust Recipe: Easy, Buttery, and Perfect for Any Dessert
Elevate your desserts with this incredibly easy, thick, and buttery Homemade Graham Cracker Pie Crust. Made from scratch with just 4 simple ingredients, it offers a superior flavor and texture that store-bought crusts simply can’t match. Get ready to create the perfect foundation for all your favorite cheesecakes, pies, and delightful no-bake treats!
Why Master This Easy Homemade Graham Cracker Pie Crust Recipe?
Every home baker needs a reliable and easy graham cracker crust recipe in their repertoire. It’s truly a game-changer, serving as the perfect base for an endless array of desserts, from classic cheesecakes and creamy pies to tangy lemon bars and decadent no-bake treats. Once you have this foolproof recipe down, you’ll wonder how you ever baked without it.
While there’s absolutely no shame in reaching for a pre-made crust – we all do it from time to time for convenience – I promise you’ll be astonished by the difference a homemade graham cracker crust makes. It delivers a rich, authentic flavor that store-bought versions simply can’t replicate, and it never has that slightly stale taste. Our recipe results in a crust that is delightfully thick, perfectly buttery, and utterly delicious. It’s balanced in sweetness, making it a versatile complement to countless dessert fillings. Plus, it’s so incredibly simple to whip up, you’ll feel like a baking pro in minutes.
Once you’ve mastered this recipe, you’ll have a superior homemade graham cracker pie crust ready for anything. Whether you need to pre-bake it for a crisp finish (don’t worry, we’ll cover baking times below!), prepare it ahead of time for future use by chilling or freezing, or simply use it as a no-bake foundation for your favorite cold desserts, the possibilities are truly limitless. This recipe empowers you to create stunning, delicious desserts with ease.
Benefits of Making Your Own Graham Cracker Crust
You’ll quickly fall in love with making your graham cracker crust from scratch. Here’s why this homemade version stands out:
- Minimal Ingredients: It requires just 4 basic ingredients, many of which you likely already have in your pantry.
- Unmatched Versatility: This crust is a culinary chameleon, perfect for virtually any pie, cheesecake, bar, or no-bake dessert you can imagine.
- Incredibly Easy Process: Forget complicated steps! This recipe is designed to be straightforward and achievable for bakers of all skill levels.
- Quick Preparation: You can have this crust ready to use or bake in as little as 15 minutes, making it ideal for when dessert cravings strike.
- Superior Taste and Texture: Hands down, it tastes far better than any store-bought alternative, boasting a fresh, buttery, and perfectly crumbly-yet-firm texture.
- Customizable Flavor: Easily adjust the sweetness or add extra spices to perfectly match your dessert’s profile.
Key Ingredients for the Perfect Homemade Graham Cracker Pie Crust
Crafting the perfect graham cracker crust requires only a handful of essential ingredients. Here’s a closer look at what you’ll need and why each plays a vital role:
- GRAHAM CRACKERS: The star of our show! I typically use classic honey graham crackers for a traditional flavor that pairs beautifully with most fillings. However, feel free to get creative! Cinnamon-sugar graham crackers add a delightful warmth, while chocolate graham crackers are fantastic for chocolate-based desserts. You can even find pre-crushed graham cracker crumbs in most grocery stores for ultimate convenience, but crushing them yourself ensures optimal freshness and texture.
- BUTTER: This is your binder. Make sure to melt the butter completely before incorporating it into the crumbs. Unsalted butter is usually preferred in baking to control the salt content of your dish, but salted butter can work if that’s all you have; just be mindful of any additional salt in your filling. The melted butter coats the crumbs, allowing them to stick together and form a firm crust once chilled or baked.
- GRANULATED SUGAR: Regular white granulated sugar provides just the right amount of sweetness to the crust, ensuring it complements your dessert without being overwhelmingly sweet. For an extra layer of flavor and a slightly chewier texture, you can also substitute a portion or all of the granulated sugar with light brown sugar. This adds a subtle molasses note that can be wonderful in certain pies or cheesecakes.
- CINNAMON: A small touch of ground cinnamon makes a surprisingly big difference. It adds a subtle warmth and aromatic depth that elevates the overall flavor of the crust, making it feel extra special. Don’t worry, it won’t overpower your dessert, but rather enhance it. If you’re feeling adventurous, a pinch of nutmeg or a dash of pumpkin pie spice blend could also be lovely, especially for seasonal desserts.
Step-by-Step Instructions to Make Your Easy Graham Cracker Crust
Follow these simple steps to create a flawless homemade graham cracker crust every time:
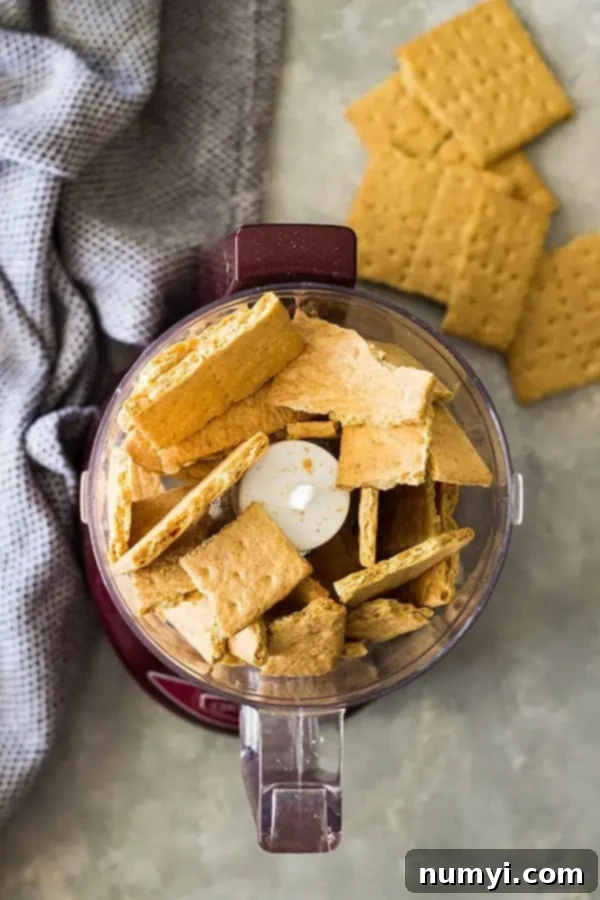
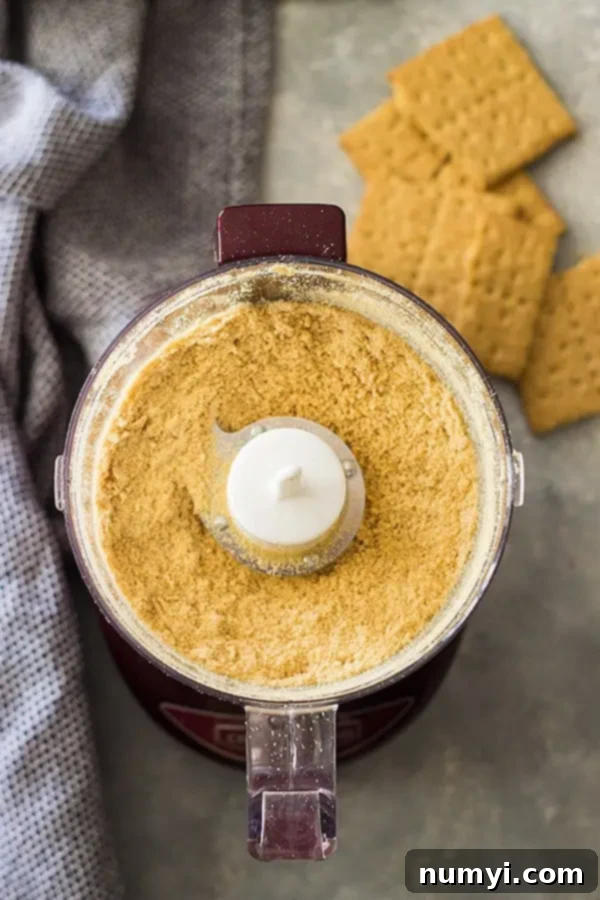
PREPARE THE GRAHAM CRACKERS: The first crucial step is to transform your graham crackers into super-fine crumbs. For the quickest and most consistent results, add the graham cracker sheets to a food processor or a high-speed blender. Pulse until the crackers are reduced to an ultra-fine, sand-like consistency. This fine texture is essential for a crust that holds together firmly and evenly. If you don’t have a food processor, no problem! Place the graham crackers in a sturdy Ziploc bag, seal it, and use a rolling pin to crush them until very fine. Ensure there are no large chunks left.
COMBINE WITH THE SUGAR AND CINNAMON: Transfer your finely ground graham cracker crumbs into a medium-sized mixing bowl. Add the granulated sugar (or brown sugar, if you’re using it) and the ground cinnamon. Use a whisk or a spoon to thoroughly mix these dry ingredients together. This ensures that the sweetness and spice are evenly distributed throughout the crumbs, guaranteeing a balanced flavor in every bite of your finished crust.
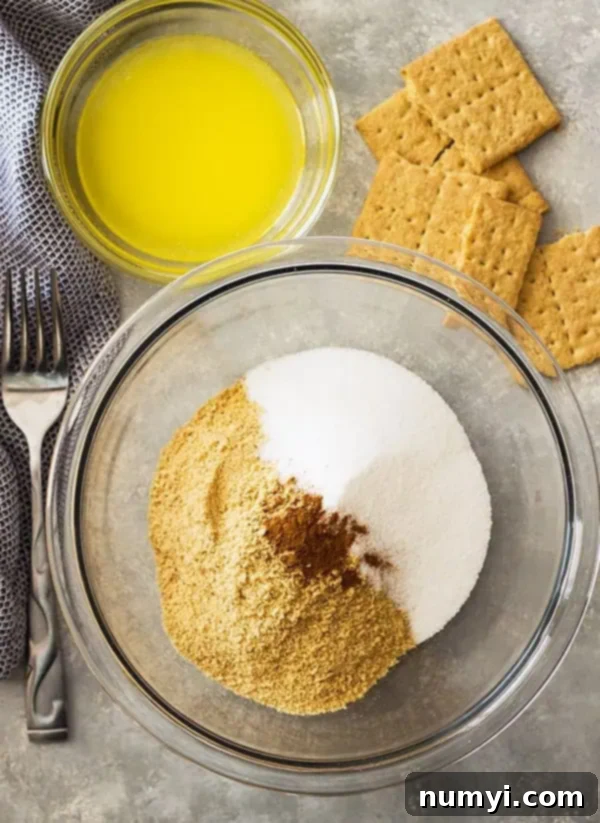
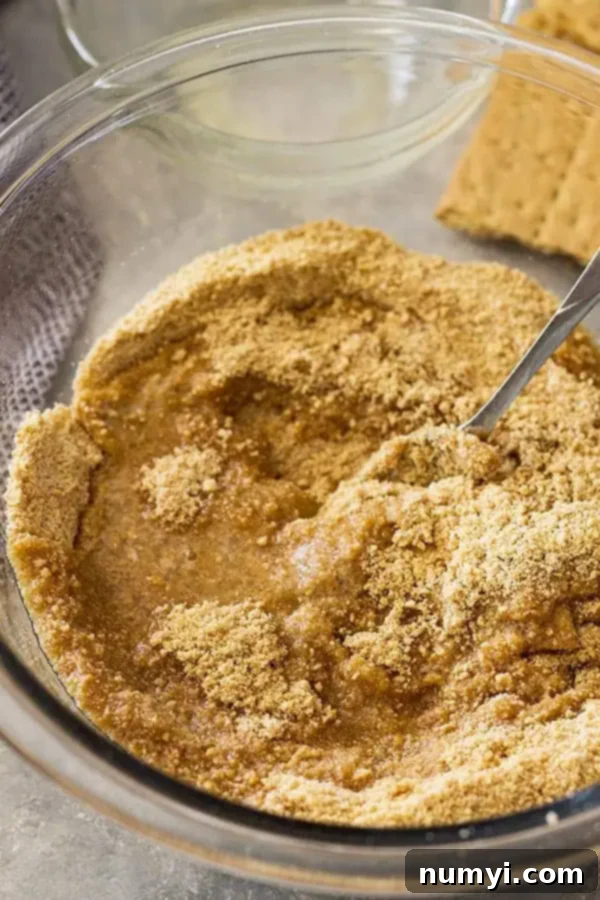
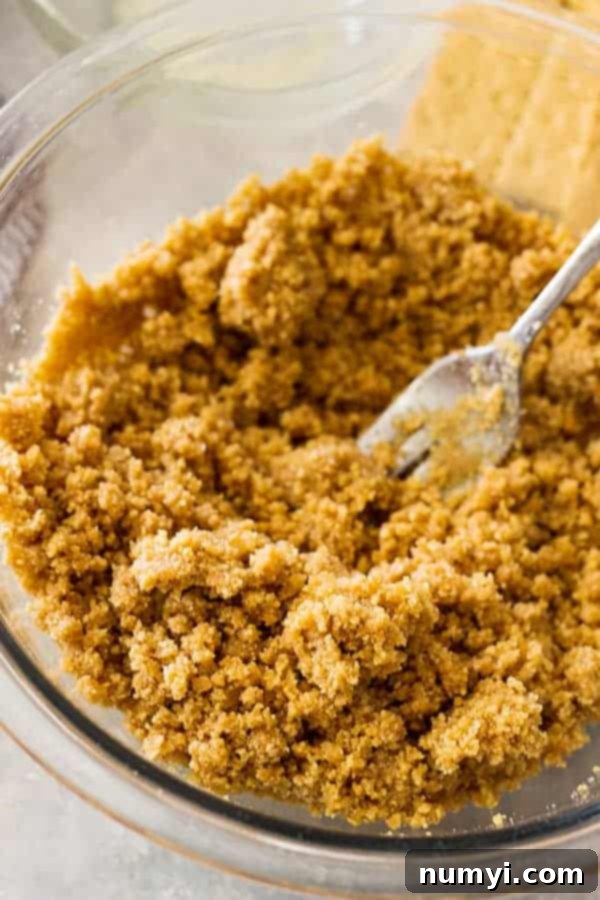
STIR IN THE BUTTER: Now for the magic! Pour the melted butter over the crumb mixture. Stir continuously with a fork or spatula until all the crumbs are thoroughly moistened and coated with butter. The mixture should transform into a thick, coarse, and sandy texture that holds together when pressed between your fingers. It should resemble wet sand – clumpy, but not soggy. This is the perfect consistency for forming a stable crust.
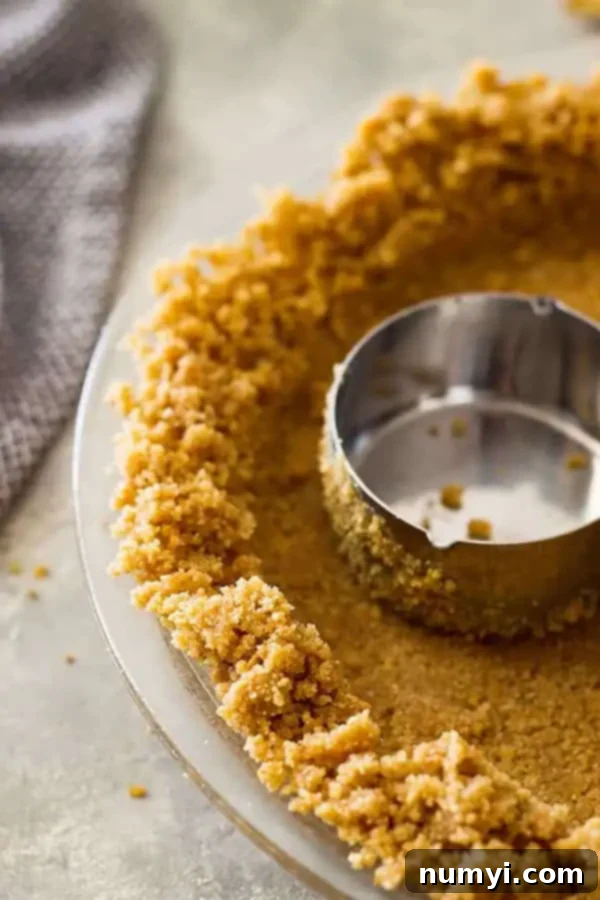
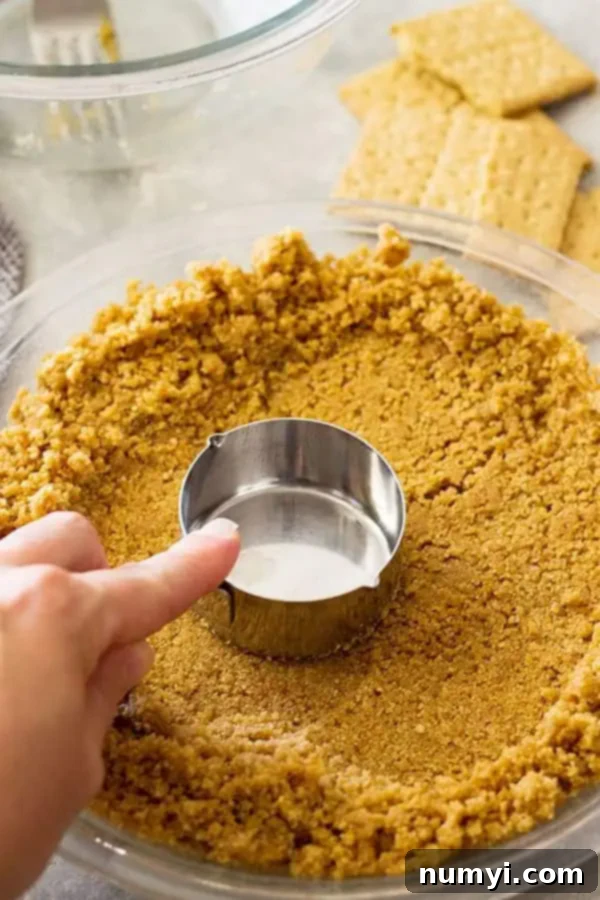
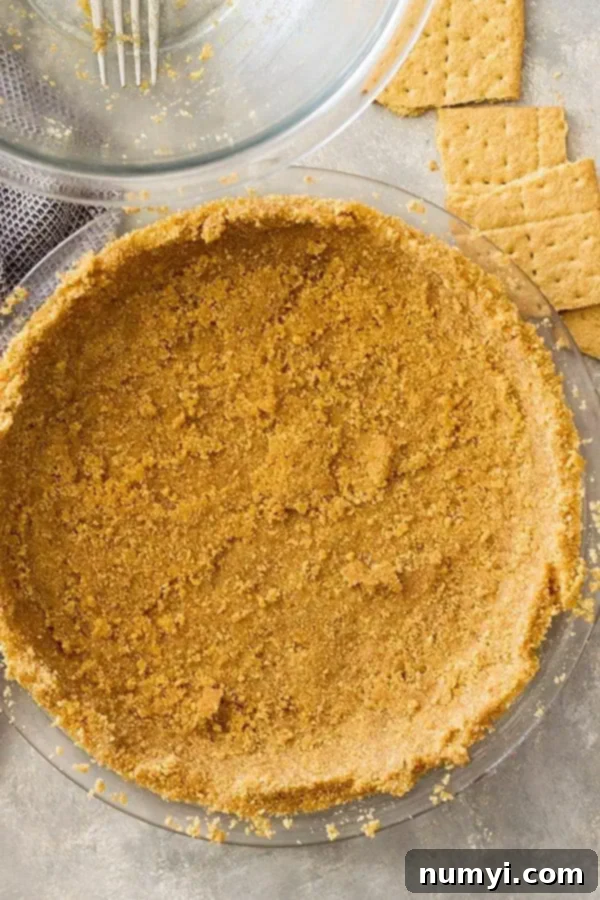
PRESS CRUST INTO PAN: Carefully transfer the buttery graham cracker mixture into a 9-inch pie pan (or a springform pan for cheesecakes, or even a tart pan). This step is critical for a crust that holds its shape. Begin by distributing the crumbs evenly across the bottom of the pan. Then, using the bottom of a flat measuring cup, a small glass, or even your knuckles, press the crumbs down very firmly into the bottom of the pan. The goal is to make it as compact and smooth as possible. For the sides, use your fingers to gently push the crumbs up the edges of the pan, then use the flat bottom of your cup again to smooth and compact the sides against the pan for a neat finish. The firmer you press, the less likely your crust is to crumble when sliced.
Versatile Ways to Use Your Homemade Graham Cracker Pie Crust
One of the best things about this homemade graham cracker crust is its incredible versatility. Here are various ways you can prepare and use it for your dessert creations:
- No-Bake Desserts: For no-bake cheesecakes, pies, or other chilled desserts, simply press the crust firmly into your pan and then chill it in the refrigerator. Allow it to chill for at least 1-2 hours. This crucial step allows the melted butter to solidify again, effectively binding the graham cracker crumbs together and creating a stable, sliceable crust. You can also fill the crust with a cold filling immediately and then refrigerate the entire dessert, but be prepared for a longer chilling time to ensure both the filling and crust are fully set. Just remember to ensure the crust is super compact before filling.
- Baked Desserts: If your recipe calls for a baked crust (often for custard pies or some cheesecakes to give it a firmer, crisper texture), you’ll need to pre-bake it. Generally, I recommend baking your crust at 350 degrees F (175 degrees C) for about 8 minutes. However, baking times and temperatures can vary depending on the specific dessert you’re making. Some recipes might suggest 325 F (160 C) or 300 F (150 C) for 10-12 minutes. Always refer to the instructions of your chosen dessert recipe for the most accurate baking guidelines. The goal of pre-baking is to lightly toast the crumbs and set the butter, creating a delicious barrier that prevents a soggy bottom.
- Make-Ahead & Storage: This crust is fantastic for meal prepping or baking ahead!
- Refrigeration: You can prepare the crust and store it, tightly covered with plastic wrap, in the refrigerator for up to 3 days before you plan to fill it.
- Freezing: For longer storage, you can freeze the unbaked or pre-baked crust for up to 3 months. To freeze, ensure the crust is in its pie pan. Wrap the entire pan very well first in plastic wrap, then in a layer of aluminum foil. This double layer of protection is essential to prevent freezer burn and to keep the crust from absorbing any unwanted flavors from your freezer. When you’re ready to use it, remove it from the freezer and let it thaw completely at room temperature or in the refrigerator before filling or baking.
Frequently Asked Questions About Graham Cracker Pie Crust
The versatility of this crust is truly astounding! You can use it for almost any dessert that requires a sturdy, flavorful base. Think decadent chocolate pie, tangy key lime pie, refreshing lemon bars, classic baked cheesecakes, or light and airy no-bake cheesecakes. It’s also fantastic for s’mores bars, peanut butter pies, and fruit tarts. For a great starting point, try this No Bake Vanilla Cheesecake, or these delightful S’mores Cookie Bars.
If your crust is falling apart or seems too crumbly, the most common culprit is not enough butter. Butter is the primary binding agent in a graham cracker crust; as it cools (whether by chilling or baking), it solidifies and holds the crumbs together. The sugar also contributes to the binding process, creating a slightly sticky mixture. To avoid a crumbly crust, it’s crucial to follow the recipe’s precise measurements for both butter and sugar, and ensure the crumbs are thoroughly coated.
On the flip side, a crust that turns out too hard or rock-solid usually indicates that too much butter was used. While butter is essential for binding, an excess can lead to an overly dense, almost brittle crust once it sets. This can make it difficult to cut and unpleasant to eat. To achieve that perfect balance of firm yet tender, always adhere closely to the butter amount specified in the recipe card below.
For a classic graham cracker flavor, regular honey graham crackers are an excellent choice. However, don’t limit yourself! You can experiment with different varieties like cinnamon-sugar graham crackers for a warm spiced note, or chocolate graham crackers for a rich, cocoa-infused base. Many brands also offer honey or plain crackers. For ultimate convenience, you can even purchase pre-ground graham cracker crumbs, which save you the step of crushing them yourself.
If your recipe requires a pre-baked crust, a good general guideline is to bake it for approximately 8 minutes at 350 degrees F (175 degrees C). This short bake time helps to lightly toast the crumbs, deepen their flavor, and set the butter, creating a firmer crust that is less prone to becoming soggy once filled. However, it’s vital to always consult the specific dessert recipe you are following, as baking temperatures and times can vary slightly (some might call for 325 F or 300 F for 10-12 minutes) depending on the overall dessert’s requirements.
Homemade Graham Cracker Crust Pro Tips for Success
Achieve graham cracker crust perfection every time with these expert tips:
- Don’t skimp on the butter: This is arguably the most crucial tip! Butter acts as the glue that holds your crust together. Using too little butter will result in a dry, crumbly crust that won’t hold its shape when you try to cut into your delicious dessert. Ensure all crumbs are evenly coated.
- Feel free to adjust, but be wise: While the butter quantity is key for structural integrity, you have more flexibility with the sugar and spice levels. For a sweeter crust that complements a less sweet filling, slightly increase the granulated sugar. If you adore cinnamon, feel free to add a bit more than the recommended ¼ teaspoon. You can also experiment with other spices; a pinch of nutmeg, ground ginger, or even a pre-made pumpkin pie spice blend would be fantastic with a pumpkin cheesecake or apple pie.
- Press the crust in very firmly: This cannot be overstressed! A compact crust is a sturdy crust. Start by using your hands to distribute the crumbs, then switch to a tool. The bottom of a flat measuring cup, a straight-sided glass, or even a tamper from a food processor works wonders for pressing the crumbs down tightly onto the bottom and up the sides of the pan. This firm compression prevents the crust from falling apart when sliced.
- Don’t worry about perfection: Part of the charm of a homemade graham cracker pie crust is its slightly rustic, artisanal appearance. Minor imperfections only add to its homemade appeal and don’t detract from its deliciousness. Embrace the beauty of a crust made with love!
- No food processor? No problem! If you don’t own a food processor or blender, you can still achieve perfectly fine crumbs. Place your graham crackers in a large, sturdy Ziploc bag. Seal it, pressing out as much air as possible. Then, use a rolling pin to repeatedly roll over and crush the crackers until they are reduced to very fine crumbs. The finer the crumbs, the better the crust will hold together.
- Embrace a thicker crust: This graham cracker crust recipe typically yields about 1.5 cups of crumbs, which is slightly more than what some standard recipes call for. I intentionally make it a bit thicker than average because it ensures a super sturdy base that won’t fall apart under a heavy filling. Plus, a thicker crust means more of that delicious, buttery flavor in every bite!
More Delicious Dessert Recipes To Try
Now that you have the perfect crust, what will you fill it with? Here are some other delightful dessert recipes to inspire your next baking adventure:
- No Bake Vanilla Cheesecake
- Lemon Mousse Dessert Cups
- One Bowl Cocoa Brownies
- Fresh Strawberry Pie
- Devil’s Food Cake
- Chewy Rice Krispie Treats
Thank you for exploring this guide to making the ultimate homemade graham cracker pie crust! I’m confident that once you try this recipe, you’ll never go back to store-bought. Let me know how it turns out for you in the comments below!
HUNGRY FOR MORE? Don’t miss out on my latest recipes and baking tips! Subscribe to my newsletter and follow along on Pinterest, Facebook, and Instagram for all my latest updates!
Homemade Graham Cracker Pie Crust Recipe
Ingredients
- 1½ cups graham cracker crumbs about 10 full sheets
- ¼ cup sugar
- ¼ teaspoon cinnamon
- 6 tablespoons butter melted
Instructions
-
Using a food processor or blender grind the crackers until you have fine crumbs. Otherwise place crackers in a ziploc bag and crush with a rolling pin until you have fine crumbs. It is important to have fine crumbs so the crust holds together well.
-
In a medium sized bowl combine the crumbs, sugar and cinnamon. Stir in the butter until well combined. The mixture should be thick, coarse and sandy.
-
Press the mixture into any 9 inch pan. Use a flat measuring cup or the bottom of a glass to help compact the crust. This is very important or the crust may fall apart.
-
No bake: Chill in the refrigerator for at least 1 hour before filling.
-
Baked: Bake for 8 minutes at 350 degrees F or according to the recipes directions.
-
Make ahead: Store the crust wrapped in cling wrap in the refrigerator for up to three days before filling, or freeze for up to three months. Freeze in pan wrapped in both cling wrap and foil. Thaw completely before using.
Notes
- This recipe also works great with any flavor of graham crackers.
- You can use brown sugar in place of regular sugar for some extra flavor.
Tips:
- Don’t skimp on the butter. It really holds the crust together, so using too little will result in a crumbly crust that doesn’t hold together when filled.
- Make sure to press the crust in very firmly. You can start with your hands, but using a flat measuring cup (as pictured) or a glass cup really helps compact the crust.
- Don’t worry about it looking perfect. The beauty of a graham cracker crust is the slightly rustic, homemade look.
Nutrition
