Mastering Homemade Soft Pretzels: Your Ultimate Guide to Chewy, Golden Perfection
There’s something truly magical about a warm, soft pretzel. That irresistible combination of a slightly crisp, salty exterior giving way to a wonderfully chewy and tender interior is pure comfort food. While store-bought pretzels are convenient, nothing compares to the unparalleled freshness and flavor of homemade. Many believe making pretzels from scratch is a daunting task, but we’re here to prove that crafting perfect, soft pretzels at home is not only achievable but surprisingly simple and incredibly rewarding.
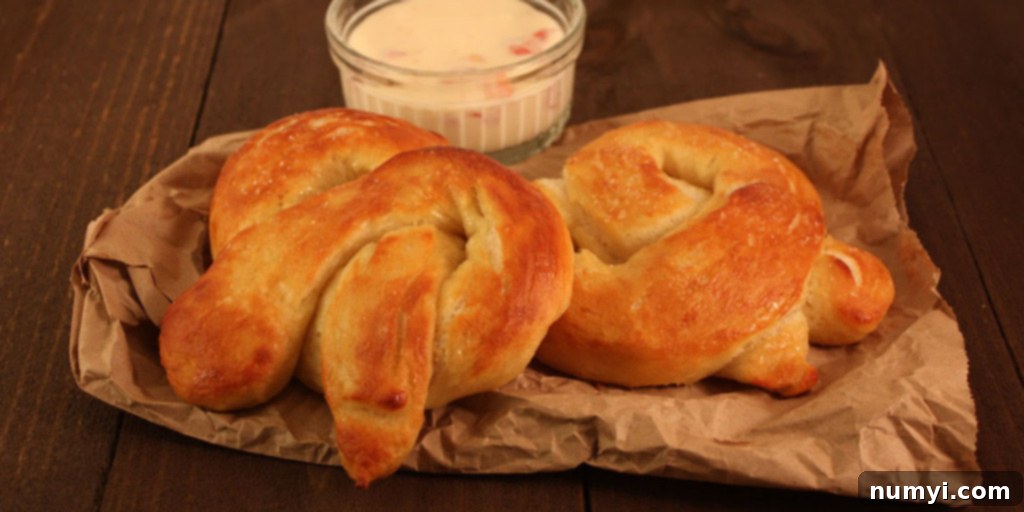
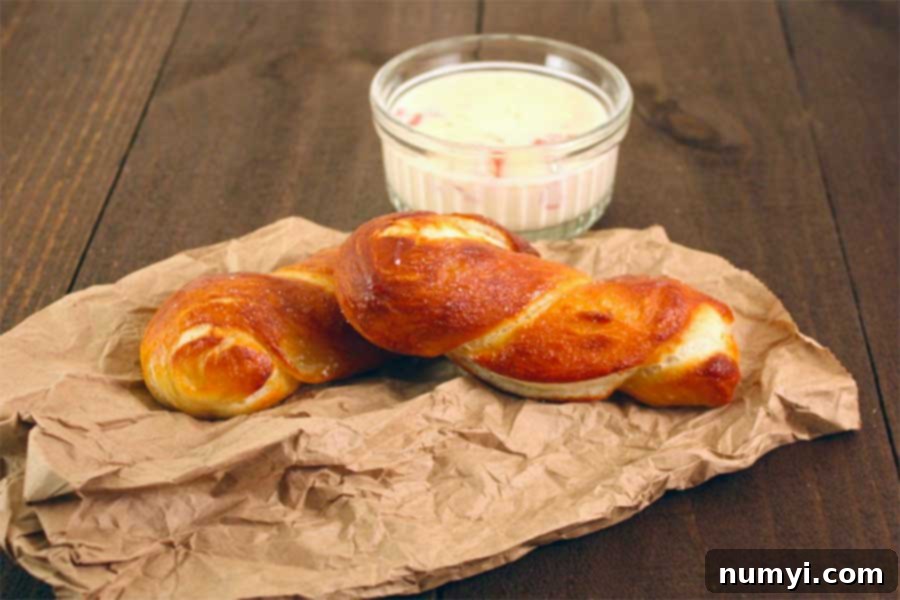
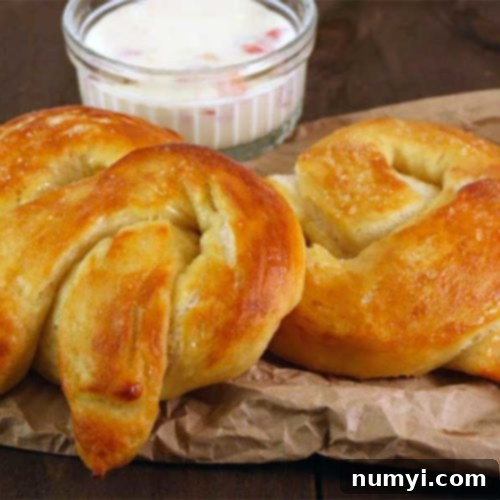
This comprehensive soft pretzel recipe guides you through every step, from activating the yeast to achieving that perfect golden-brown crust. One of the best parts about making pretzels at home is the freedom to get creative with shapes. We experimented with several forms during our testing, and while the classic pretzel twist is always a winner, we found ourselves particularly fond of the twisted stick pretzel – a fun, easy-to-make variation that’s perfect for dipping.
Imagine pulling these soft, chewy, buttery, and perfectly salty delights straight from your oven. The aroma alone is enough to make mouths water! We recently shared a batch, still warm, with our neighbors, and their enthusiastic reactions were truly gratifying. To be honest, I was quite impressed with myself at how perfectly these turned out. If you’ve ever felt intimidated by baking with yeast, this easy pretzel recipe is the perfect starting point to conquer those fears and create something truly delicious.
Essential Ingredients for Perfect Soft Pretzels
Crafting delicious homemade soft pretzels requires a few basic ingredients, each playing a crucial role in achieving the desired texture and flavor. Here’s a closer look at what you’ll need and why:
- All-purpose flour – This is our preferred choice for a soft and fluffy interior. While bread flour can be used, it tends to yield a chewier, denser texture, which some prefer, but for that classic soft pretzel feel, all-purpose is ideal. Make sure it’s fresh for best results.
- Warm water, active dry yeast, and light brown sugar – This trio is essential for activating the yeast and giving rise to the pretzel dough. The warm water (around 105-115°F or 40-46°C) helps the yeast bloom, while the brown sugar provides food for the yeast, encouraging it to produce the carbon dioxide needed for a light and airy dough.
- Unsalted butter – Melted unsalted butter is incorporated into the dough to add richness, flavor, and incredible tenderness. It contributes significantly to the characteristic melt-in-your-mouth quality of these pretzels. Using unsalted butter allows you to control the overall saltiness of the final product.
- Baking soda – This is arguably one of the most important ingredients for achieving the pretzel’s signature dark, chewy crust. When added to boiling water, the baking soda creates an alkaline bath that gelatinizes the dough’s surface, promoting a deep golden-brown color and that distinctive chewy texture during baking. Do not skip this crucial step!
- Coarse sea salt – Or kosher salt. A generous sprinkling of coarse salt on top of the pretzels after they emerge from the baking soda bath is non-negotiable. It provides that iconic salty crunch that perfectly balances the sweetness and butteriness of the pretzel. Pretzel salt, with its larger, irregular crystals, also works wonderfully.
Crafting Your Homemade Soft Pretzels: A Step-by-Step Guide
Making homemade soft pretzels is a delightful process, and with this recipe, it’s easier than you might imagine. Follow these steps for perfect, bakery-quality pretzels:
1. Prepare the Dough
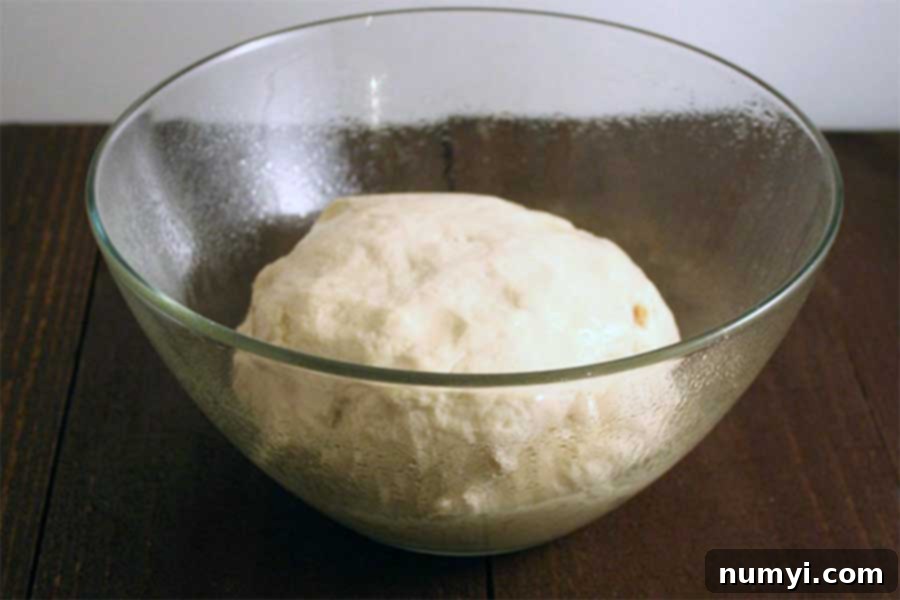
Begin by combining the warm water, light brown sugar, active dry yeast, and melted unsalted butter in the bowl of a stand mixer. If you don’t have a stand mixer, a large mixing bowl and a sturdy wooden spoon or your hands will work just as well for kneading. Mix these ingredients together with the dough hook attachment until they are well combined. It’s crucial that your water is warm, not hot, to activate the yeast without killing it. Let this mixture sit undisturbed for about 5 minutes. During this time, you should see small bubbles forming on the surface, indicating that your yeast is active and ready to work its magic.
Next, add the sea salt (or kosher salt) and 4½ cups of all-purpose flour to the mixture. Start by mixing on low speed until all the flour is incorporated and a shaggy dough forms. Once combined, increase the speed to medium and continue kneading. You’re looking for a dough that becomes smooth, elastic, and begins to pull away cleanly from the sides of the bowl. This usually takes about 3 to 4 minutes in a stand mixer. If the dough still appears too wet and sticky after this time, add additional flour, one tablespoon at a time, until it reaches the desired consistency. Once kneaded, remove the dough from the bowl, place it on a lightly floured flat surface, and briefly knead it into a smooth ball with your hands.
2. The First Rise
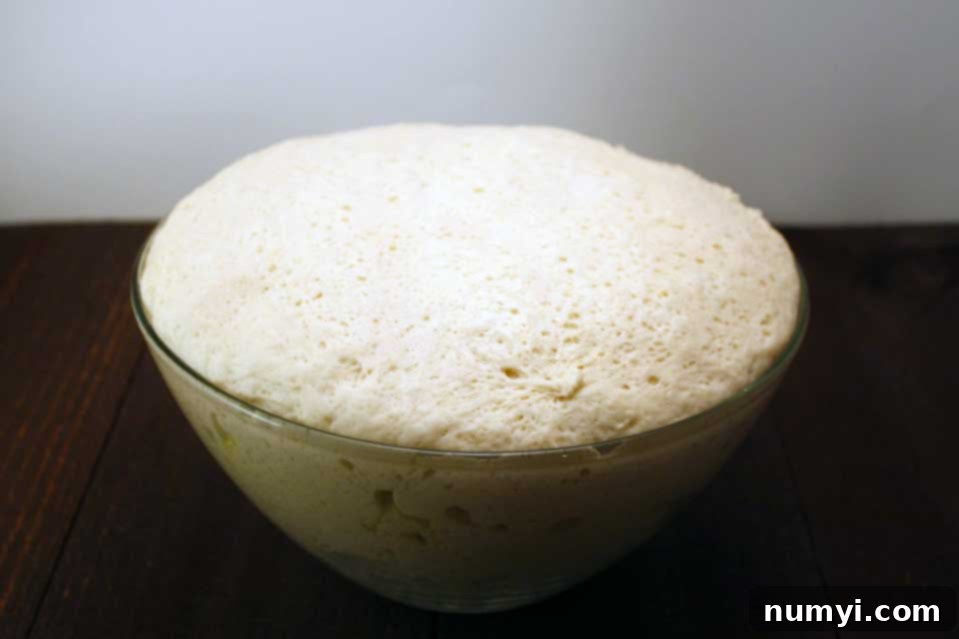
Generously coat a large clean bowl with canola oil or another neutral cooking oil. Place the dough ball into the oiled bowl, then turn it once to ensure it’s coated evenly with the oil. This prevents the dough from sticking and drying out during its rise. Cover the bowl tightly with plastic wrap or a clean kitchen towel. Now, place the bowl in a warm, draft-free spot. The ideal temperature for rising dough is around 75-85°F (24-30°C). A common trick is to preheat your oven for a few minutes until it’s slightly warm (you should be able to comfortably place your hand on the inside wall), then turn it off and place the covered dough inside. Leaving the oven light on can also provide a gentle warmth. Allow the dough to rise until it has visibly doubled in size, which typically takes about 1 hour. This first rise is critical for developing flavor and achieving a light, airy texture.
I must admit, for many years, working with bread dough felt like battling an unruly enemy. It was often sticky, uncooperative, and rarely yielded the results I envisioned. However, this particular soft pretzel recipe truly changed my perspective. It consistently works perfectly, even for those who might consider themselves novice bakers or have had less-than-stellar experiences with yeast doughs in the past. It’s a testament to the simplicity and reliability of this method.
3. Prepare for Baking
Once your dough has successfully risen, preheat your oven to 425°F (220°C). As the oven heats, start a large pot of water to boil on your stovetop. While waiting, line two large baking sheets with parchment paper. This will prevent your pretzels from sticking and ensure easy cleanup.
Shaping Your Perfect Pretzels
The shaping process is where your pretzels truly come to life. With the dough ready, gently punch it down to release the air, then turn it out onto a lightly floured surface. Divide the dough into 8 equal pieces. For consistent results, you can weigh each piece to ensure they are roughly the same size (approximately 3.5 to 4 ounces or 100-115 grams each). This helps ensure even baking.
For each piece of dough, roll it out into a long rope, about 20-24 inches (50-60 cm) in length. Aim for a rope that is relatively even in thickness across its length. The ends can be slightly thinner, as they will be twisted. Now, for the classic soft pretzel shape, take the right side of the rope and cross it over to the left, creating a loop. Then, cross the right end over the left again, forming a second, smaller loop. Finally, flip the twisted ends up and press them gently onto the bottom curve of the pretzel to secure the shape. Don’t worry if they aren’t absolutely perfect; homemade charm is part of the appeal!
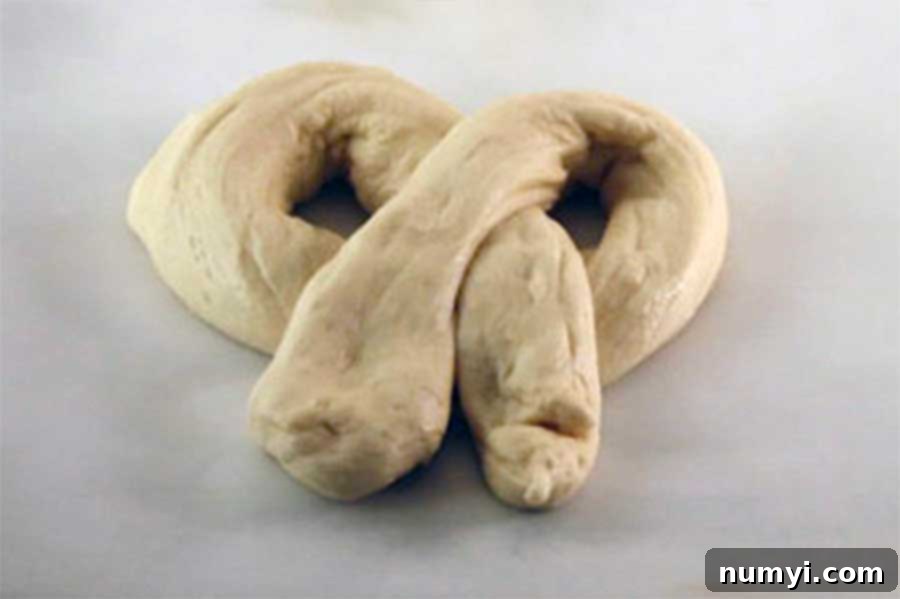
The method described above will yield the iconic, standard soft pretzel shape, a timeless classic that’s loved by all.
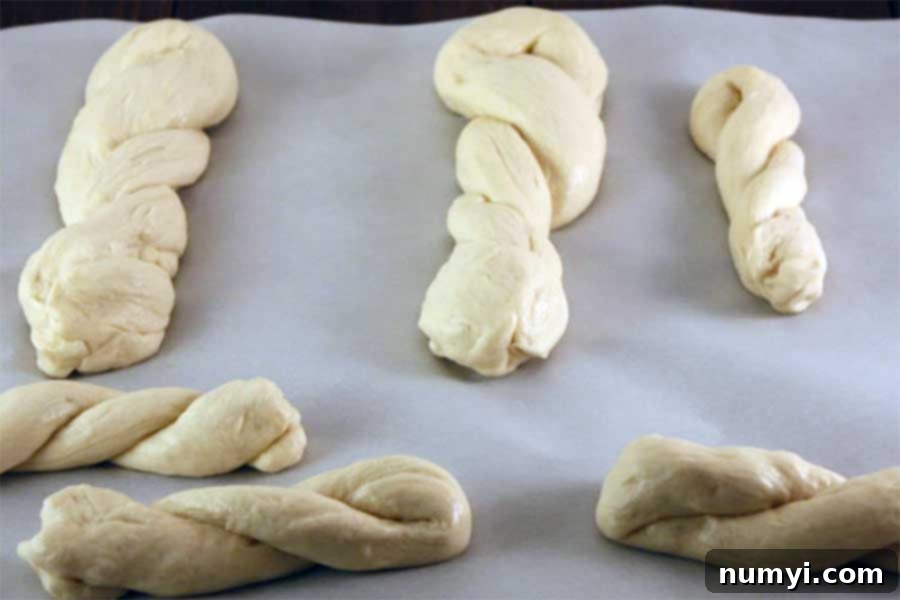
If you’re looking for an even simpler, yet equally delicious, alternative, you can make twisted soft pretzel sticks. Just fold the long rope of dough in half, then twist the two ends together. These are fantastic for dipping and are particularly kid-friendly. We initially made some of these twisted sticks quite large, only to find they were a bit unwieldy and baked unevenly. So, we highly recommend sticking with smaller, more manageable sizes for both twisted sticks and traditional pretzels to ensure uniform baking and a more enjoyable eating experience.
4. The Essential Baking Soda Bath
Once your water is at a rolling boil, slowly and carefully add the baking soda. **Warning:** Adding baking soda to boiling water too quickly can cause it to fizz up dramatically and overflow, creating a hot, messy, and potentially dangerous situation. Add it gradually, stirring constantly. This creates an alkaline solution, known as the baking soda bath, which is vital for developing the pretzel’s characteristic golden-brown crust and chewy texture. Boil the shaped pretzels in this solution, typically two at a time, for exactly 30 seconds per side. During this short boil, gently splash the tops of the pretzels with the warmed water using a spoon to ensure even exposure to the alkaline solution.
5. Bake to Golden Perfection
Carefully remove the boiled pretzels from the baking soda bath using a large, flat slotted spatula, allowing excess water to drain. Place about 4 pretzels on each prepared baking sheet, ensuring they have enough space to expand slightly. Immediately after boiling, brush the tops of the pretzels liberally with melted butter. This not only adds a delicious buttery flavor but also helps the coarse sea salt adhere. Season generously with coarse sea salt or your preferred pretzel salt. Don’t be shy with the salt; it’s a key component of the classic pretzel experience!
Transfer the baking sheets to your preheated oven and bake for 15 to 18 minutes, or until the pretzels achieve a beautiful deep golden-brown color. The exact baking time may vary slightly depending on your oven and the size of your pretzels, so keep an eye on them during the last few minutes. Once baked, remove the pretzels from the oven and let them cool for a few minutes on a wire rack before serving. They are truly best enjoyed warm.
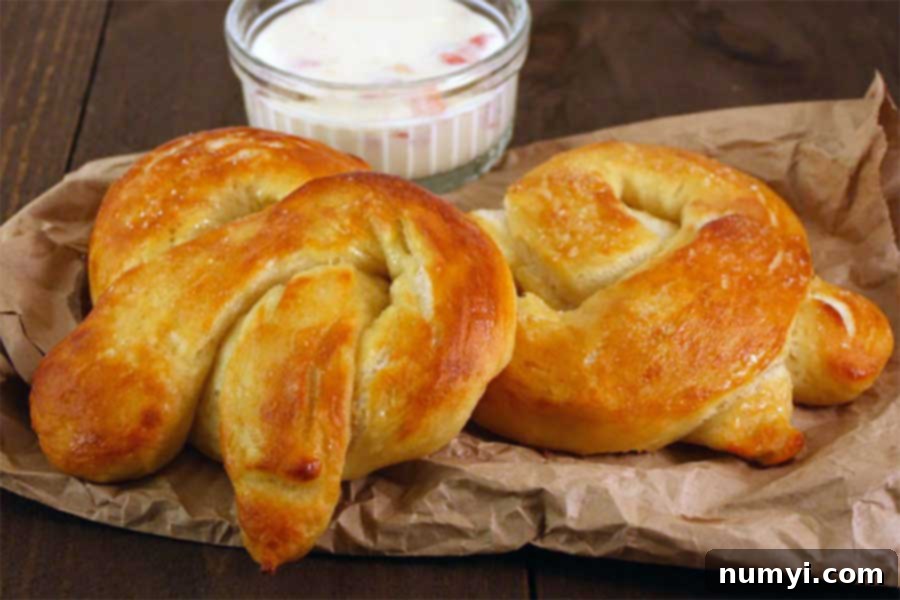
This homemade soft pretzel recipe genuinely surpasses any store-bought version, even those from popular chains like Auntie Anne’s. The freshness, the perfect chewiness, and that warm, buttery, salty taste are simply unmatched. You’ll be amazed at how much better they are when made with love in your own kitchen.
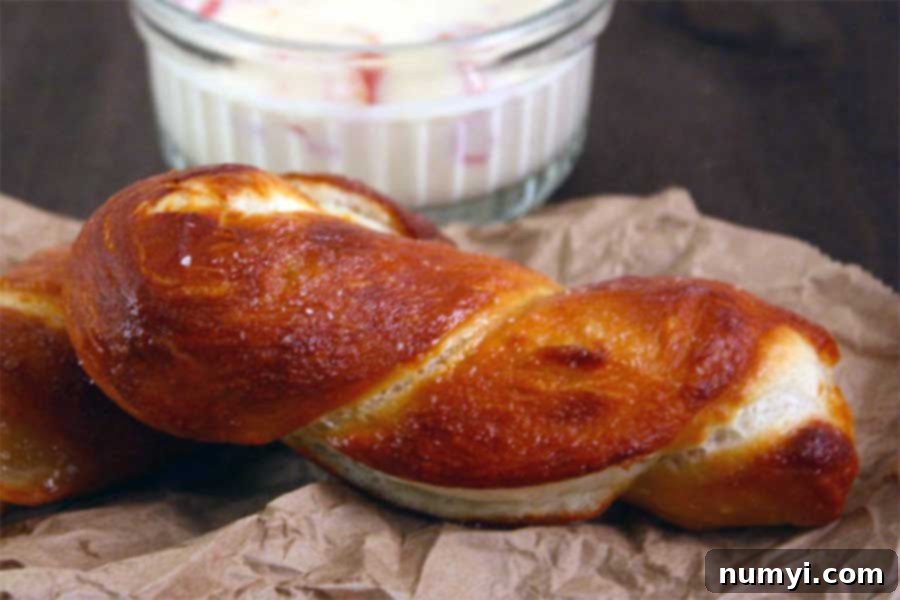
The cheese dip pictured here was a simple yet delicious concoction my husband whipped up earlier in the day, and it paired absolutely perfectly with the warm pretzels. In fact, these delightful pretzels, paired with the dip, became our impromptu and incredibly satisfying dinner. Don’t underestimate the power of a freshly baked, comforting pretzel to elevate any meal or snack time!
Delicious Variations to Customize Your Pretzels
While classic salty soft pretzels are undeniably delicious, this versatile recipe lends itself beautifully to a variety of creative variations. Feel free to experiment and make these pretzels uniquely yours:
- Cheesy Pretzels – For a savory twist, incorporate shredded cheddar, Gruyere, or Parmesan cheese directly into the dough during the kneading stage. This ensures an even distribution of cheesy goodness throughout the pretzel. Before baking, you can also sprinkle additional cheese on top of the butter-brushed pretzels for an extra crispy, golden cheese crust.
- Cinnamon Sugar Sweet Pretzels – Transform these savory treats into a delectable dessert! Instead of brushing with melted butter and sprinkling with coarse salt, once the pretzels come out of the baking soda bath, brush them generously with melted butter. Then, immediately dip or toss them in a mixture of cinnamon and granulated sugar until evenly coated. Bake as directed. These are fantastic with a cream cheese frosting dip.
- Pretzel Bites – This dough is also perfect for making bite-sized pretzel nuggets! After the first rise, instead of shaping long ropes, simply roll the dough into a thick rope (about 1-inch in diameter) and slice it into 1-inch pieces. Boil and bake these bites just like the larger pretzels, adjusting baking time as needed (they will cook faster). They are excellent for appetizers or snacking.
- Garlic Parmesan Pretzels – After the baking soda bath and before baking, brush with garlic butter (melted butter infused with minced garlic and a pinch of garlic powder) and sprinkle with grated Parmesan cheese and a dash of Italian seasoning.
- Everything Bagel Pretzels – For a trendy and flavorful topping, use “Everything Bagel” seasoning instead of coarse sea salt.
This recipe typically yields approximately 8 medium-sized pretzels, but the exact number will depend on the size and shape you choose to make.
Frequently Asked Questions About Homemade Soft Pretzels
Yes, boiling is an absolutely crucial step for making a soft and chewy pretzel with that characteristic golden-brown crust. The brief dip in the hot baking soda solution creates an alkaline environment that gelatinizes the exterior of the dough. This process is what gives pretzels their distinct flavor, color, and wonderfully chewy texture that can’t be achieved through baking alone. Do not skip this essential step, as it’s what differentiates a pretzel from a regular bread roll.
Absolutely! You have several options for preparing soft pretzels in advance.
- Dough: You can prepare the pretzel dough up to the end of the kneading step, wrap it tightly with plastic wrap, and store it in the fridge for up to 1 day. Let it come to room temperature for about 30 minutes before proceeding with the rising step. You can also freeze the dough, wrapped tightly, for up to 3 months. Thaw overnight in the refrigerator, then let it sit at room temperature for an hour before continuing.
- Baked Pretzels: Baked pretzels keep well for up to 3-4 days when stored in an airtight container or resealable bag at room temperature. For best results, reheat them briefly in a toaster oven or microwave before serving to restore their warmth and chewiness.
Several factors can contribute to hard or dry pretzels:
- Over-kneading: Too much kneading can develop too much gluten, resulting in a tough texture.
- Too much flour: Adding excessive flour during kneading or rolling can dry out the dough. Always add flour gradually.
- Over-baking: Baking for too long at a high temperature will dry out the pretzels. Keep an eye on them and remove them once they’re golden brown.
- Not enough rise: An insufficient rise can lead to a dense, hard pretzel. Ensure your yeast is active and the dough doubles in size.
Soft pretzels are incredibly versatile when it comes to dips! Classic choices include:
- Cheese Sauce: A creamy, warm cheddar or beer cheese dip is a timeless favorite.
- Mustard: Spicy brown mustard, Dijon mustard, or honey mustard all offer a fantastic tangy counterpoint to the salty pretzel.
- Sweet Dips: For cinnamon sugar pretzels, a cream cheese glaze or a simple vanilla icing is heavenly.
- Garlic Herb Butter: A melted butter dip infused with fresh garlic and herbs adds another layer of savory goodness.
More Delicious Recipes You’ll Love
Sausage Pretzel Bites
Honey Mustard Pretzels
Crispy Puff Pastry Cheese Straws
Soft Pretzels Recipe
Print
Pin
Rate
Ingredients
- 1 1/2 cups water warm (105-115°F / 40-46°C)
- 2 tablespoons light brown sugar
- 1 package active dry yeast (about 2 1/4 teaspoons)
- 4 ounces unsalted butter (1 stick), melted
- 1 1/2 teaspoons sea salt or kosher salt (for the dough)
- 5 cups all-purpose flour (plus more if needed)
- Canola oil to grease bowl
- 3 quarts water (for boiling)
- 2/3 cups baking soda (for the bath)
- 4 tablespoons butter melted, or more if desired (for brushing)
- Coarse sea salt (for topping)
Instructions
-
To make the soft pretzel dough: In the bowl of a stand mixer fitted with a dough hook attachment, combine the warm water, light brown sugar, active dry yeast, and 4 ounces of melted unsalted butter. Mix on low speed until combined. Let the mixture sit for 5 minutes until it starts to bubble, indicating the yeast is active.1 1/2 cups water, 2 tablespoons light brown sugar, 1 package active dry yeast, 4 ounces unsalted butter, melted
-
Add the 1 1/2 teaspoons sea salt and 4½ cups of all-purpose flour to the mixture. Mix on low speed until just combined. Increase the speed to medium and continue kneading until the dough is smooth, elastic, and begins to pull away from the side of the bowl, approximately 3 to 4 minutes. If the dough appears too wet or sticky, add additional flour, 1 tablespoon at a time, until it reaches the correct consistency. Remove the dough from the bowl, place it on a lightly floured flat surface, and knead it into a smooth ball with your hands.1 1/2 teaspoons sea salt or kosher salt, 5 cups all-purpose flour
-
Coat a large bowl with canola oil, add the dough ball, and turn to coat it thoroughly with the oil. Cover the bowl with plastic wrap or a clean kitchen towel and place it in a warm, draft-free spot (such as a slightly warmed, then turned-off oven with the light on). Let the dough rise until it doubles in size, which will take about 1 hour.Canola oil
-
Once the dough has risen, preheat your oven to 425°F (220°C). Bring 3 quarts of water to a rolling boil in a large pot on the stovetop. While waiting, prepare two baking sheets by lining them with parchment paper.
-
Remove the dough from the bowl and gently punch it down to release the air. Place the dough on a lightly floured flat surface and divide it into 8 equal pieces. For best results, ensure pieces are of similar size.
-
Roll each piece of dough into a long rope, about 20-24 inches (50-60 cm) in length, ensuring consistent thickness. To shape into classic pretzels: take the right side of the rope and cross it over to the left, creating a loop. Cross right to left again and then flip the twisted ends up, pressing them onto the bottom curve of the pretzel to secure. For pretzel sticks, simply fold the rope in half and twist the two ends together.
-
Slowly and carefully add the 2/3 cups of baking soda to the boiling water (add it gradually to prevent a sudden overflow). Boil the shaped pretzels in this baking soda solution, 2 at a time, for 30 seconds. While boiling, use a spoon to splash the tops of the pretzels with the hot water to ensure even coverage.3 quarts water, 2/3 cups baking soda
-
Remove the boiled pretzels with a large flat slotted spatula, allowing any excess water to drain off. Place 4 pretzels on each prepared baking sheet. Immediately brush the tops of the pretzels generously with the remaining 4 tablespoons of melted butter and season liberally with coarse sea salt or pretzel salt.4 tablespoons butter, Coarse sea salt
-
Bake for 15 to 18 minutes, or until the pretzels are beautifully golden brown. Keep a close eye on them during the last few minutes as ovens can vary.
-
Remove pretzels from the oven and transfer them to a wire baking rack to cool slightly. Serve warm with your favorite dips!
