How to Store Fresh Herbs: Keep Your Parsley and Cilantro Fresh for Weeks!
Are you consistently frustrated by buying beautiful bunches of fresh parsley, cilantro, or other leafy herbs, only to find them wilted, slimy, or discolored just a few days after purchase? This common kitchen dilemma leads to unnecessary food waste and diminishes the joy of cooking with vibrant, aromatic ingredients. Fresh herbs are culinary gems, offering unparalleled flavor and aroma that dried alternatives simply cannot replicate. The good news is, you don’t have to settle for short-lived herbs anymore!
We’ve all experienced that moment: reaching for a sprig of fresh garnish, only to discover a limp, unappetizing mess at the back of the refrigerator. This universal problem has a surprisingly simple and incredibly effective solution that can keep your fresh herbs looking and tasting pristine for up to two weeks, sometimes even longer! Inspired by time-tested kitchen wisdom, this method is an absolute game-changer for anyone passionate about cooking with fresh ingredients. If fresh herbs are a regular item on your grocery list, consider this your essential guide to preserving their peak quality and extending their shelf life.
Why Proper Herb Storage is Essential for Every Kitchen
Understanding the science behind why herbs spoil quickly helps us appreciate the effectiveness of proper storage techniques. Most fresh herbs, especially delicate, leafy varieties like parsley and cilantro, are living plants that continue to “breathe” and lose moisture after they’ve been harvested. Improper storage can accelerate dehydration, promote bacterial growth, or lead to rot due to excessive moisture. By providing a carefully controlled environment, we can significantly slow down these natural processes and maintain their vitality.
- Reduce Food Waste: This is arguably the most impactful benefit. Less spoilage means fewer perfectly good herbs ending up in the trash, which is beneficial for both your budget and the environment.
- Save Money: Constantly replacing wilted or spoiled herbs can quickly add up. Storing them correctly means fewer trips to the store and more savings in your pocket.
- Enhance Culinary Flavor: Fresh, vibrant, and flavorful herbs infuse your dishes with superior taste and aroma, elevating your cooking far beyond what limp or dried alternatives can offer.
- Increase Kitchen Convenience: Having fresh herbs readily available means you can spontaneously add them to any meal or recipe without an extra, unplanned trip to the grocery store.
Try our Fresh Herb Vegetable Dip!
The Ultimate Method: How to Store Fresh Herbs for Maximum Freshness
This proven method focuses on creating an optimal environment for your delicate herbs—one that meticulously balances hydration with controlled humidity, effectively mimicking a mini-greenhouse within your refrigerator. Follow these detailed steps for consistently fresh and vibrant results every time.
Step 1: Prepare the Stems with a Fresh Trim

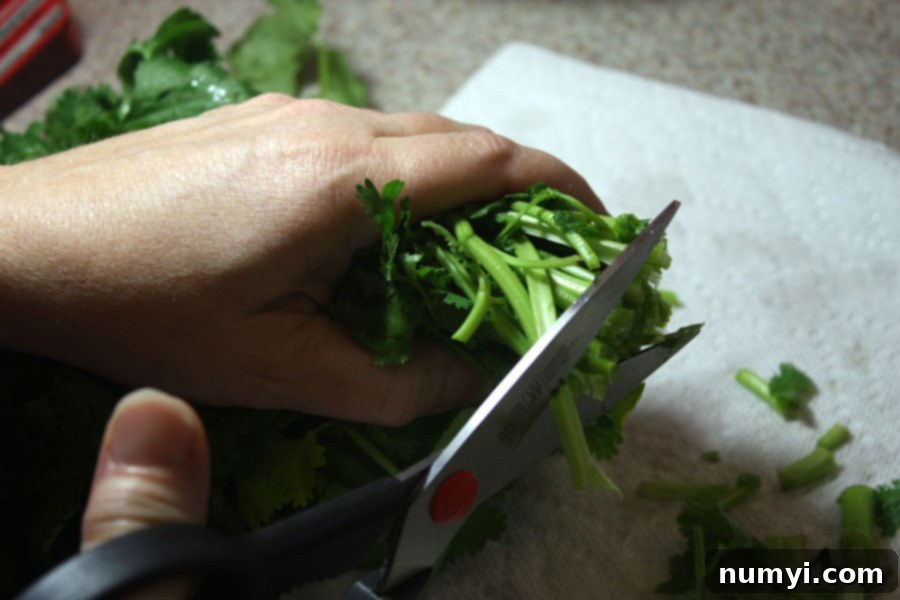
Just as you would with a bouquet of cut flowers, the stems of your fresh herbs require a fresh cut to efficiently absorb water. When herbs are harvested, the severed ends can quickly dry out and seal, impeding their ability to draw in moisture. Therefore, the critical first step is to gently trim approximately a quarter to a half-inch off the very bottom of the stems. Use sharp kitchen scissors or a clean knife to ensure a clean, precise cut. This action re-opens the tiny capillaries within the stems, allowing them to drink water more effectively, which is absolutely crucial for maintaining their crispness, vibrant color, and overall vitality.
Step 2: Thoroughly Wash Your Herbs
Before storing your herbs, it’s absolutely essential to clean them meticulously. Fresh herbs often carry remnants of dirt, dust, tiny insects, or even pesticide residues from the farm or grocery store. The most efficient and gentle way to accomplish this is by utilizing a salad spinner. Carefully place the trimmed herbs into the spinner’s inner basket. Fill the main spinner bowl with cold water (ensuring the strainer basket is inserted) and gently submerge the herbs. Swish them around softly to dislodge any loose debris or contaminants. Then, carefully lift the strainer basket straight out of the water, allowing any settled dirt to remain at the bottom of the bowl. Discard the now-dirty water.
Step 3: Spin Dry Completely – A Crucial Step
This step is often overlooked, but it is unequivocally vital for preventing rapid spoilage. After washing, place the herbs back into the clean salad spinner basket. Give them a really good, vigorous spin. The objective is to remove as much excess surface water from the leaves as humanly possible. While hydration through the stems is beneficial, excessive moisture clinging to the leaves themselves is the primary culprit behind mold formation and rot. A thorough spin ensures that the leaves are dry to the touch, which is a key factor in extending their shelf life within the refrigerator.
The ultimate goal here is to achieve dry leaves that won’t succumb to fungal growth, while the freshly cut stems are primed and ready to absorb water. Overly wet leaves are the number one cause of rapid deterioration in stored herbs. Do not skip or rush this essential drying step!
Check out our Tomato Basil Soup!
Step 4: Prepare the Hydrating Water Bath Setup

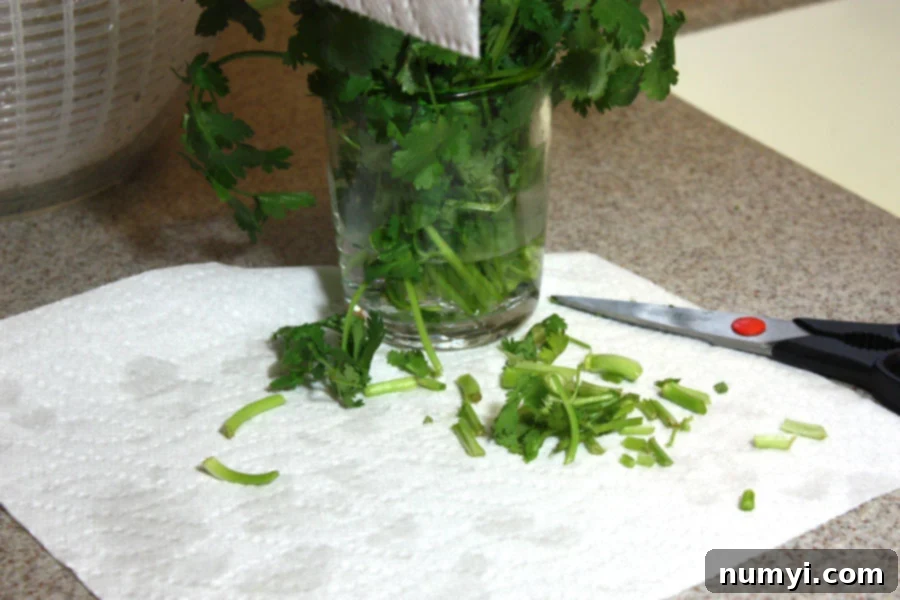
Now, it’s time to prepare their specialized “flower vase.” Select a clean glass jar or a sturdy drinking glass of appropriate size. Fill it partially with approximately one inch of fresh, cold water. Gently place the stem ends of your thoroughly dried herbs into the water, ensuring that all the freshly cut ends are fully submerged. Arrange the herbs so they stand upright, much like a beautiful bouquet of flowers. This ingenious method allows the herbs to continuously draw water up through their stems, keeping their delicate leaves plump, vibrant, and full of life, effectively mimicking how they would absorb moisture if they were still rooted in the soil.
It’s important to ensure the water level is sufficient to cover the trimmed ends without submerging any of the leaves, as wet leaves in standing water will quickly begin to break down and rot.
Step 5: Create a Protective, Humid Canopy

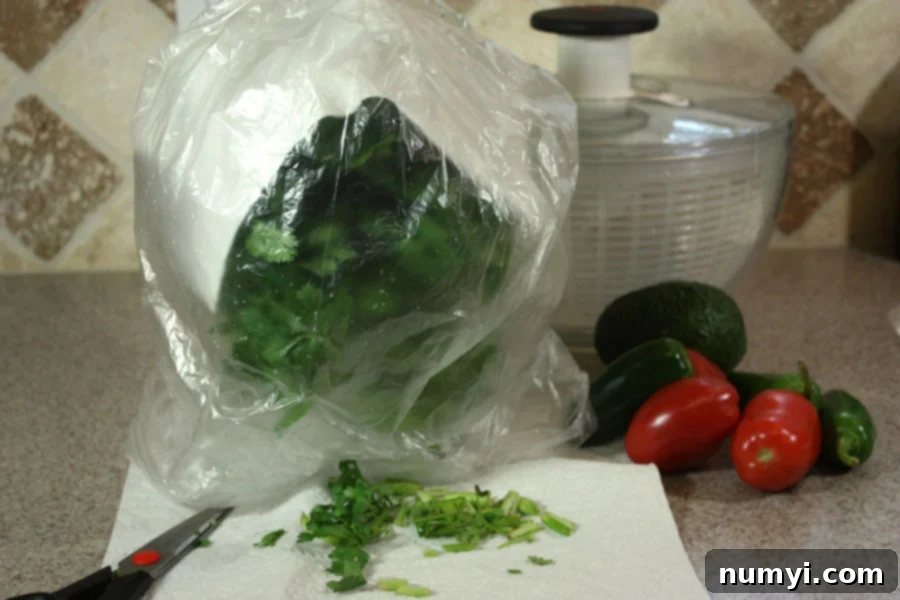
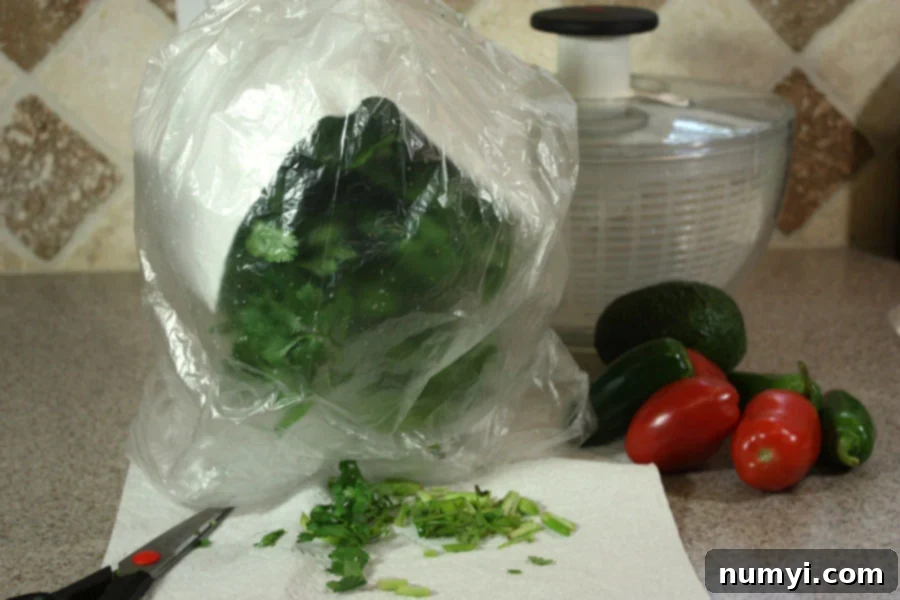
This crucial step provides the perfect microclimate for your herbs. First, gently drape a fresh, dry paper towel over the top of the herbs, allowing it to rest lightly on the leaves without crushing them. The paper towel serves a vital dual purpose: it acts as a wick, absorbing any excess condensation that might form inside the cover, thereby preventing water droplets from accumulating directly on the delicate leaves. Next, take the plastic bag you purchased the herbs in (or any clean, lightweight plastic bag, such as a produce bag) and carefully place it over the entire glass setup, completely enclosing the herbs and the paper towel. This meticulously creates a humid, yet not overly wet, environment, effectively protecting the herbs from the drying air currents within the refrigerator while still allowing for a minimal amount of air circulation due to the typically loose fit of the bag.
The plastic bag functions as a mini-greenhouse, adeptly trapping just enough humidity to prevent the leaves from wilting due to dehydration without suffocating them. This combined approach—a constant fresh water source for the stems coupled with a humid, protective cover for the leaves—is precisely what makes this storage method so remarkably effective and superior.
Check out our Strawberry Shortcake!
Refrigerator Storage and Essential Maintenance
Once your herbs are meticulously prepped and covered, carefully place the glass setup in your refrigerator. Herbs generally thrive in a stable, cool environment. To ensure optimal conditions, avoid placing them near the very back of the fridge, where temperatures can occasionally drop too low and cause freezing damage, or near fruits that release ethylene gas (such as apples and bananas), which can significantly accelerate spoilage in delicate herbs.
While this setup is incredibly effective, it’s not a “set it and forget it” solution. However, it requires only minimal, periodic maintenance for maximum, long-lasting results:
- Change the Water Regularly: After a few days, typically every 2-3 days, diligently check the water in the glass. If it begins to look cloudy, appears discolored, or if there’s any noticeable sliminess, it’s a clear indicator that it’s time to change it. This prevents the proliferation of bacterial growth that can contaminate and spoil your precious herbs. Simply lift the herbs out, discard the old water, rinse the glass thoroughly, and refill it with fresh, cold water.
- Re-trim Stems (Optional but Highly Recommended): When you perform the water change, consider giving the stem ends another tiny trim, especially if they appear a bit soft, discolored, or less vibrant. This simple action refreshes the cut, significantly improving the stems’ ability to absorb water efficiently.
- Replace the Paper Towel: If the paper towel feels damp to the touch or looks soiled, promptly replace it with a fresh, dry one. This critical step ensures that the optimal moisture balance within the plastic bag is consistently maintained, preventing excessive humidity or dryness.
- Inspect Herbs Diligently: While performing your routine maintenance, gently inspect your herbs for any early signs of spoilage, such as yellowing leaves, soft spots, or a developing unpleasant odor. Immediately remove any affected leaves or sprigs to prevent the spread of decay to the healthy parts of the bunch.
Consistently following these simple maintenance tips will ensure your herbs remain vibrantly fresh, flavorful, and aromatic for up to two weeks, and often even longer, dramatically reducing the amount of fresh produce you have to discard.
Which Herbs Benefit Most from This Method?
This particular “bouquet” storage method is exceptionally ideal for delicate, leafy, and soft-stemmed herbs. It performs remarkably well for:
- Parsley (both flat-leaf and curly varieties)
- Cilantro
- Dill
- Mint
- Tarragon
- Chives (though some prefer wrapping chives loosely in a slightly damp paper towel and storing them in a plastic bag in the crisper drawer)
For tougher, woody-stemmed herbs like rosemary, thyme, oregano, and sage, you can certainly still employ a similar water bath method. However, these more robust herbs often fare equally well when simply wrapped loosely in a slightly damp paper towel and stored within a plastic bag in the crisper drawer of your refrigerator. Basil is a unique and notable exception; it notoriously dislikes cold temperatures and is best stored at room temperature, with its stems in water and covered loosely with a plastic bag, but explicitly *not* in the refrigerator.
Common Mistakes to Avoid for Optimal Herb Preservation
To maximize the success of your fresh herb storage and ensure they stay vibrant for as long as possible, be acutely mindful of these common pitfalls:
- Not Drying Herbs Enough: Excess moisture clinging to the leaves is the absolute enemy of fresh herbs. It creates a perfect breeding ground for mold and accelerates rot. Always spin them dry thoroughly after washing.
- Submerging Leaves in Water: Only the freshly trimmed stems should be immersed in water. Wet leaves submerged in standing water will quickly break down, becoming slimy and spoiled.
- Forgetting to Change the Water: Stale, cloudy, or discolored water is a prime breeding ground for bacteria and will quickly contaminate your herbs. Regular water changes are an absolutely crucial part of this preservation method.
- Using a Completely Airtight Container: While the plastic bag provides essential humidity, a container that is completely sealed airtight can trap too much moisture and restrict necessary air exchange, paradoxically leading to faster spoilage due to lack of ventilation. The loose fit of the plastic bag is key.
- Placing Herbs Near Ethylene-Producing Fruits: Ethylene gas is a natural plant hormone that speeds up ripening and decay in many fruits and vegetables, including delicate herbs. Always keep your stored herbs separate from high ethylene producers like apples, bananas, and ripening tomatoes.
Conclusion: Savor Every Fresh Leaf
Mastering the simple art of fresh herb storage is a small change that yields profound and delightful benefits in your kitchen. By wholeheartedly adopting this straightforward yet incredibly effective method—which involves meticulously trimming, washing, thoroughly spinning dry, hydrating the stems in fresh water, and creating a protective, humid canopy—you can drastically extend the vibrant life of your parsley, cilantro, and other delicate, leafy herbs. Imagine the sheer convenience of consistently having truly fresh, aromatic, and flavorful herbs readily available for all your culinary creations, all while significantly reducing frustrating food waste and saving your hard-earned money in the process.
Say goodbye to those sad, wilted herbs destined for the trash bin! Embrace this invaluable kitchen tip, and unlock the true, vibrant potential of fresh, aromatic herbs in every single one of your cooking adventures. Your discerning taste buds, your healthy wallet, and the environment will undoubtedly thank you.
