Homemade Panettone: The Ultimate Guide to Crafting Italian Christmas Bread
Embark on a delightful baking journey with this authentic panettone recipe, designed to create a rich, buttery, and beautifully sweet bread. Its signature light and airy texture, studded with a harmonious blend of candied fruits, makes it a quintessential centerpiece for any holiday celebration. This is more than just a recipe; it’s an experience that culminates in a truly spectacular Italian Christmas bread, far superior to anything you’ll find in stores.
Panettone, a sweet Italian bread, holds a cherished place in Christmas traditions across Italy and beyond. Its unique dome shape and delicate crumb are instantly recognizable, signaling the start of festive indulgence. While it might be a holiday staple in many Italian households, its popularity can vary, as I discovered firsthand. When I first mentioned attempting this delightful bread to my aunts, I was met with puzzled looks and the question, “What is that?”
This heartwarming (and slightly humorous) anecdote meant I didn’t have a cherished family recipe passed down through generations to guide me. Instead, my passion for baking led me to extensive research, countless trials, and a persistent dedication to perfecting this traditional bread. The result is the meticulous recipe I’m thrilled to share with you today, one that captures the true essence of authentic panettone.
For those who love a chocolatey twist, don’t miss our Chocolate Orange Panettone recipe!
Why Homemade Panettone is a Must-Try This Season
There’s an undeniable magic in homemade panettone that store-bought versions simply can’t replicate. Fresh from your oven, this sweet bread boasts an unparalleled freshness and a depth of flavor that will astound you. While the process requires patience, it’s surprisingly straightforward once you understand the steps, making it an incredibly rewarding project.
Imagine gifting a loaf of this soft, sweet, and buttery brioche-like bread, generously filled with succulent dried fruits and fragrant citrus zests. It’s a gift from the heart that truly stands out. I poured countless hours into perfecting this recipe so that your baking experience can be smooth and successful. All you need to bring is a generous dose of patience, and you’ll be rewarded with a masterpiece.
If you’re looking for more festive delights to complement your holiday baking, explore our other beloved Christmas recipes: indulge in our delightful cut-out eggnog cookies, the traditional crunch of Italian sesame cookies, the sweet richness of Italian fig cookies, or transform leftovers into a decadent Panettone French Toast, and for a grand finale, our eggnog cheesecake with gingersnap crust.
Crafting a Light and Fluffy Panettone: A Detailed Guide
I understand that the prospect of a multi-day baking project might seem daunting, and I admit I was initially hesitant to share this particular recipe due to its requirement for patience and planning. This truly is a three-day panettone bread recipe, designed to maximize flavor and achieve that signature ethereal texture. Additionally, the dough is notably sticky and can be somewhat challenging to handle. However, if you approach it with determination—much like I did during my extensive testing—you absolutely can achieve a beautifully fluffy panettone bread.
During my recipe development, I lost count of how many panettones I baked. There was even a point when my husband, witnessing my relentless pursuit of perfection, suggested it was “time to put a bow on this one.” But giving up on this panettone recipe was simply not an option for me!
Don’t Sweat The Recipe is supported by its readers. We may earn a commission if you purchase through a link on our site. Learn more.
Day One: Cultivating the Flavorful Starter
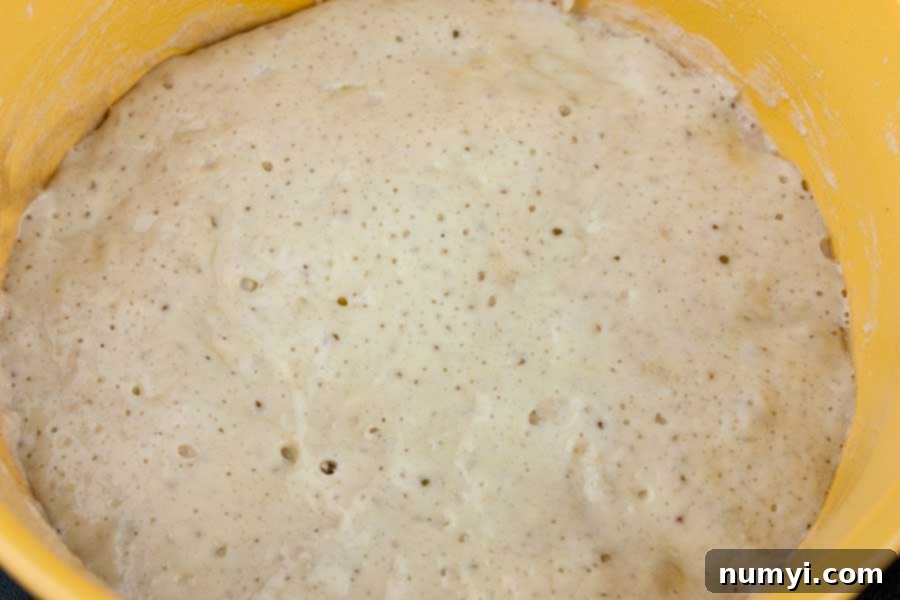
The first step in our panettone adventure begins the night before the main baking, by preparing a simple yet crucial starter. In a medium-sized bowl, combine 3/4 cup of all-purpose flour, 1/3 cup of water, and just 1/8 teaspoon of dry active yeast. Mix these ingredients thoroughly until they form a thick, somewhat wet consistency – it shouldn’t be as firm as dough, but rather a shaggy mixture. This starter, also known as a preferment, is vital for several reasons: it significantly enhances the volume of your final bread, deepens its complex flavors, and extends its freshness, allowing you to enjoy your homemade panettone for longer.
Once mixed, cover the bowl tightly with plastic wrap and allow it to rest at room temperature overnight. This slow, overnight fermentation process is where the magic begins, giving the yeast ample time to develop and create a robust foundation for your panettone. By morning, you’ll observe a bubbly, active starter, ready to infuse your dough with life and character.
Day Two: Preparing and Proofing the Panettone Dough
Day two is dedicated to building the main panettone dough, a process that requires careful attention and kneading. Begin by accurately measuring your flour. The “spoon and swoop” method is recommended: aerate the flour in its container, then gently spoon it into your measuring cup before leveling it off with a straight edge. Whisk this properly measured flour with the salt in a medium-sized bowl and set it aside.
Next, in the bowl of a stand mixer, proof your main batch of yeast. Combine 2 1/4 teaspoons of dry active yeast with 1/4 cup of warm water (around 115ºF or 46ºC). Let this mixture sit for 5-10 minutes until a frothy layer forms on top, indicating the yeast is active and ready. To this yeast mixture, add the eggs, vanilla extract, granulated sugar, and the fragrant orange and lemon zests. Whisk these ingredients together until well combined.
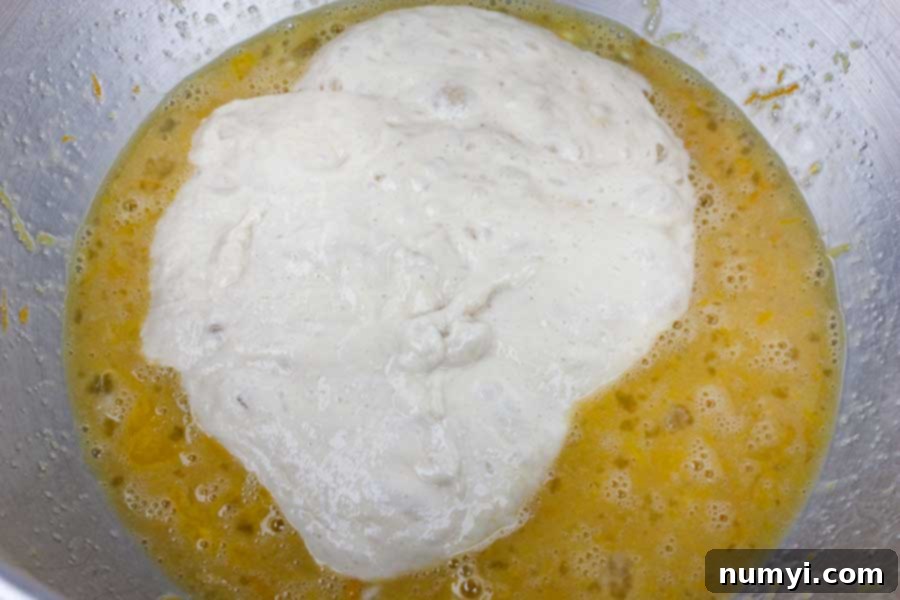
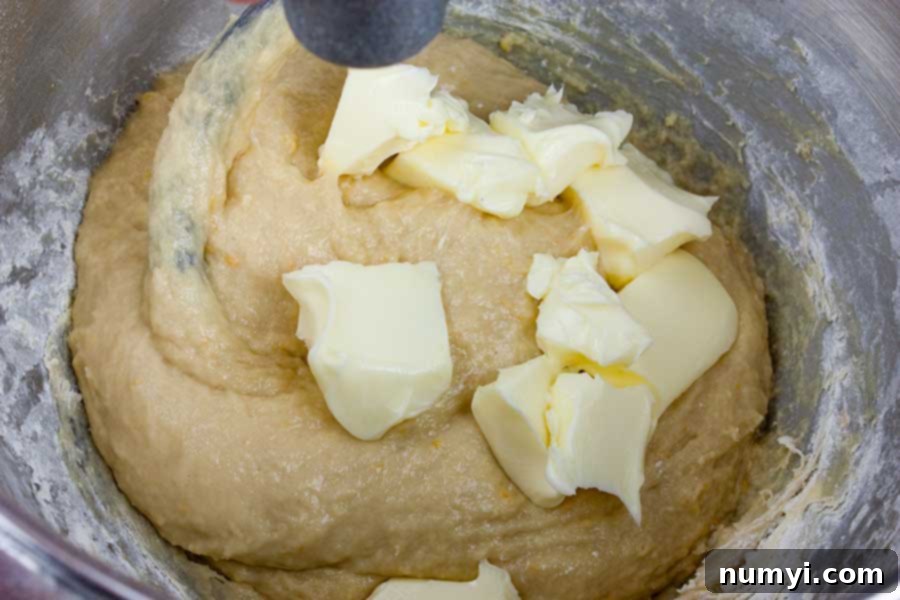
Now, add your overnight starter and the reserved flour mixture to the stand mixer bowl. Attach the dough hook and begin mixing on low speed until the ingredients just come together and the dough starts to pull away slightly from the sides of the bowl. Increase the mixer speed to medium and knead for a solid 10-15 minutes, or until the dough appears smooth and elastic. Due to its sticky nature, you’ll likely need to pause the mixer a few times to scrape down the sides of the bowl, ensuring all ingredients are fully incorporated. Remember, this enriched dough will not completely pull away from the bowl like a typical white bread dough; it will remain quite sticky.
Next, introduce the room-temperature unsalted butter, adding it gradually. Continue kneading for another 10-15 minutes, or until the butter is fully absorbed and the dough is glistening and elastic. Again, frequent scraping of the bowl’s sides will be necessary. This extensive kneading develops the gluten, crucial for panettone’s signature airy texture.
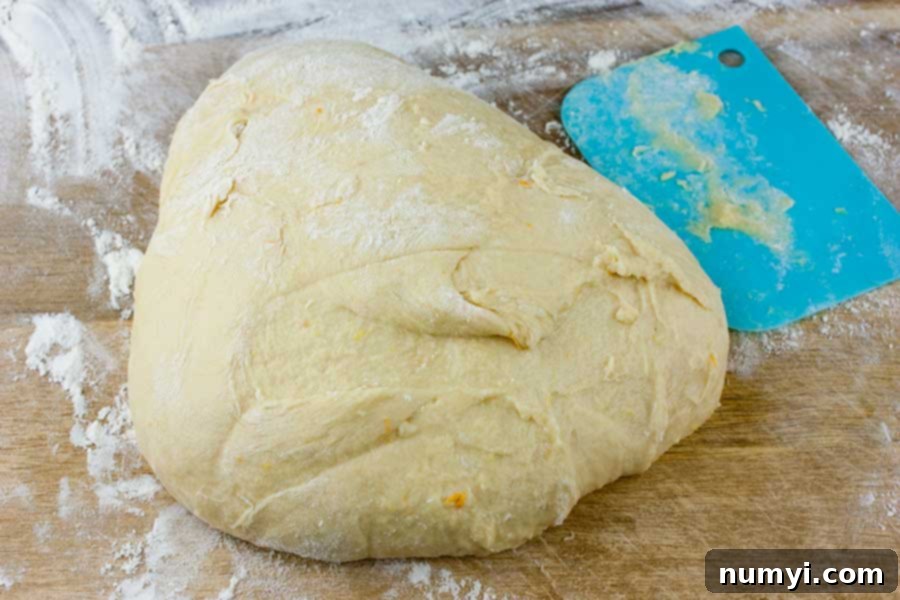
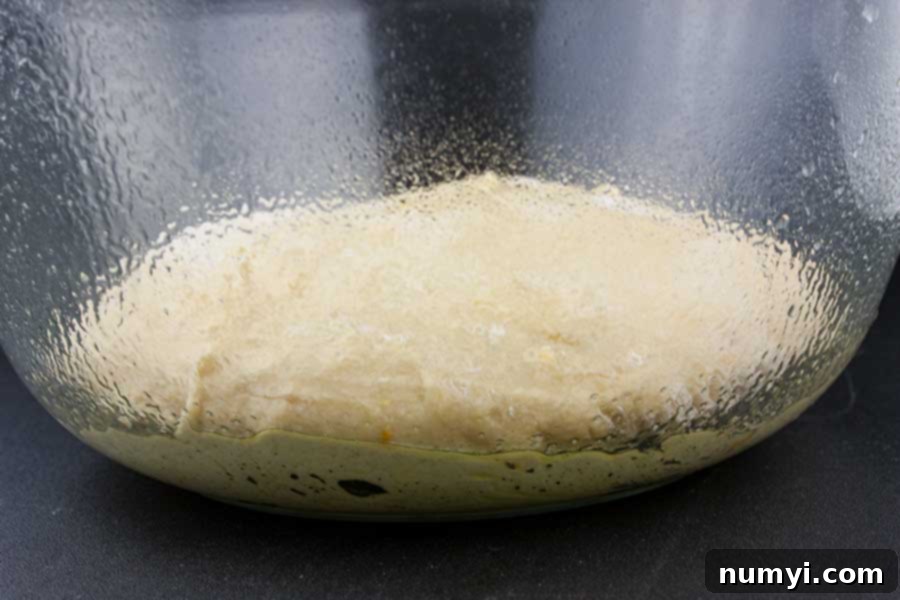
Once kneading is complete, scrape the dough out onto a lightly floured surface. Here’s a critical tip: knead in just enough additional flour to make it slightly easier to handle, but avoid adding too much. The less extra flour you incorporate, the lighter and fluffier your baked panettone will be. A bench scraper will be an invaluable tool to manage this sticky dough with minimal flour. Be patient, it will come together!
Transfer the dough into a large, well-oiled bowl. Lightly oil the top of the dough itself, then cover the bowl tightly with plastic wrap. Allow the dough to rise for 3 to 4 hours, or until it has tripled in size. The rising process for panettone is indeed lengthy, and patience is truly paramount here. Don’t rely solely on the clock; observe the dough’s volume closely, and proceed to the next step once it has visibly tripled.
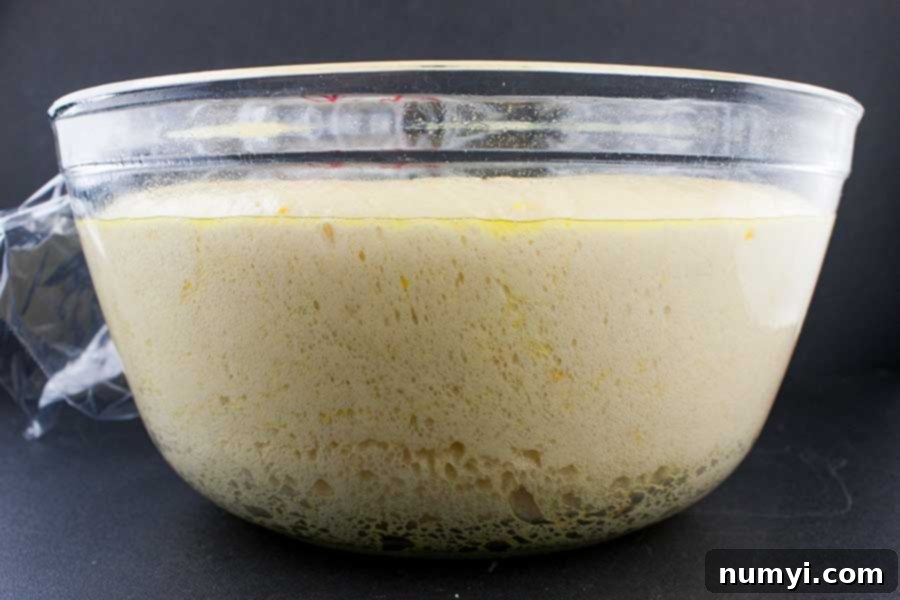
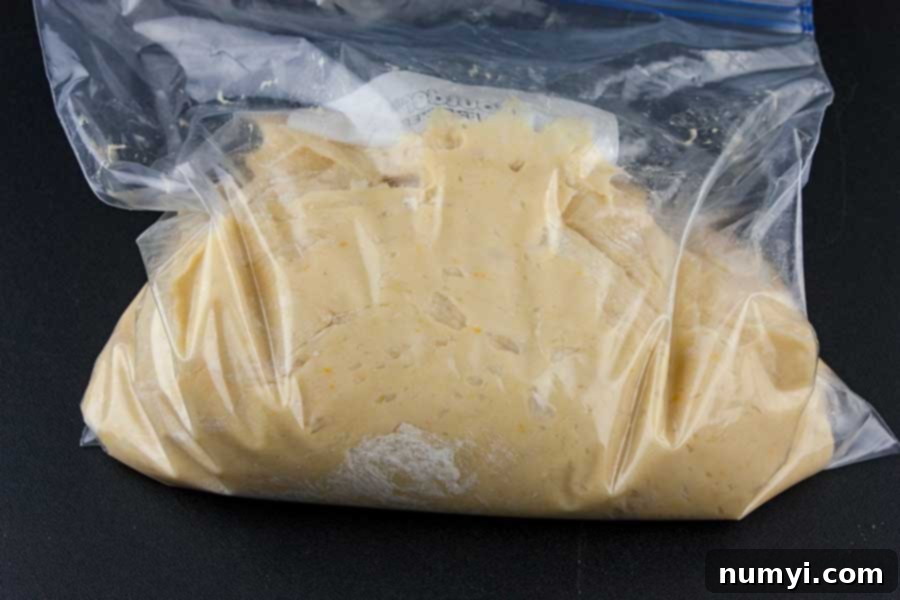
Once the dough has tripled, gently punch it down to release the air. Remove the dough from the bowl and place it onto a very lightly floured surface. Again, use minimal flour—just enough to make it manageable. The goal is to avoid incorporating too much additional flour, which can lead to a dense crumb. Transfer the dough into a one-gallon zip-top bag or another bowl covered tightly with plastic wrap, and then place it in the refrigerator overnight. This slow, cold fermentation in the refrigerator is a game-changer: it not only develops a much deeper and more complex flavor profile but also makes the dough significantly easier to shape on day three.
While your dough is in the fridge, prepare your fruit. In a small bowl, combine the dried golden raisins, dark raisins, and candied orange peel (or candied citron) with the orange liqueur (I personally prefer Grand Marnier for its rich flavor). Stir everything together, cover the bowl, and let the fruit soak overnight. This infuses the fruit with moisture and a wonderful citrusy aroma, preventing them from drying out during baking.
I find using a zip-top bag for the dough incredibly convenient for refrigerating, as it’s much easier to fit into a crowded fridge. The next day, you can simply tear open the sides of the bag to effortlessly remove the dough.
UPDATE: I successfully tested a two-day panettone method! If you’re short on time, you can condense the process. Make the starter early on day one, allowing it at least 6 hours to become bubbly and well-risen. Then, proceed to make the dough, letting it rise for 3-4 hours until tripled. Transfer it to a plastic zip-lock bag and refrigerate overnight, or for a minimum of 12 hours. The next day, you can continue with the rest of the steps for day three as outlined below.
Day Three: Shaping, Proofing, and Baking Your Masterpiece
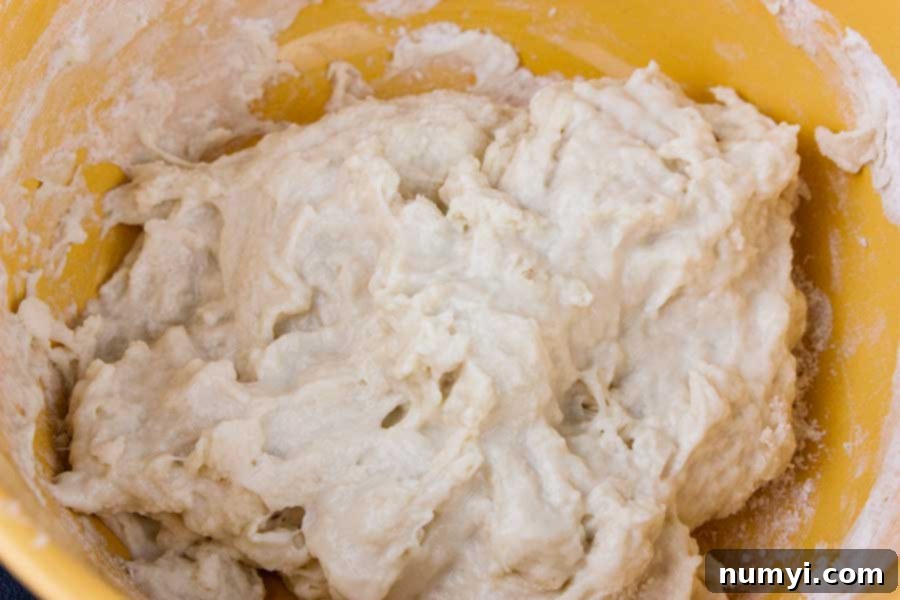
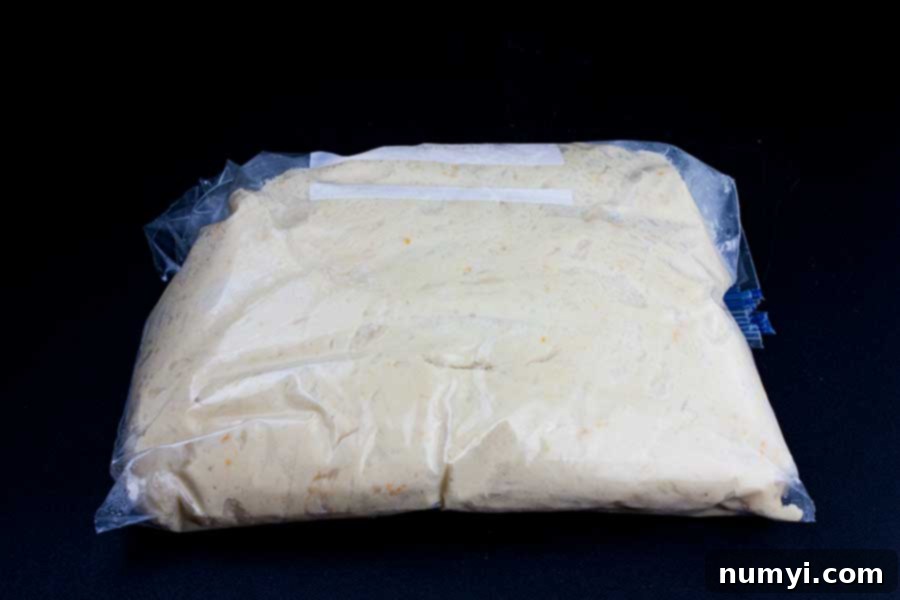
Welcome to the final day of your panettone journey! The dough, having undergone its slow rise in the refrigerator, will look beautifully expanded, as shown in the photo above. This cold fermentation has worked wonders, not only improving its texture but also deepening its incredible flavor. Thanks to the chill, the dough will be much firmer and significantly easier to handle during this stage, requiring very little, if any, additional flour. In fact, I’ve successfully shaped it without any extra flour, yielding a perfect result.
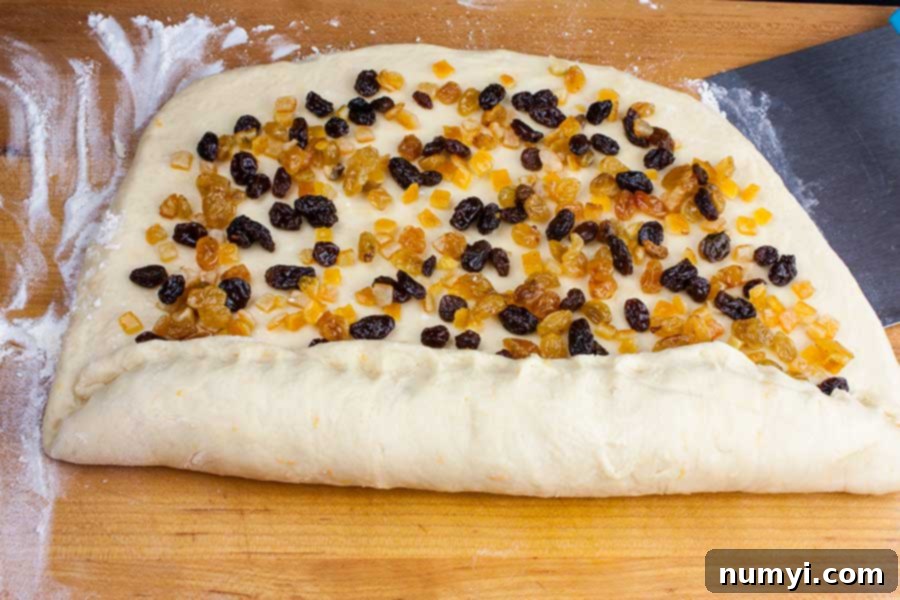
Carefully remove the dough from its container. If you used a plastic bag, simply rip it down the sides to easily access the dough, then place it on a very lightly floured surface. Press and gently roll the cold dough out into a rectangular shape. Drain any excess orange liqueur from your marinated dried fruits, then sprinkle the soaked raisins and candied fruit evenly over the entire surface of the dough.
Beginning from one of the longer sides, roll the dough up tightly into a log. Once rolled, fold the ends inwards towards the center, then continue to fold and tuck the dough around itself to form a smooth, round ball. Try to keep a good portion of the dough on top to encourage a beautiful dome shape. Carefully transfer this shaped dough into a greased panettone paper mold (easily found on Amazon) or a metal panettone pan, then place it on a baking sheet.
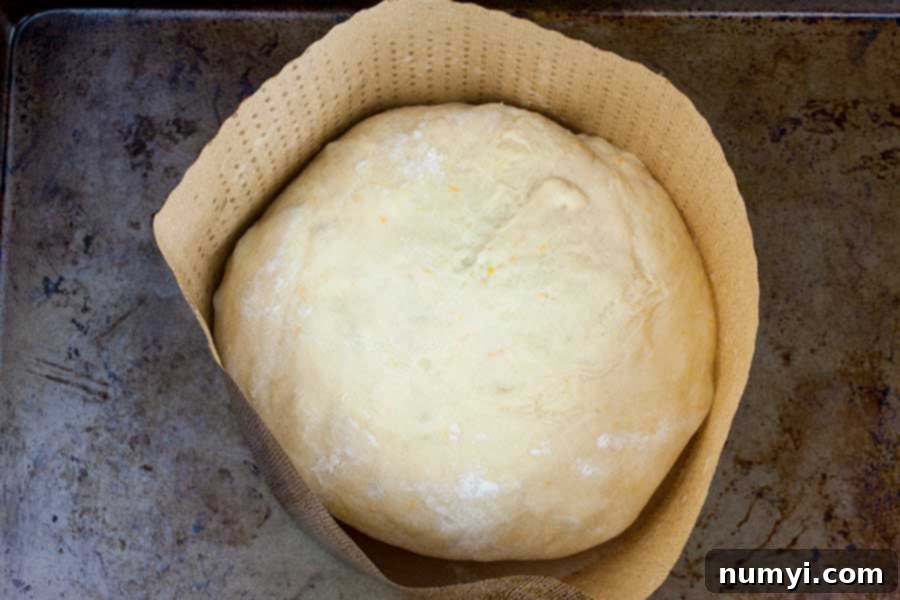
Cover the mold with oiled plastic wrap and let the dough rise in a warm place until it nearly reaches the top of the paper mold. This final rise will take approximately 3 to 4 hours, or until the dough has almost tripled in size again. Keep in mind that because the dough is cold, it will require a bit more time to come to temperature and achieve its full rise. To create an ideal warm environment, I often preheat my oven to about 150ºF (65ºC), then turn it off and simply switch on the oven light. Once the dough is shaped, I place it inside the warm, off oven to rise. In my most recent tests, this method reduced the final rise time to about 2.5 hours.
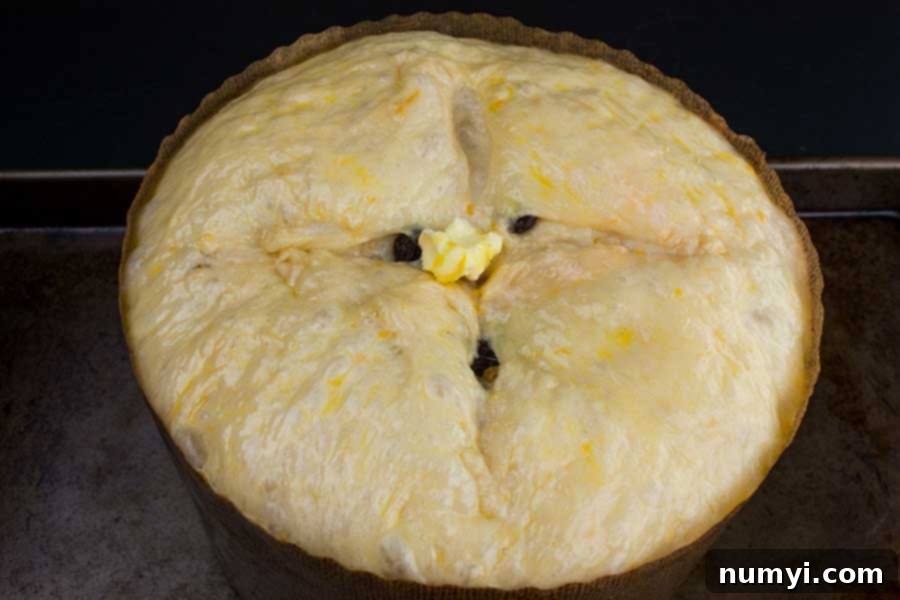
Just before the dough has completely risen, gently remove it from the oven (if that’s where it was proofing) and preheat your oven to 350ºF (175ºC). Prepare an egg wash by whisking one large egg with one tablespoon of water. Before baking, delicately brush this egg wash over the entire surface of the panettone dough. Next, using a very sharp knife, carefully cut a “cross” pattern into the top of the dough, about 1/4 to 1/2 inch deep. Place a small dab of softened butter right in the center of this cross. This step is crucial; it helps the panettone rise properly, allowing it to achieve that iconic domed shape and a beautiful, golden crust.
Bake your panettone for 40-45 minutes, or until a wooden skewer inserted into the center comes out clean. If you notice the top browning too quickly, lightly tent it with a piece of aluminum foil to prevent over-baking. During the baking process, prepare your cooling setup. The key to preserving panettone’s light and fluffy texture and preventing it from collapsing is to hang it upside down immediately after baking. I use the deep bowl from my stand mixer for this purpose, ensuring the bread’s top doesn’t touch the bottom of the bowl. Some brave bakers even hang it between two chairs, but I prefer the security of a deep bowl!
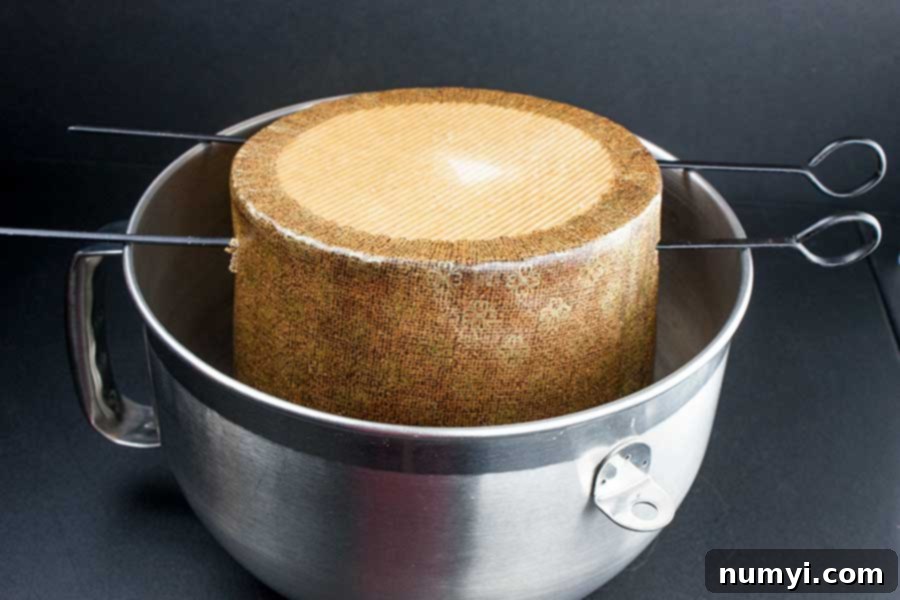
Immediately after removing the panettone from the oven, carefully slide two long metal skewers through each side, about an inch from the base of the bread. Then, gently invert the panettone and hang it in your prepared cooling setup for at least 2 hours, or until completely cool. This crucial step allows the delicate structure of the bread to set without compressing under its own weight, ensuring that wonderfully light and airy texture.
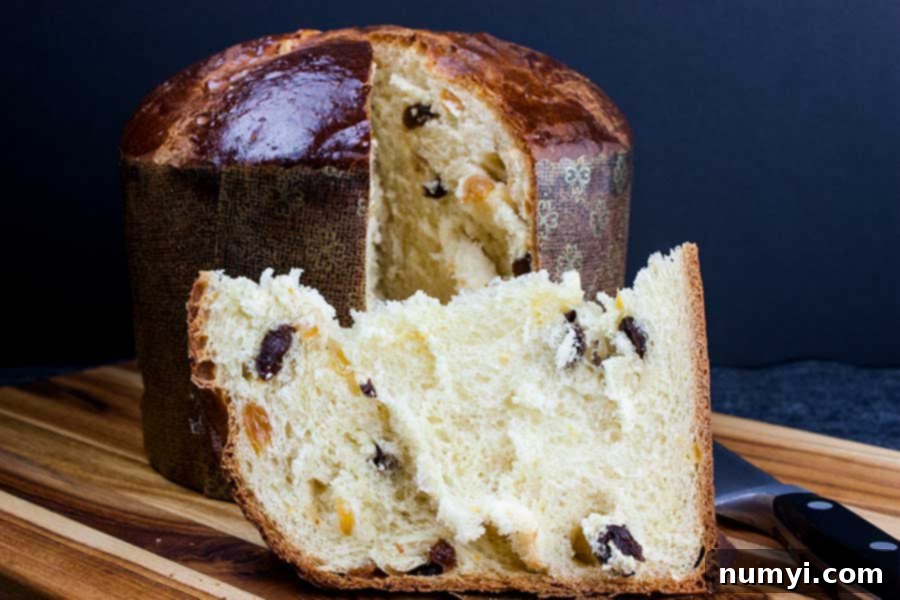
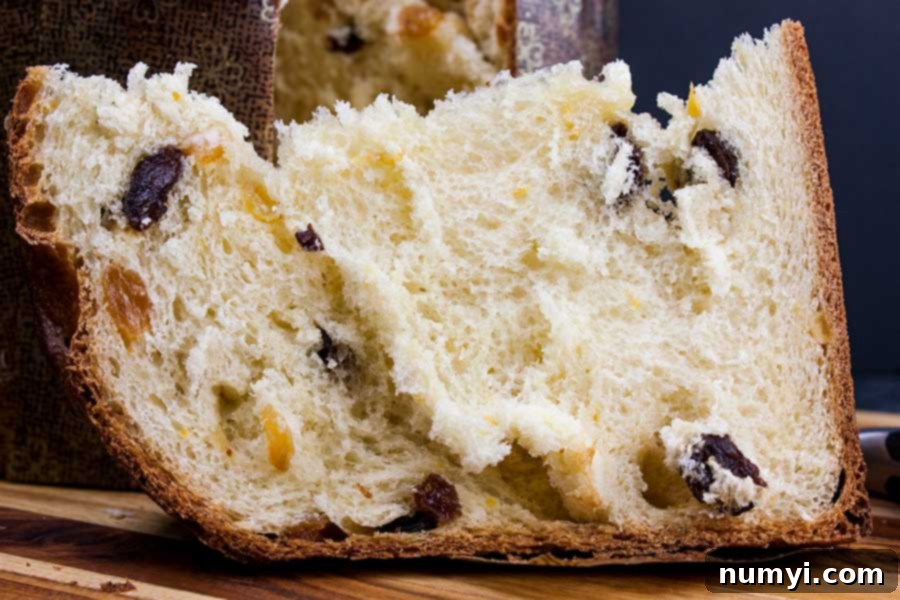
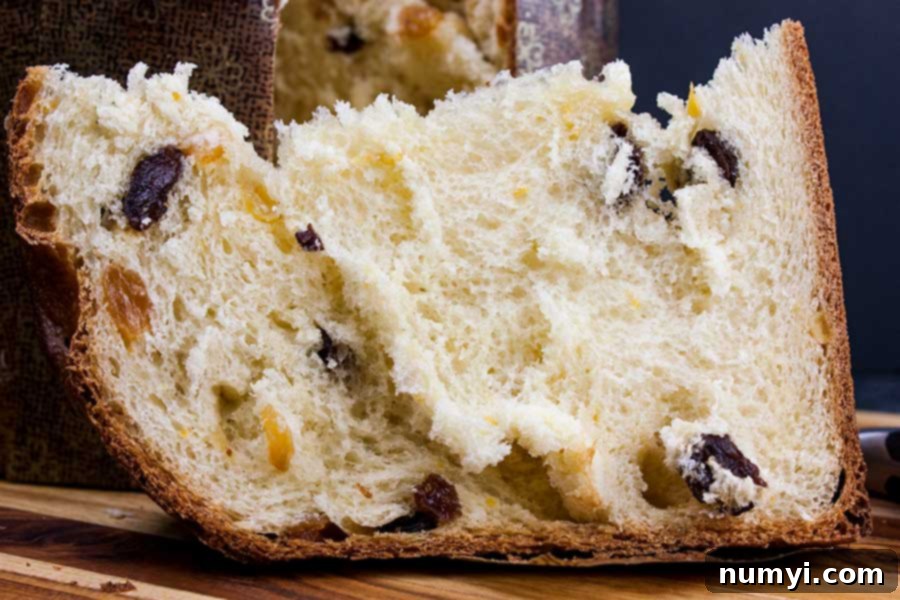
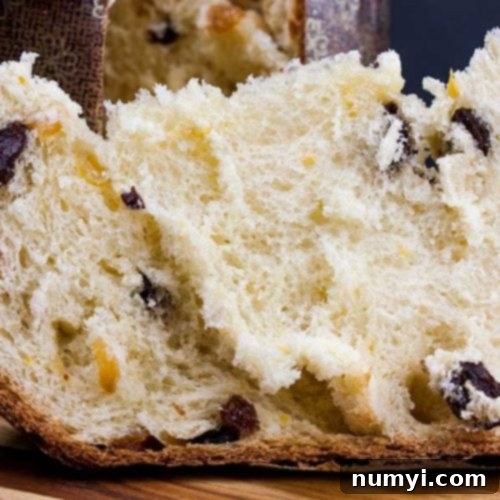
Once fully cooled, slice into your magnificent homemade panettone and savor the fruits of your three-day baking adventure! Just look at that incredibly light, fluffy bread, generously studded with plump raisins and fragrant candied orange peel (also known as candied citron). This bread, while traditionally associated with Christmas, has become such a joy to make that I don’t think I can limit myself to enjoying it just once a year.
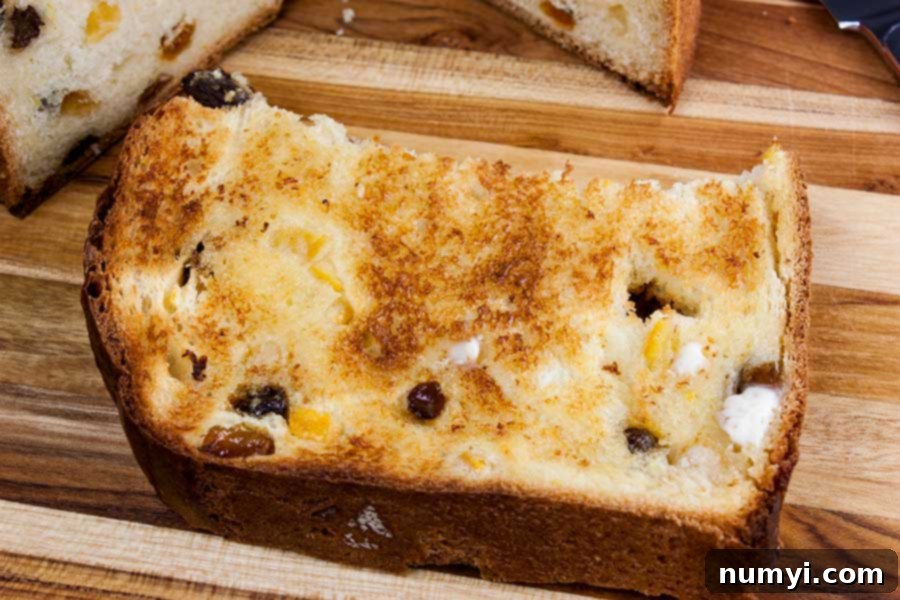
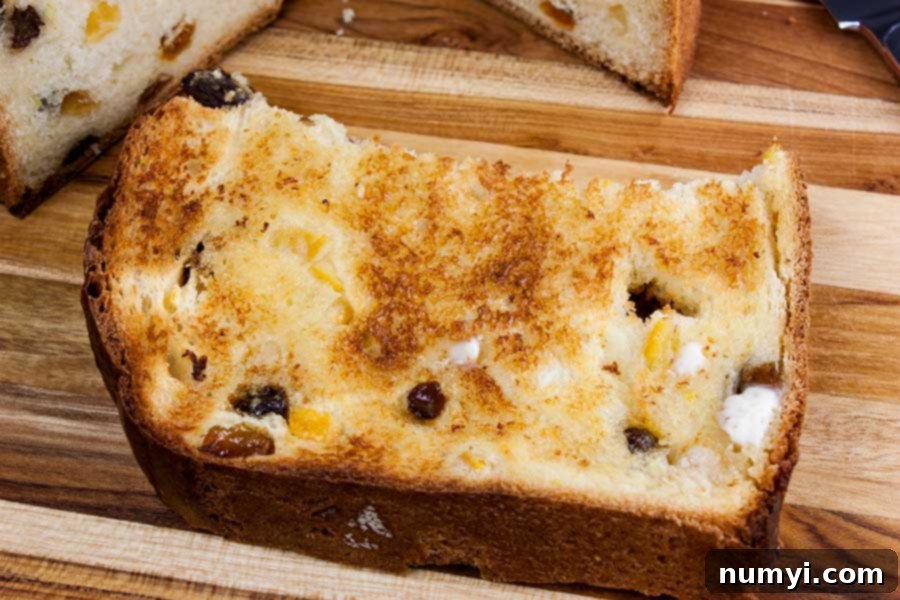
Our absolute favorite way to savor panettone is to toast a slice until golden brown and then generously slather it with butter. The warmth enhances its sweetness, the butter adds another layer of richness, and the subtle crunch is simply irresistible. This is truly a holiday tradition worth embracing and perfecting!
Essential Tips for Perfect Panettone
- Starter is Key: Panettone is traditionally a long-ferment, sourdough-based bread. While you can use the simple starter recipe provided below, if you already maintain an active sourdough starter, that works beautifully too! Both methods will contribute to the unique flavor and texture.
- Mind Your Flour Measurement: Avoid the common pitfall of adding too much flour. Over-flouring will result in a dense, heavy bread, losing panettone’s characteristic lightness. Always measure your flour correctly: aerate it by fluffing it with a spoon, then spoon it gently into your measuring cup and level it off without packing. For ultimate precision, consider weighing your ingredients.
- Room Temperature Ingredients: Ensure your eggs and butter are at room temperature. This allows them to incorporate more smoothly and evenly into the dough, creating a consistent emulsion that leads to a softer, more uniform crumb. Cold ingredients can cause the dough to be lumpy and tough.
- Quality Butter Matters: Invest in good quality European butter for the best panettone. European butters typically have a higher fat content and a richer flavor, which significantly impacts the taste and texture of this enriched bread. If you’re putting in the effort, high-quality ingredients will truly make a difference.
- Cold Fermentation Benefits: Refrigerating the dough for its slow rise and fermentation is not merely a convenience. This extended cold period allows the flavors to develop profoundly, resulting in a more complex and nuanced taste profile. It also firms up the dough, making it much easier to handle and shape when it’s time for the final steps.
- Sturdy Skewers for Cooling: Use strong metal skewers to hang your panettone upside down after baking. I learned this the hard way – my first attempt with wooden skewers resulted in them breaking under the weight of the warm bread, causing a bit of panic! Metal skewers provide the necessary support to prevent your beautiful panettone from collapsing as it cools.
- Prevent Over-Browning: To prevent the bottom of your panettone from browning too much during baking, consider using double pans (placing your panettone on a baking sheet, which is then placed on another baking sheet). If the top starts to brown excessively before the bread is fully baked, lightly tent it with aluminum foil.
- The Upside-Down Cool: Piercing the cooling bread with two long metal skewers (about 1 inch from the base) and hanging it upside down is absolutely crucial. This method prevents the delicate crumb structure from compressing and collapsing under its own weight as it cools, ensuring that signature lofty, airy texture.
Delicious Panettone Variations
- Flour Alternatives: While all-purpose flour works wonderfully, bread flour can also be used. Its higher protein content can provide a slightly chewier texture, which some bakers prefer.
- Custom Fruit Mixes: Feel free to customize the dried fruit blend to your liking. Classic combinations include sultanas, candied orange peel, and candied citron. However, you can mix and match any dried fruits you desire, such as dried cherries, cranberries, apricots, or even chopped figs. Ensure they are small enough or chopped to distribute evenly.
- Chocolate Indulgence: For chocolate lovers, stir in about 1/2 to 1 cup of semi-sweet chocolate chips or chopped dark chocolate along with the dried fruit. The chocolate melts beautifully into the warm bread, creating pockets of rich flavor.
- Sweet Topping: Before baking, sprinkle the top of the panettone with pearl sugar for an added crunch and a touch of sweetness. Alternatively, a simple almond glaze (made with powdered sugar, almond extract, and milk) can be drizzled over the cooled bread for an elegant finish.
Frequently Asked Questions About Panettone
Panettone is definitively more bread than cake. It’s an enriched, sweet bread dough, similar to brioche, characterized by its long fermentation and the inclusion of eggs, butter, and dried fruits. While it can be quite rich, its yeast-leavened structure and fluffy texture classify it as a bread.
Panettone can be enjoyed in various ways! Slice it into thick or thin wedges and serve it warm or at room temperature. Many people love it simply as is with a cup of coffee or tea. A particularly popular method is to toast a slice until lightly golden and then slather it with butter, which enhances its flavor and creates a delightful contrast in textures.
Leftover panettone is incredibly versatile! Its rich, sweet flavor and airy texture make it perfect for transforming into other delicious treats. You can slice it up for everyday toast, use it to make an unforgettable French toast (it absorbs the custard beautifully), or even create a decadent bread pudding. Get creative and enjoy every last crumb!
To keep your panettone fresh, ensure it has cooled completely. Then, wrap it tightly in plastic wrap to prevent it from drying out. Store it at room temperature for up to 5 days. If you need to keep it longer, you can refrigerate it for up to a week. For extended storage, freezing is an excellent option.
To freeze panettone, make sure it is completely cooled. Wrap the entire loaf (or individual slices) tightly in plastic wrap, then wrap it again in aluminum foil to protect it from freezer burn. It can be frozen for up to 2 months. To thaw, simply transfer it to the refrigerator overnight, or for quicker enjoyment, some prefer to gently warm slices in a toaster or oven.
More Delicious Pastry Recipes to Explore
Morning Buns
Chocolate Orange Panettone Recipe
Easy Pistachio Walnut Baklava Recipe
Are you on Pinterest? Click the button below to add this recipe to one of your boards!
Easy Panettone Recipe (Italian Christmas Bread)
Print
Pin
Rate
Ingredients
For the Starter
- 3/4 cup all-purpose flour
- 1/3 cup water
- 1/8 teaspoon dry active yeast (a pinch)
For the Dough
- 1/4 cup water warm
- 2 1/4 teaspoons dry active yeast
- 3 large eggs room temperature
- 1/2 cup granulated sugar
- 1 1/2 teaspoon vanilla
- 1 tablespoon orange zest freshly grated
- 1 tablespoon lemon zest freshly grated
- all the starter from above
- 3 cups all-purpose flour (plus more for dusting)
- 1 teaspoon salt
- 6 tablespoons unsalted butter softened
For the Fruit
- 1/2 cup golden raisins
- 1/2 cup dark raisins
- 1/3 cup candied orange peel
- 1/4 cup orange liqueur (such as Grand Marnier)
For the Egg Wash
- 1 large egg beaten
- 1 tablespoon water
A dab of butter for the top just before baking
Instructions
The Starter (day one)
-
Mix 3/4 cup of all-purpose flour, 1/3 cup water (or a little more to make the starter thick and somewhat wet but not like a dough consistency), and 1/8 teaspoon yeast in a medium-size bowl.
Cover and let rise overnight.
3/4 cup all-purpose flour, 1/3 cup water, 1/8 teaspoon dry active yeast
The Dough (day two)
-
Measure the flour properly (spoon and swoop) into a medium-size bowl. Whisk the salt into the flour and set aside.
In the bowl of a stand mixer, proof the 2 1/4 teaspoons of yeast with the 1/4 cup of warm (115º degrees F) water about 5-10 minutes until frothy on top.
Add the eggs, vanilla, sugar, and orange and lemon zest, to the yeast mixture and whisk together.
1/4 cup water, 2 1/4 teaspoons dry active yeast, 3 large eggs, 1/2 cup granulated sugar, 1 1/2 teaspoon vanilla, 1 tablespoon orange zest, 3 cups all-purpose flour, 1 teaspoon salt, 1 tablespoon lemon zest -
Add the starter and flour, attach the dough hook and mix until it comes together and starts pulling away from the bowl slightly. Turn the mixer to medium speed and knead for 10-15 minutes or until smooth and elastic. You may need to stop the mixer and scrape down the sides a few times.all the starter from above
-
Add the butter and knead for about 10-15 minutes more or until it’s fully incorporated. Again you may need to scrape down the sides of the bowl. The dough should be smooth and elastic but will still be sticky.6 tablespoons unsalted butter
-
Scrape the dough out onto a lightly floured surface and knead JUST ENOUGH flour into it until it’s not EXTREMELY sticky and slightly easier to handle. The less flour you can use the lighter and fluffier your panettone will be once baked.
-
Place the dough in a large oiled bowl. Oil the top of the dough, cover with plastic wrap and allow to rise 3 to 4 hours or until tripled in size. Once tripled in size gently punch the dough down, remove the dough from the bowl to a very lightly floured surface. Again only knead in enough flour to help you handle the dough a little easier. Place it in a one-gallon zip-top bag or another bowl covered with plastic. Place in the refrigerator overnight.
-
In a medium-size bowl marinate the dried golden raisins, dark raisins, and candied orange peel with the orange liqueur. Cover with plastic wrap set aside and stir occasionally.1/2 cup golden raisins, 1/2 cup dark raisins, 1/3 cup candied orange peel, 1/4 cup orange liqueur
Day Three
-
Remove the dough from the refrigerator and place on a lightly floured surface. Press and roll the dough out into a rectangle. Sprinkle the marinated fruit evenly over the dough. Roll the dough up tightly into a log shape. Fold the ends into the center and fold and tuck it around to form a smooth ball. Transfer the dough into a greased panettone mold
-
Cover with oiled plastic wrap and let rise until almost to the top of the paper mold about 3 to 4 hours. Almost tripled in size again. Remember the dough is cold so it will take a while to rise.
-
Just before it’s completely risen, preheat the oven to 350ºF degrees. Brush the dough gently with the egg wash over the entire surface. With a very sharp knife gently cut across the top about 1/4-1/2″ deep and again in the other direction. Place a dab of softened butter in the center of the cross.1 large egg, 1 tablespoon water
-
Bake for 40-45 minutes or until a wooden skewer comes out clean. If it starts to brown too much lightly tent with a piece of aluminum foil.
-
While the bread is baking prepare a way to hang it upside down to cool. Once baked carefully slide two skewers through each side of the bottom of the bread. Flip it over into the prepared place to let cool at least 2 hours.
Notes
Then make the dough and let it rise for 3-4 hours. Transfer to a plastic zip-lock bag and refrigerate overnight. Then continue with the rest of the steps.
Weigh the ingredients for more accuracy but using the cup measurements also works. Just be sure to aerate, spoon, and swoop level.
Avoid adding too much flour it will make the bread dense. Measure the flour correctly, aerate, spoon, and swoop level.
Using double pans when baking helps to prevent the bottom from browning too much.If it starts to brown too much lightly tent it with a piece of aluminum foil.
Storing – Let the bread cool completely, wrap tightly in plastic wrap, and store it at room temperature for up to 5 days. Or refrigerate it for up to a week.
Freezing – Wrap completely cooled bread tightly in plastic wrap, then in aluminum foil, and freeze for up to 2 months. You can wrap it whole or wrap individual pieces. Thaw in the refrigerator overnight.
