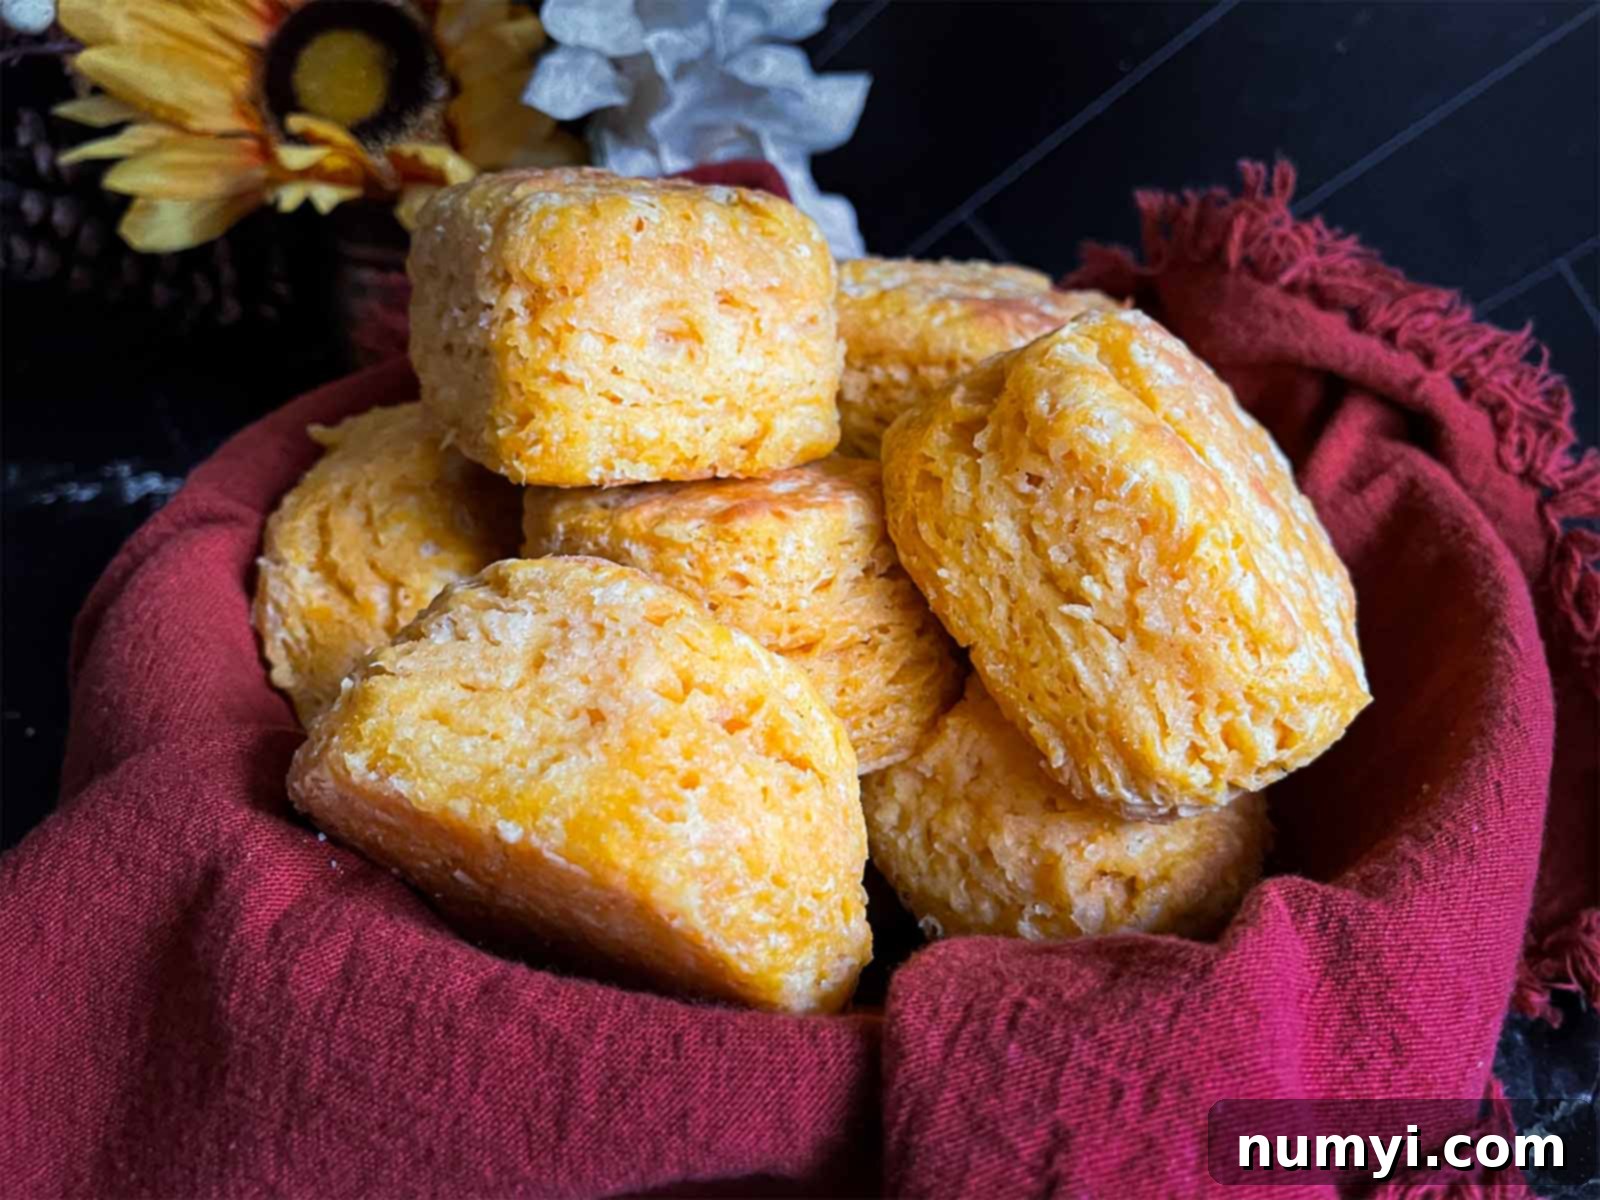
Fluffy, Flaky, and Flavorful: Your Ultimate Guide to Homemade Sweet Potato Biscuits
There’s nothing quite like a perfectly baked Southern biscuit – tender, buttery, and incredibly flaky. Now, imagine elevating that classic comfort with the subtle, earthy sweetness of roasted sweet potatoes. These homemade sweet potato biscuits offer exactly that: a harmonious blend of savory Southern tradition and a delightful fall-inspired twist, making them a true culinary gem.
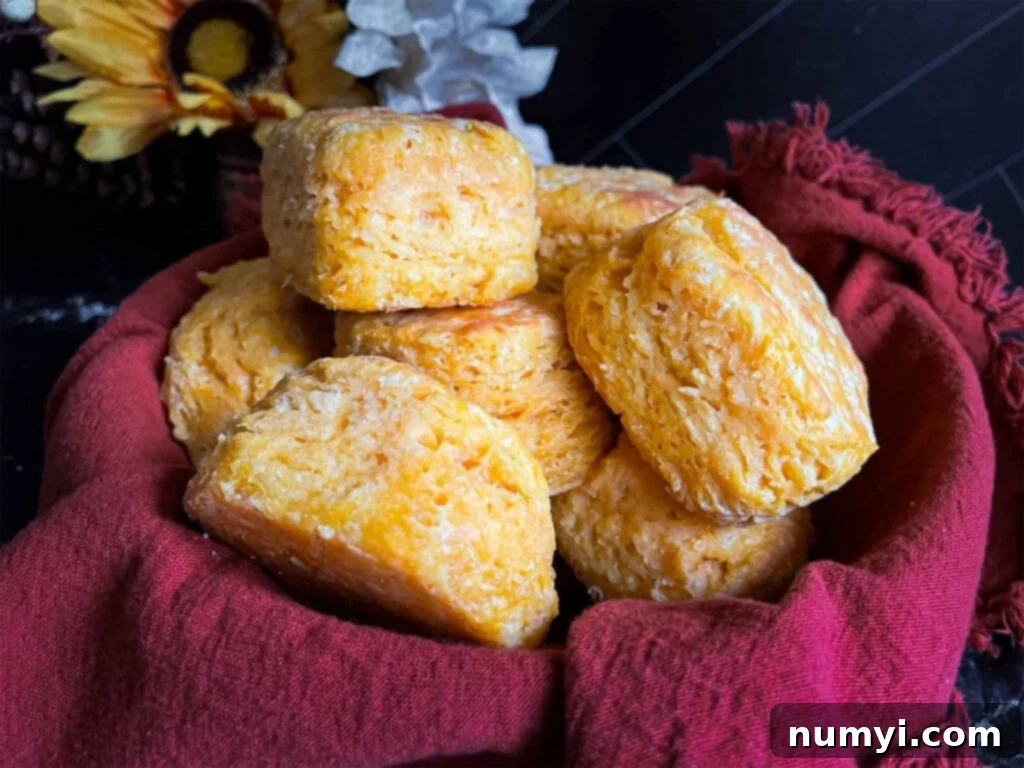
Why You’ll Adore These Sweet Potato Biscuits
These sweet potato biscuits aren’t just another recipe; they’re an experience waiting to happen. Here’s why they’ll quickly become a cherished staple in your kitchen:
- Unforgettable Flavor Profile – Prepare your taste buds for a delightful dance! These biscuits strike a perfect balance between the natural sweetness of the sweet potatoes and the rich, comforting savoriness of a classic Southern biscuit. The roasted sweet potato puree adds a depth of flavor that’s both unique and incredibly pleasing, making each bite a memorable one. They’re sweet without being overly sugary, and savory without being bland.
- Remarkably Versatile – One of the greatest qualities of these fluffy sweet potato biscuits is their adaptability. They seamlessly transition from a delightful breakfast side to a hearty brunch staple, a comforting addition to lunch, or a unique accompaniment for dinner. Imagine a warm biscuit split open, filled with a slice of country ham or a savory breakfast sausage – a quick and satisfying meal in itself! They pair beautifully with both sweet and savory toppings, from maple syrup and honey to gravies and stews.
- Quick, Easy, and Resourceful – Don’t be intimidated by homemade biscuits; this recipe for sweet potato biscuits is designed for simplicity. Even novice bakers can achieve impressive results. Plus, it’s an excellent and delicious way to utilize any leftover mashed sweet potatoes you might have from a previous meal, transforming them into something entirely new and exciting.
- Perfect for Holidays and Special Occasions – With their warm hue and comforting flavor, these biscuits are an ideal addition to any fall or winter holiday spread. They’re especially beloved at Thanksgiving and Christmas dinners, adding a touch of homemade elegance and seasonal cheer that guests will rave about. They stand out from traditional dinner rolls and offer a unique, festive twist.
If you’re a fan of delicious homemade bread, be sure to explore some of our other favorite bread recipes throughout the year. Don’t miss out on classics like Better Than Starbucks Pumpkin Bread, the incredibly simple Easy Crescent Roll Recipe, our robust Italian Bread Recipe, and the effortlessly elegant Overnight Focaccia. Each offers its own unique charm and flavor.
Essential Ingredients for Perfect Sweet Potato Biscuits
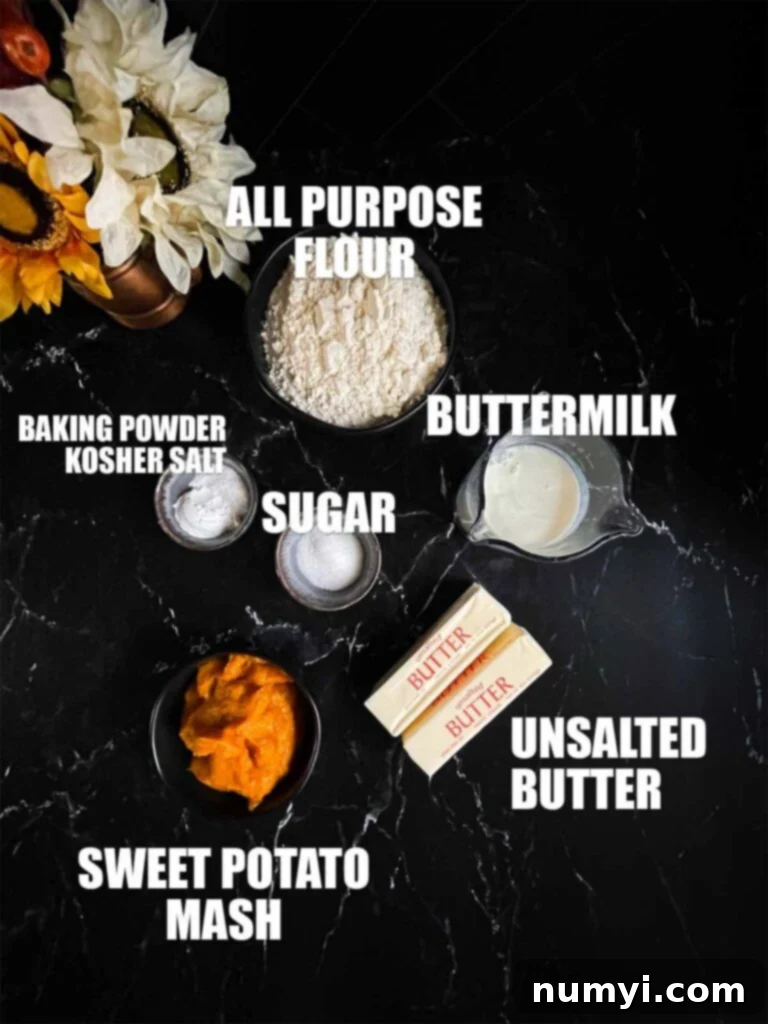
Crafting the perfect batch of flaky sweet potato biscuits starts with selecting high-quality ingredients and understanding their role. Below, we highlight the core components, but for a comprehensive list of all ingredients, precise measurements, and detailed instructions, please refer to the full recipe card at the bottom of this page.
- Sweet Potato Puree – The star of the show! For the best flavor and consistency in your sweet potato biscuits, I always recommend using mashed baked sweet potatoes (sweet potato puree). Roasting sweet potatoes concentrates their natural sugars, imparting a sweeter, deeper, and richer flavor to the biscuits compared to boiled sweet potatoes. Ensure your puree is smooth, well-drained, and chilled before incorporating it into the dough.
- Dry Ingredients Foundation – The structural backbone of any great biscuit recipe, our dry mix consists of all-purpose flour, baking powder, granulated sugar, and kosher salt. All-purpose flour provides the structure, baking powder acts as the crucial leavening agent for that characteristic rise and fluffiness, and salt balances the sweetness while enhancing all other flavors. A touch of granulated sugar complements the sweet potato beautifully.
- Unsalted Cold Butter – This is the secret to achieving those coveted flaky layers in your biscuits. Cold butter, especially when grated or cut into small pieces, creates pockets of air as it melts during baking. These air pockets expand, separating the layers of dough and resulting in an incredibly tender and flaky texture. Using unsalted butter allows you to control the overall salt content of your recipe. Keeping it very cold, even frozen, is paramount.
- Cold Buttermilk – Buttermilk is a non-negotiable for authentic Southern biscuits. Its acidity reacts with the baking powder, producing carbon dioxide that helps the biscuits rise even higher and become lighter. Beyond leavening, buttermilk adds a distinct tangy flavor that complements the sweet potato perfectly, and its fat content contributes significantly to the biscuits’ overall moisture and tenderness. Always ensure your buttermilk is thoroughly chilled. If you don’t have buttermilk on hand, you can make a quick substitute by adding 1 tablespoon of white vinegar or lemon juice to a measuring cup and filling the rest with regular milk (dairy or non-dairy), letting it sit for 5 minutes until it slightly curdles.
Crafting Your Own Flaky Sweet Potato Biscuits
Follow these simple steps to create a batch of incredibly delicious and flaky sweet potato biscuits that will impress everyone.
- Prepare Your Baking Surface and Butter: Begin by preheating your oven to a robust 425 degrees F (220 degrees C). For baking, you can either grease a cast iron skillet for that classic Southern crust or line a baking sheet with parchment paper for easy cleanup. A crucial step for flaky biscuits is using very cold butter. Grate your unsalted butter directly from the freezer and place the grated butter back into the freezer while you gather and prepare the rest of your ingredients. This ensures the butter stays as cold as possible until it’s time to mix.
- Combine Dry Ingredients and Butter: In a large mixing bowl, whisk together your all-purpose flour, baking powder, a touch of granulated sugar, and kosher salt until thoroughly combined. These dry ingredients form the base of your biscuits. Now, retrieve your grated cold butter from the freezer and add it to the flour mixture. Using your hands, gently toss the butter with the flour until each piece is coated. This prevents the butter from clumping and helps create those desirable flaky layers. If you’re not grating, you can use a pastry blender or two knives to cut the cold butter into pea-sized pieces. In a separate, medium-sized bowl, whisk together the cold buttermilk and your smooth, mashed sweet potato puree. Make sure the sweet potato puree is not too wet, as excess moisture can affect the dough’s consistency.
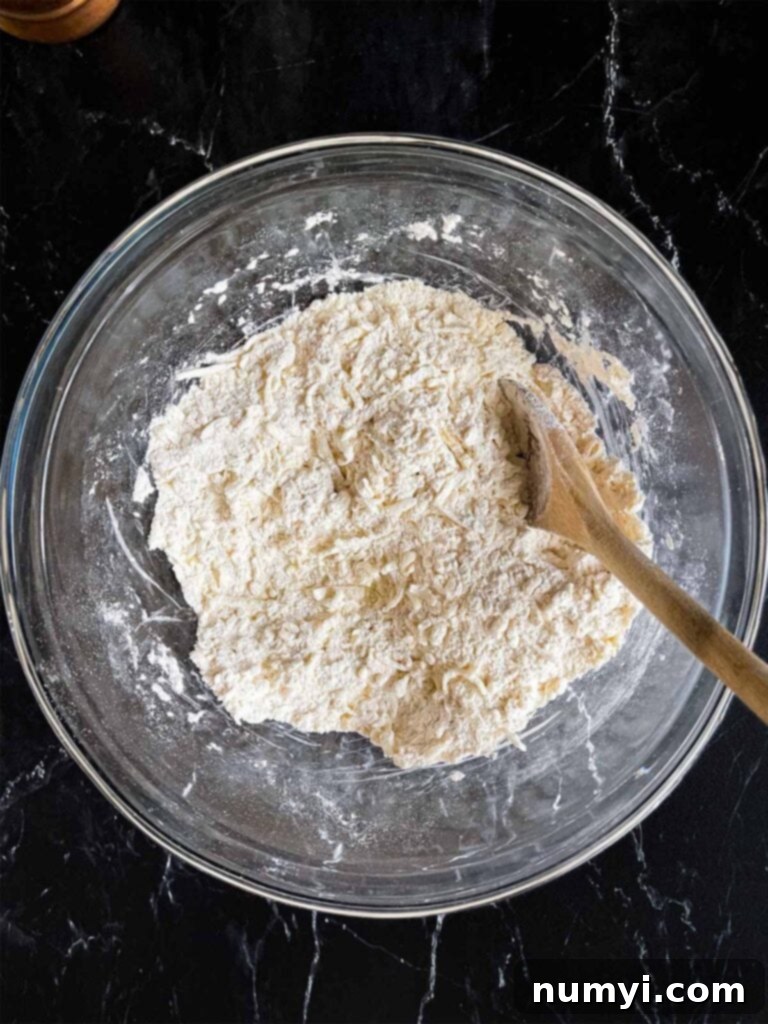
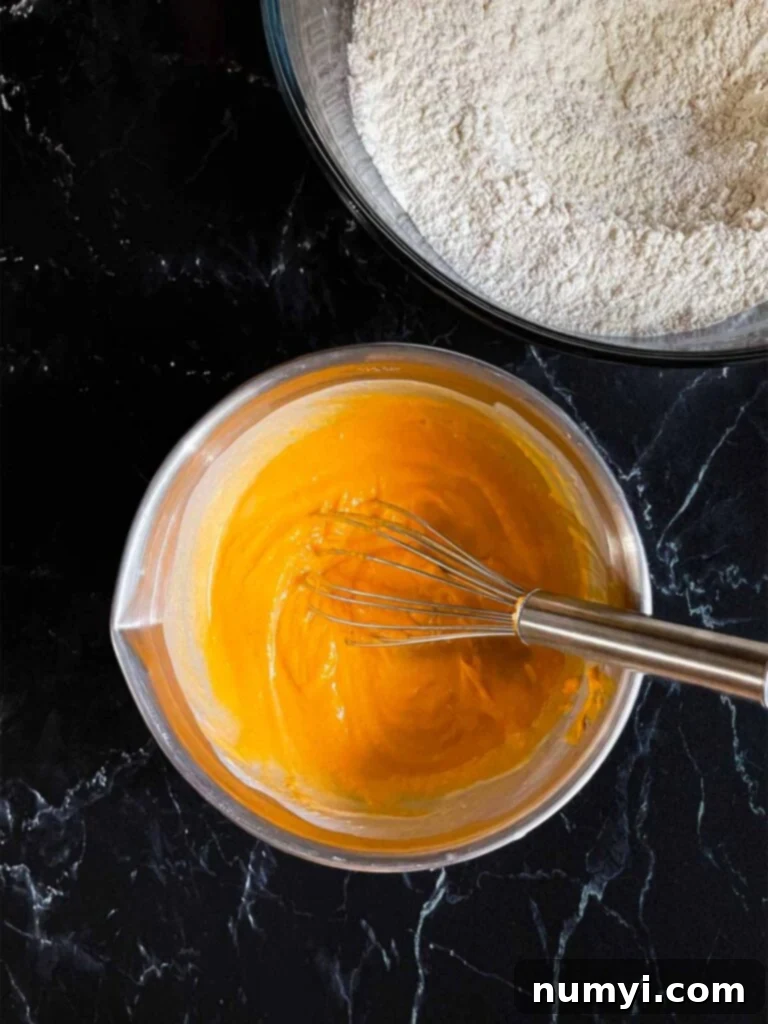
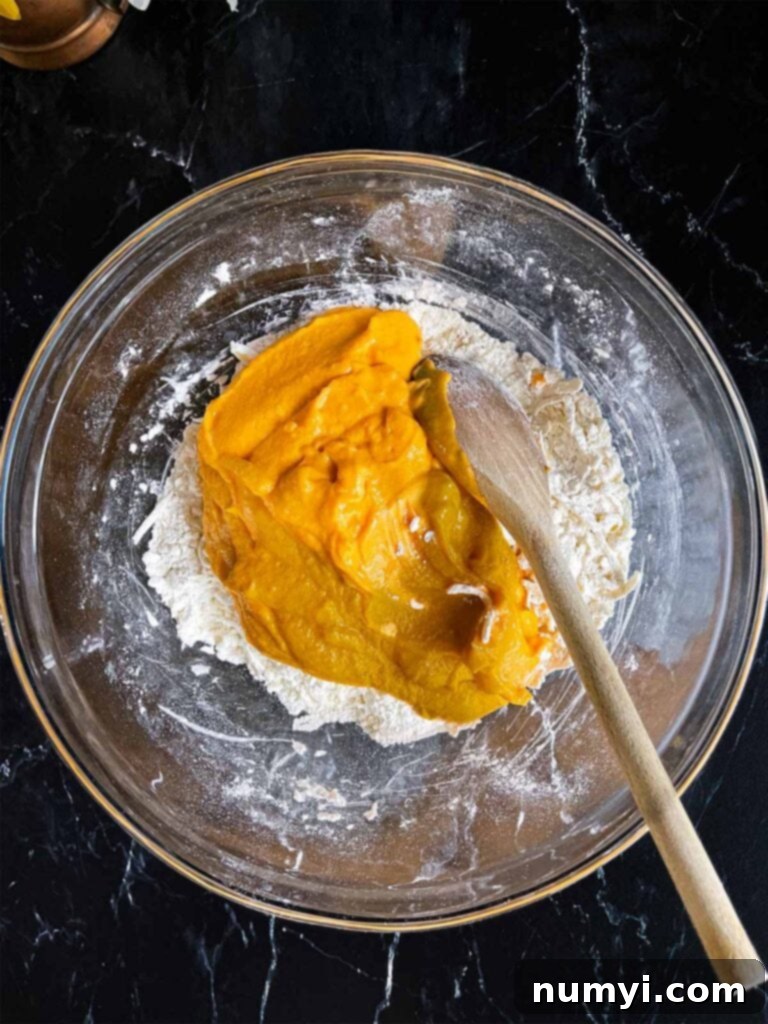
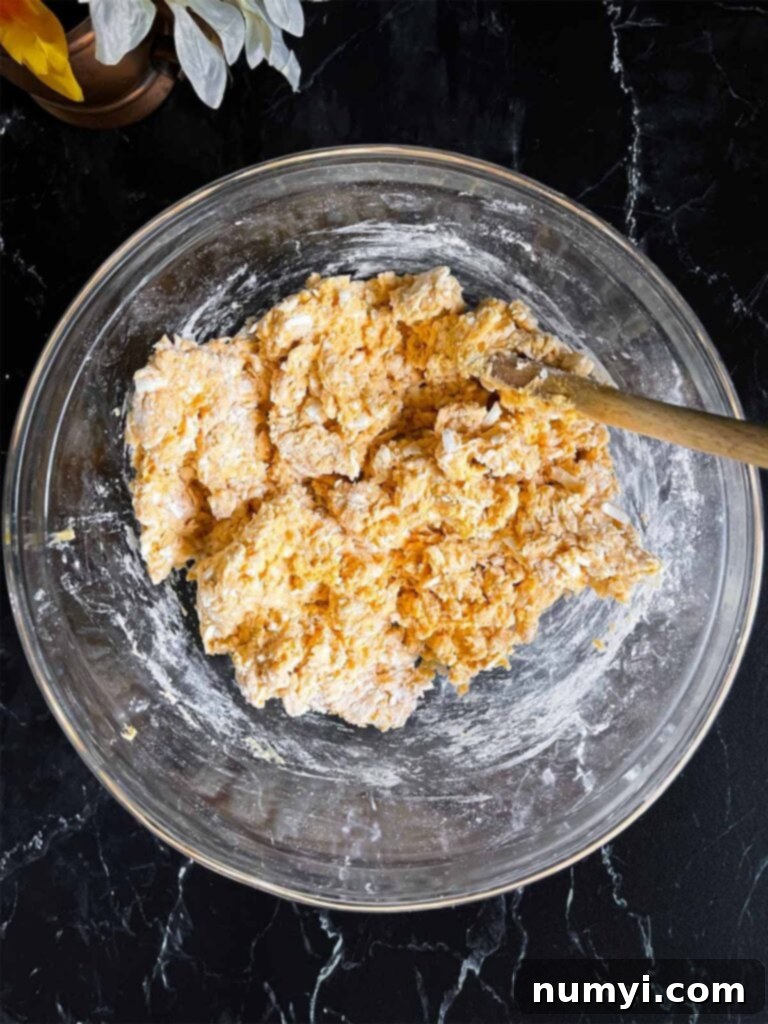
- Gently Mix the Dough: Pour the sweet potato and buttermilk mixture into the bowl with your dry ingredients and butter. Using a wooden spoon or a spatula, gently stir the ingredients. The key here is to mix just until the mixture begins to come together into a shaggy ball. Avoid overmixing at all costs, as excessive kneading develops gluten, which can lead to tough, dense biscuits instead of light, flaky ones. The dough might look a little crumbly, and that’s perfectly normal – resist the urge to keep mixing!
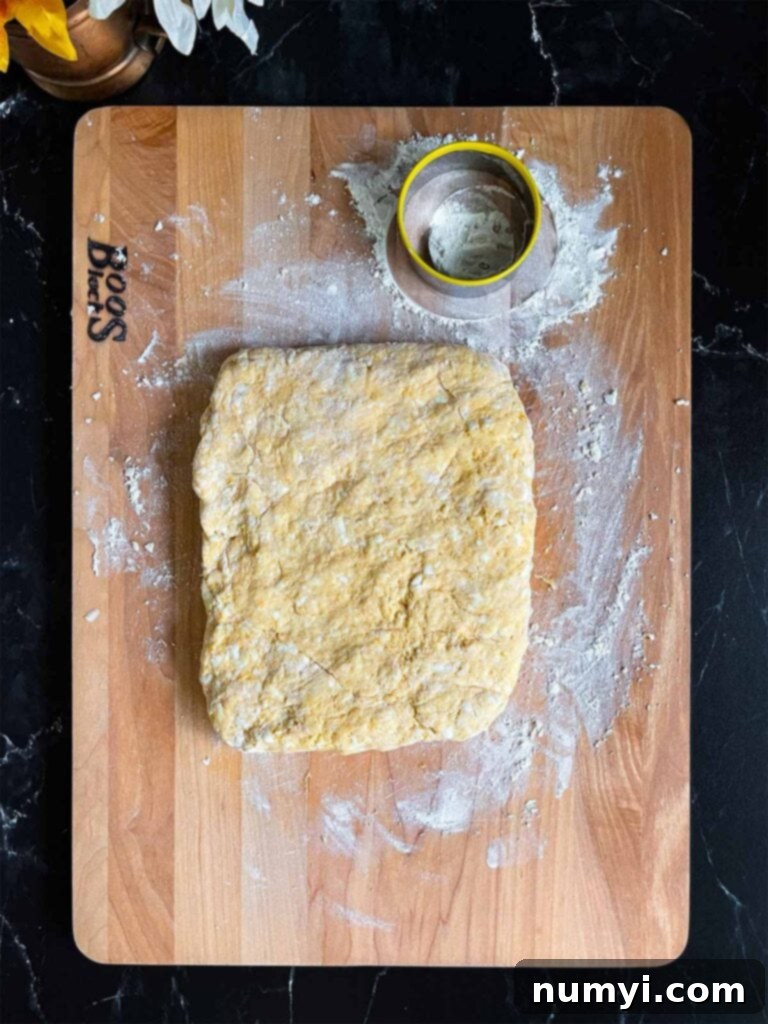
- Shape and Cut the Biscuits: Turn the shaggy dough out onto a lightly floured surface. To create those magnificent flaky layers, gently fold the dough over onto itself about 4 to 6 times. This is a crucial step for building structure without overworking the gluten. After folding, gently pat the dough out into a uniform 1-inch thickness. Using a sharp 2 ½-inch round biscuit cutter, cut out your biscuits. Press straight down firmly without twisting, as twisting seals the edges and can prevent them from rising tall and evenly. Place the cut biscuits onto your prepared baking sheet or into the cast iron skillet. Gather the dough scraps, gently press them together (avoid excessive kneading!), and pat them out once more to cut any remaining biscuits. Try to do this only once to keep the biscuits tender.
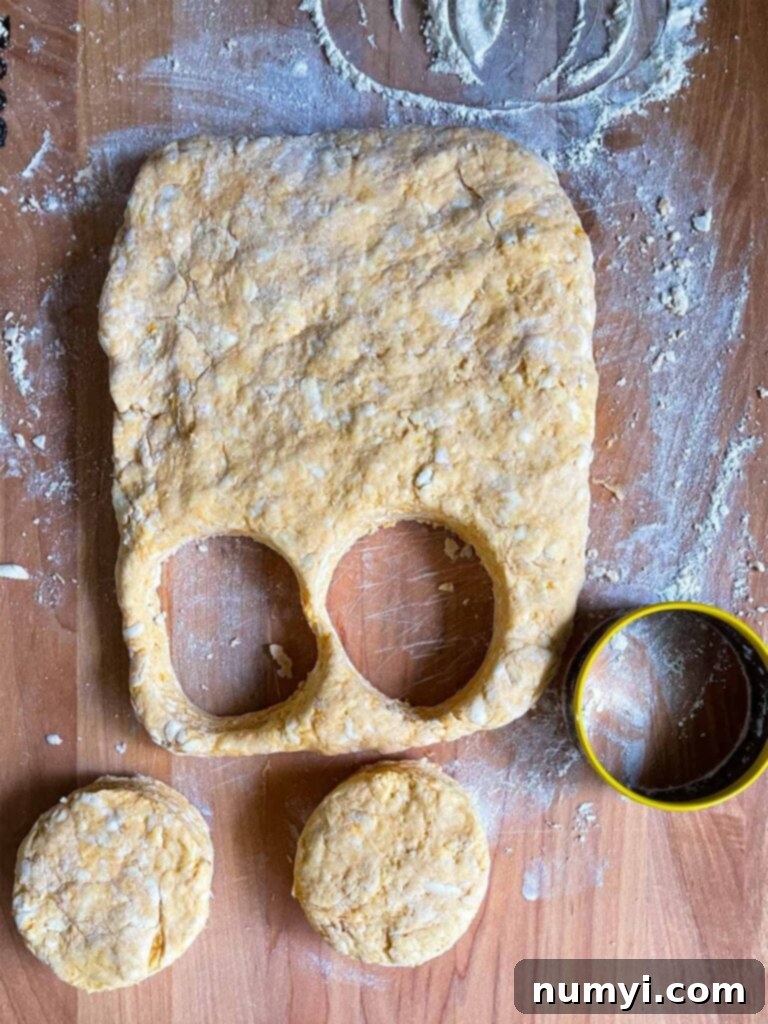
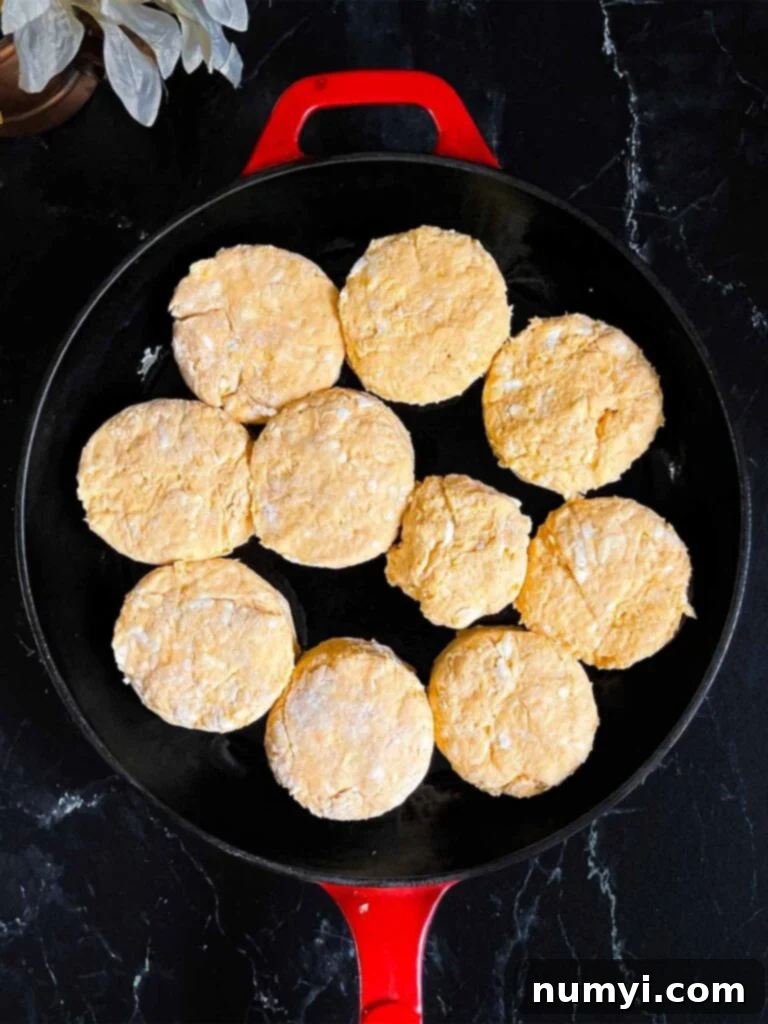
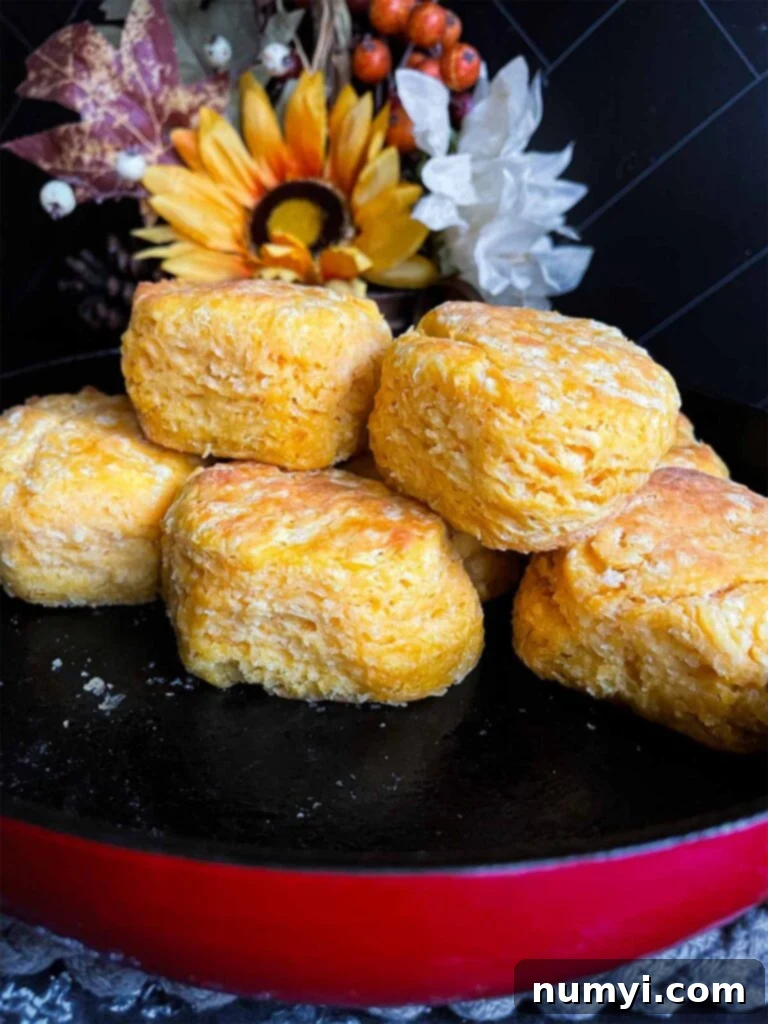
- Chill and Bake to Golden Perfection: Once cut, place the biscuits in the freezer for about 5 minutes. This quick chill helps firm up the butter one last time, ensuring maximum flakiness and rise during baking. Transfer the chilled biscuits to your preheated oven and bake for 15-20 minutes, or until they achieve a beautiful golden brown color and are cooked through. The exact baking time may vary slightly depending on your oven. For an extra touch of richness and shine, you can brush the tops of the hot, baked biscuits with melted butter immediately after removing them from the oven.

Delicious Ways to Serve Your Sweet Potato Biscuits
These savory-sweet potato biscuits are a versatile delight that can grace your table at any meal. While they are undeniably best served warm, straight from the oven, there are countless ways to enjoy their tender, flaky goodness.
For a simple yet satisfying treat, serve them split open with a generous slather of extra butter, a drizzle of golden honey, or a rich maple syrup. The natural sweetness of the sweet potato truly shines when paired with these classic toppings, creating a comforting experience.
Transform them into a hearty meal by using them as the base for sandwiches. A warm sweet potato biscuit makes an incredible vessel for baked ham, crispy bacon, or savory breakfast sausage. They also pair wonderfully with a spread of cream cheese or a spiced apple butter for a fall-inspired breakfast or brunch.
Beyond breakfast and brunch, these biscuits are a fantastic addition to any dinner plate. Their unique flavor complements a variety of savory dishes. Try them alongside a steaming bowl of thick, homestyle chili or a robust hearty beef stew, where they can soak up all the delicious juices. They’re also a delightful alternative to traditional bread rolls with roasted chicken or pork tenderloin.
Expert Tips for Flawless Flaky Sweet Potato Biscuits Every Time
Achieving light, fluffy, and perfectly flaky sweet potato biscuits is easier than you think when you keep a few key techniques in mind:
- The Golden Rule of Cold Ingredients: This is arguably the most crucial tip for any flaky biscuit. Ensure your butter, buttermilk, and especially your mashed sweet potatoes are all thoroughly chilled. Cold ingredients prevent the butter from melting too quickly into the flour, allowing it to create those desirable pockets of steam that result in countless flaky layers during baking.
- Grating the Butter for Superior Flakiness: While cutting butter with a pastry blender works, I highly recommend grating frozen butter. This creates tiny, uniform pieces that are more easily distributed throughout the flour mixture, leading to even more consistent flakiness. Pop the grated butter back in the freezer for a few minutes while you prepare other ingredients.
- Accurate Flour Measurement is Key: Improper flour measurement can drastically change the texture of your biscuits. Always aerate your flour first by fluffing it with a spoon, then gently spoon it into your measuring cup, and finally, level it off with the back of a knife. Avoid scooping directly from the bag, as this compacts the flour and can result in too much dry ingredient.
- Mind the Moisture of Your Sweet Potato Puree: Your sweet potato puree should be smooth and contribute moisture to the dough, but it must not be excessively wet. After mashing, if it appears watery, gently press out any excess liquid using a fine-mesh sieve or paper towels. Too much moisture will make the dough sticky and difficult to work with, affecting the final texture.
- Do Not Overmix the Dough: Once you add the wet sweet potato and buttermilk mixture to the dry ingredients, mix only until the dough just barely comes together. Overmixing develops gluten, which will lead to tough, chewy biscuits instead of tender, melt-in-your-mouth ones. A shaggy, somewhat crumbly dough is exactly what you’re aiming for before turning it out.
- The Art of Folding (Lamination): To build those beautiful layers, gently fold the biscuit dough over onto itself about 4 or 5 times on a lightly floured surface. This process, known as lamination, helps distribute the cold butter and creates distinct layers. However, be careful not to overdo it, as too much folding or kneading can activate the gluten and result in a tough texture.
- Master the Biscuit Cutter Technique: Always use a sharp, floured biscuit cutter for clean cuts. Press straight down firmly without twisting the cutter. Twisting seals the edges of the biscuit, which can prevent it from rising evenly and as high as it should. A clean cut ensures the layers can expand properly.
- Embrace the Snug Fit: When arranging your cut biscuits on the baking sheet or in the cast iron skillet, place them so they are lightly touching each other. This proximity helps them rise taller and encourages a softer side, contributing to that classic Southern biscuit texture.
- A Quick Chill Before Baking: After cutting your biscuits, place them in the freezer for about 5-10 minutes. This re-chills the butter, giving it a final boost to ensure maximum steam production and an ultra-flaky rise when they hit the hot oven.
Exciting Variations for Your Sweet Potato Biscuits
While this recipe provides the perfect foundation for our favorite sweet potato biscuits, don’t hesitate to get creative and customize them to your liking:
- Warm Spices Infusion: For an extra layer of cozy flavor, incorporate warm spices often associated with fall baking. Add 1 teaspoon of ground cinnamon, ½ teaspoon of nutmeg, ¼ teaspoon of allspice, or a ready-made pumpkin pie spice blend to your dry ingredients. These spices enhance the natural sweetness of the sweet potato and add a comforting aroma.
- Savory Bacon Twist: For those who love a salty-sweet combination, consider adding some cooked, crumbled bacon bits to your dough. About ½ cup of cooked and cooled bacon will provide a delightful smoky and savory counterpoint to the sweet potatoes, making these biscuits even more irresistible for breakfast or brunch.
- Amp Up the Sweetness: If you prefer a noticeably sweeter biscuit, feel free to increase the granulated sugar in the recipe by an additional tablespoon or two. You could also experiment with a tablespoon of brown sugar for a deeper molasses note. For a sweet glaze, whisk together powdered sugar with a splash of milk or orange juice and drizzle over the warm baked biscuits.
- Herbal Notes: For a more savory profile, consider adding finely chopped fresh herbs like rosemary or thyme to the dough. These herbs pair surprisingly well with sweet potatoes and can elevate the biscuits to a sophisticated side dish for dinner.
- Cheese Please!: A sprinkle of grated sharp cheddar or smoked gouda cheese (about ½ cup) folded into the dough before cutting can add a fantastic savory and tangy dimension, especially if you’re serving these biscuits with chili or stew.
Frequently Asked Questions About Sweet Potato Biscuits
Here are answers to some common questions you might have about making, storing, and freezing your homemade sweet potato biscuits:
For the most flavorful sweet potato puree, preheat your oven to 400 degrees F (200 degrees C). Line a baking sheet with parchment paper. Thoroughly wash your sweet potatoes and prick them in several places with the tip of a paring knife or the tines of a fork. This allows steam to escape during baking. Bake the sweet potatoes for 50-60 minutes, or until they are very tender and a knife inserts easily into the center. The baking time will depend on the size of your potatoes. Once cooled enough to handle, peel the potatoes or simply scoop out the soft sweet potato flesh with a spoon. Place the flesh in the bowl of a food processor and process until you achieve a perfectly smooth and creamy puree, scraping down the sides of the bowl as needed. Ensure it’s completely smooth before using.
Yes, you absolutely can use canned sweet potato puree as a convenient substitute. However, please be aware that the flavor profile may not be as deep and naturally sweet as with freshly roasted sweet potatoes. Canned versions often lack the concentrated flavor that comes from roasting. If using canned puree, it’s crucial to drain it very well to remove any excess liquid and pat it dry with paper towels. You want a thick, almost paste-like consistency to avoid adding too much moisture to your biscuit dough.
Absolutely! These biscuits are perfect for making ahead, which saves time and allows for fresh, warm biscuits whenever you desire. You have a couple of options: you can prepare the dough, cut out the biscuits, cover them tightly with plastic wrap, and refrigerate them for up to 24 hours before baking. Alternatively, you can flash freeze the cut-out biscuits on a parchment paper-lined baking sheet until solid (about 30-60 minutes). Once frozen, transfer them to a freezer-safe airtight bag or container and store them in the freezer for up to 3 months. When ready to bake, you can bake them directly from frozen, adding a few extra minutes to the baking time.
These biscuits are undeniably at their peak when served warm, fresh from the oven. If you happen to have any leftovers, allow them to cool completely to room temperature. Then, place them in an airtight bag or container to prevent them from drying out. They can be stored at room temperature for up to 2 days. To reheat and bring back their warmth and a touch of crispness, place them on a baking sheet in a 300-degree F (150 degrees C) oven for about 10 minutes, or until they are heated through.
Yes, freezing baked sweet potato biscuits is an excellent way to enjoy them later. First, allow the biscuits to cool completely after baking. Once cool, place them in a single layer in a freezer-safe airtight container or a heavy-duty freezer bag. They can be frozen for up to 3 months. When you’re ready to enjoy them, thaw the frozen biscuits overnight in the refrigerator, then reheat them gently in a 300-degree F oven until warm.
Explore More Delicious Biscuit Recipes
If you’ve fallen in love with these sweet potato biscuits, you’ll surely enjoy exploring our other fantastic biscuit creations. Each recipe offers a unique flavor and texture, perfect for any occasion:
Cheddar Chive Biscuits
Easy Homemade Buttermilk Drop Biscuits Recipe
Easy Homemade Butter Swim Biscuits
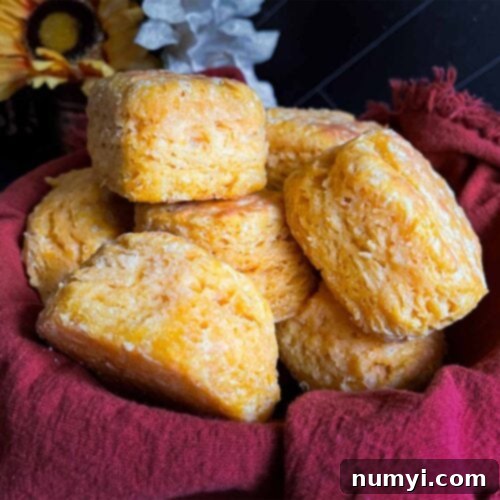
There’s truly nothing more comforting and satisfying than a batch of homemade biscuits, and these sweet potato biscuits bring a delightful twist to a Southern classic. With their irresistible balance of savory and sweet, their wonderfully flaky texture, and their incredible versatility, they are sure to become a cherished recipe in your home. Whether enjoyed fresh from the oven with a dollop of butter or as a hearty accompaniment to your favorite meal, these biscuits promise to deliver warmth and flavor with every single bite. Don’t wait for a special occasion; whip up a batch today and savor the magic!
Southern Sweet Potato Biscuits Recipe
Print
Pin
Rate
Ingredients
- 3 cups All-purpose flour
- 1 tbsp Baking powder
- 2 tbsp Granulated sugar
- 1 tsp Kosher salt
- 1 cup Mashed sweet potatoes cold
- 3/4 cup Unsalted butter cold, grated
- 3/4 cup Buttermilk full-fat, cold
Instructions
-
Preheat the oven to 425F degrees. Line a baking sheet with parchment paper or use a cast iron skillet.
-
In a large mixing bowl whisk together the flour, baking powder, sugar, and salt. Add the grated butter and toss to coat.3 cups All-purpose flour, 1 tbsp Baking powder, 2 tbsp Granulated sugar, 1 tsp Kosher salt, 3/4 cup Unsalted butter
-
In a medium-size bowl whisk together the sweet potato puree and buttermilk.1 cup Mashed sweet potatoes, 3/4 cup Buttermilk
-
Add the buttermilk mixture to the flour mixture and stir just until it starts to come together in a ball.
-
Turn the dough out onto a lightly floured work surface. Gently start folding the dough over onto itself 4-6 times. Pat it out into a 1-inch thick circle. Flour a 2-inch cutter, cut out the biscuits, and place them in the skillet. Gather the scraps and repeat.
-
Freeze the biscuits for at least 5 minutes. Bake for 15-20 or until golden brown.
Notes
- Ensure your sweet potato puree, buttermilk, and butter are cold.
- Don’t overwork the dough, it will be crumbly when first mixed in the bowl. It will come together in the folding process.
- I highly recommend grating the butter! Since incorporating this step in my biscuit making I get much flakier and tall biscuits.
- DO NOT TWIST the biscuit cutter. Cut straight down. Twisting will seal the edges and prevent the biscuits from rising evenly and tall.
Make Ahead, Storing, and Freezing – See the faq section.
