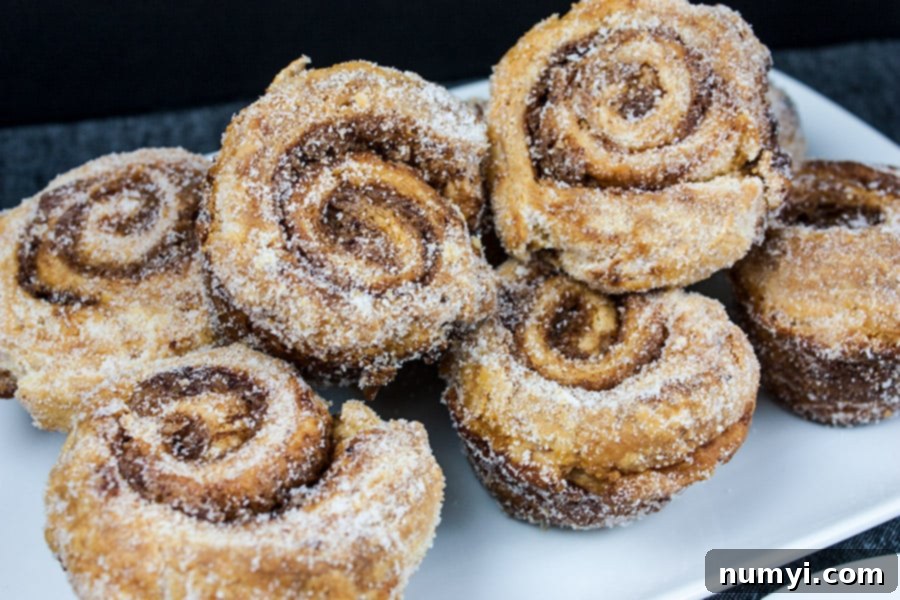
Easy Homemade Morning Buns: Flaky, Buttery Pastry Perfection (Overnight Recipe!)
If you’ve ever dreamed of waking up to the aroma of freshly baked pastries but are intimidated by complex baking, these Easy Homemade Morning Buns are about to become your new favorite obsession. Inspired by the famous Tartine Bakery morning buns, this recipe delivers all the crispy, buttery, and melt-in-your-mouth goodness without the traditional labor-intensive puff pastry techniques. Get ready for an irresistible treat that’s surprisingly simple to prepare!
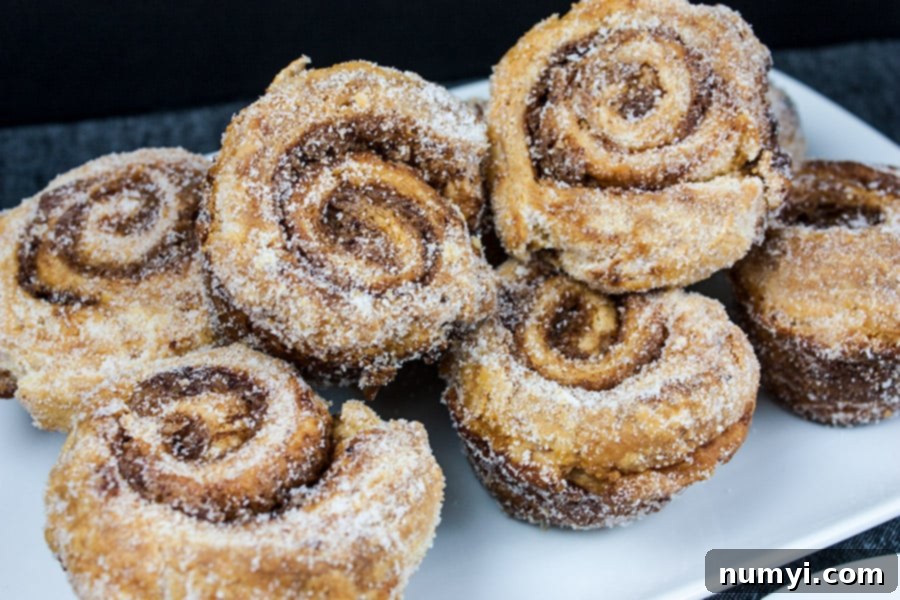
For a long time, the idea of making anything resembling a croissant or puff pastry at home felt daunting. Visions of complicated folds, precise chilling times, and endless rolling kept me from trying. However, a quick scroll through Pinterest and the captivating images of “Morning Buns” sparked my curiosity. These weren’t just any pastries; they promised a unique blend of a cinnamon roll’s warmth with a croissant’s delicate layers. The good news? They are far easier than they look, especially with a clever method we’ll explore. Once you try them, you’ll understand why they are an absolute MUST-TRY for any baking enthusiast.
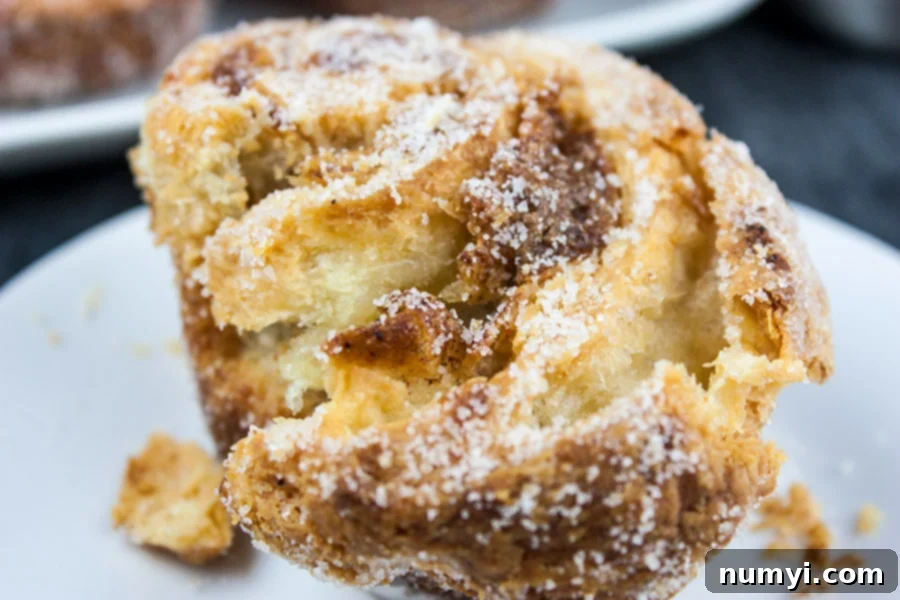
Imagine this: a perfect bite featuring a gloriously crispy outer layer that shatters gently, revealing soft, buttery, and tender inner layers of pastry dough. Each swirl is generously stuffed with a bright, aromatic cinnamon-orange filling that perfectly balances sweetness with a hint of citrus zest. These aren’t just for special occasions; they elevate any morning into an extraordinary one. Plus, the make-ahead aspect means you can prepare the dough the night before and simply bake them fresh in the morning, making them ideal for holiday breakfasts like Thanksgiving or Christmas, or simply a leisurely weekend brunch.
What Makes Morning Buns So Special?
Morning Buns offer a delightful alternative to traditional cinnamon rolls or plain croissants. While they share some similarities with both, their unique combination truly sets them apart. They boast the classic cinnamon-sugar swirl we adore in cinnamon rolls, but instead of a dense, bready texture, they offer the airy, flaky layers characteristic of a croissant. The addition of fresh orange zest in the filling and dough provides a bright, zesty contrast to the warm spices, creating a flavor profile that’s both comforting and invigorating. The signature sugar coating on the outside gives them a slightly crisp, caramelized exterior that’s absolutely divine.
Craving more comforting baked goods? Try our Warm & Delicious Bread Pudding Recipe!
The Secret to Effortless Puff Pastry: An America’s Test Kitchen Method
The core of this “easy way” recipe comes from a brilliant method perfected by America’s Test Kitchen, designed to simplify the typically laborious process of making laminated dough, like puff pastry or croissant dough. Traditional croissants involve multiple rounds of folding and chilling, meticulously layering butter and dough to create hundreds of delicate layers. This can be very time-consuming and often requires significant arm strength – a true “muscle-building” workout, as I’ve experienced firsthand! This innovative method, however, bypasses much of that intensive labor, making beautiful, flaky morning buns accessible to every home baker. Best of all, there’s no need for a stand mixer, keeping the equipment minimal and the process straightforward.
Crafting the Dough: The Zip-Top Bag Method
To begin, you’ll slice unsalted butter into uniform 1/4-inch pieces. The key here is to keep the butter as cold as possible throughout the process, so pop it back into the refrigerator while you prepare the dry ingredients. In a large, sturdy zip-top bag, combine your all-purpose flour, granulated sugar, instant rapid-rise yeast, and a touch of salt. Seal the bag securely, ensuring all the air is pressed out, then give it a good shake to thoroughly mix these dry components.
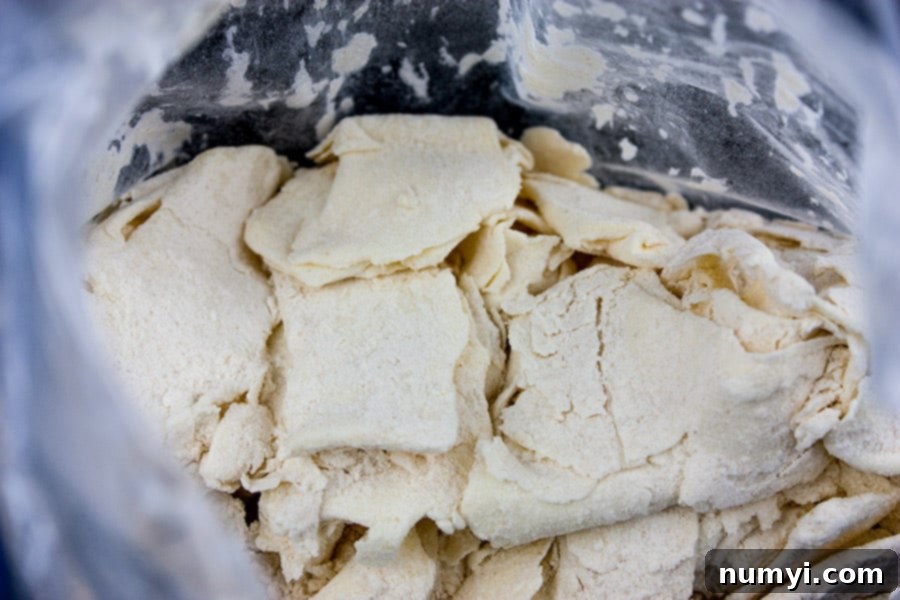
Now, introduce the chilled butter slices into the bag. Seal it once more, and shake gently to ensure each butter piece is coated with the flour mixture. This coating is crucial as it helps prevent the butter from melding entirely with the dough too soon. Next, lay the bag flat on your countertop and use a rolling pin to roll over it repeatedly. After each pass or two, pick up the bag and shake its contents to redistribute the flour-coated butter. This process systematically flattens and breaks the butter into large, flaky pieces, which will ultimately create those desirable layers in your finished buns. Continue rolling and shaking until the butter resembles large, flat flakes, well-distributed throughout the flour. This ingenious technique replaces the tedious folding steps of traditional lamination.
Once your butter is perfectly flaked, empty the contents of the bag into a large mixing bowl. To this dry mixture, add chilled sour cream, fresh orange juice, ice water, and a single egg yolk. Stir these ingredients together until they are just combined, forming a shaggy dough. Avoid overmixing at this stage.
Turn the nascent dough out onto a generously lightly floured surface. With minimal handling, gently knead the dough until it comes together into a cohesive, smooth ball. The goal is to bring it together, not to develop excessive gluten. Then, using your rolling pin, roll the dough into a large rectangle, approximately 20 inches by 12 inches. Precision here isn’t critical, but aim for an even thickness. Starting from one of the shorter ends, carefully roll the dough into a tight cylinder. Once rolled, gently pat or roll this cylinder to flatten it slightly into a smaller 12-inch by 4-inch rectangle. This initial shaping helps organize the layers. Finally, transfer this dough rectangle onto a parchment-lined baking sheet and place it in the freezer for about 15 minutes. This quick chill firms up the butter and dough, making it easier to work with in the next step.
The Flavorful Heart: Crafting the Cinnamon Orange Filling
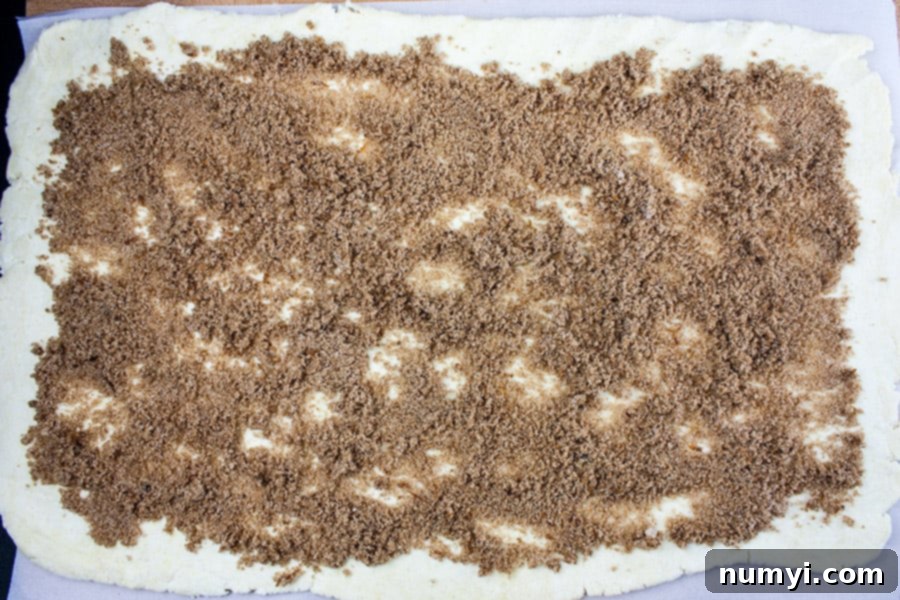
While your dough is chilling, it’s the perfect time to prepare the star of the show: the fragrant filling. In a medium-sized bowl, combine granulated sugar and dark brown sugar for a balanced sweetness and a hint of molasses depth. Add the bright, aromatic grated orange zest, ground cinnamon for warmth, and, if you desire an extra layer of complexity, ground cardamom. Cardamom is optional but highly recommended as it beautifully complements the orange and cinnamon, adding a subtle, exotic note. Finally, stir in a teaspoon of vanilla extract. Mix these ingredients together thoroughly until they are well combined and the mixture is evenly textured. The orange zest and spices will infuse the sugar, creating an incredibly aromatic filling that promises a burst of flavor in every bite.
Assembling Your Morning Buns
Once the dough has had its brief freeze, remove it from the freezer and place it on a lightly floured surface. Roll the dough out again, aiming for a 20-inch by 12-inch rectangle. This second rolling ensures evenness and prepares it for the filling. Now, evenly sprinkle your prepared cinnamon-orange mixture over the entire surface of the dough, making sure to leave a small 1/2-inch border around the edges. This border will help with sealing. Gently press the filling into the dough with your hands or a rolling pin. This step is important to ensure the filling adheres well and doesn’t fall out when you roll the dough.
Starting from one of the long sides of the rectangle, carefully and tightly roll the dough into a cylinder. A tight roll is crucial for creating those beautiful, distinct layers and swirls in the finished buns. Once rolled, pinch the edge firmly to seal the seam, ensuring your filling stays tucked inside. Trim any rough or uneven ends from the cylinder and discard them. These ends often don’t have enough layers to bake up nicely. Next, cut the long 20-inch cylinder in half, yielding two 10-inch pieces. Then, take each 10-inch half and cut it into six equal 1 1/2-inch pieces. This should give you a total of 12 rolls. This ensures uniform size and baking time for all your morning buns.
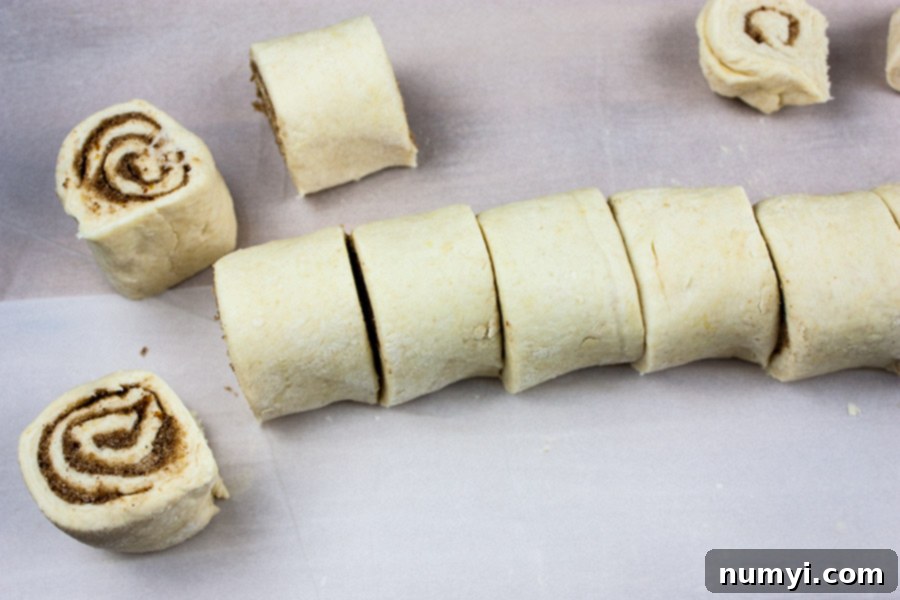
The Overnight Chill: A Step for Flavor and Convenience
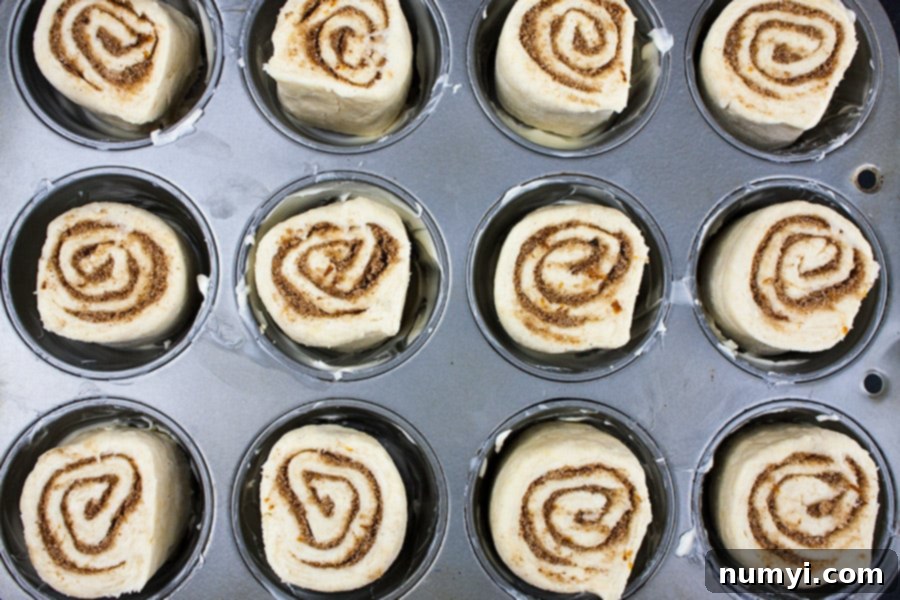
Before placing your meticulously crafted rolls into the muffin tin, make sure to thoroughly butter a 12-cup muffin tin with softened unsalted butter. This not only prevents sticking but also contributes to the delicious caramelized exterior of the buns. Place each sliced dough piece, cut-side down, into the prepared muffin tin. Don’t worry if they look small; they will expand significantly. Loosely cover the entire muffin tin with plastic wrap. This is where the “overnight” magic happens: refrigerate the buns for a minimum of 4 hours, or ideally, overnight (up to 24 hours). This long, slow cold fermentation allows the flavors to deepen and the dough to develop a richer texture, leading to a superior final product. It also transforms these into the ultimate make-ahead breakfast, ready to bake with minimal effort in the morning.
Baking Your Morning Buns to Golden Perfection
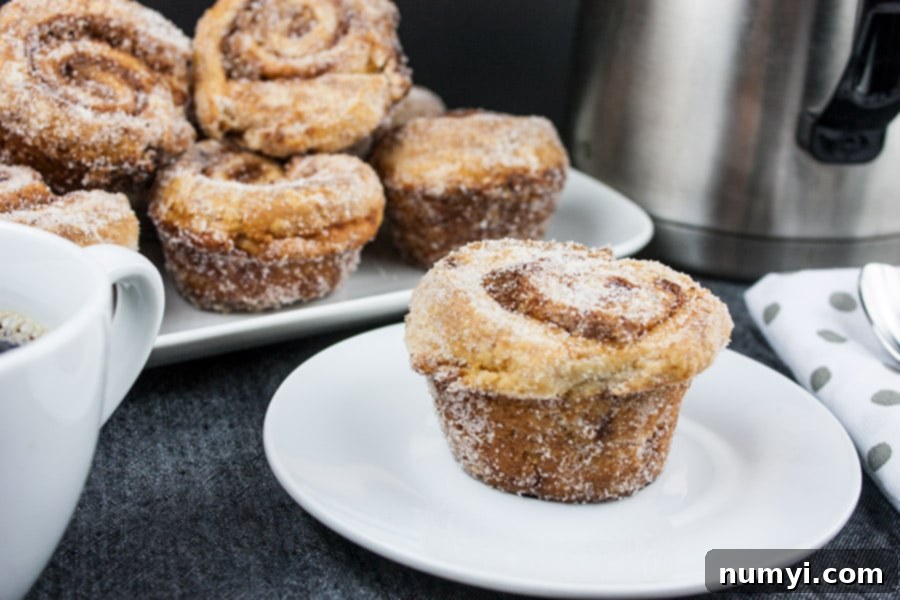
The next morning, remove your muffin tin with the chilled buns from the refrigerator and discard the plastic wrap. To create the ideal environment for proofing, preheat your oven to a very low temperature, around 125ºF (50ºC). Once the oven reaches this temperature, turn it OFF. Immediately place the morning buns in the warm, draft-free oven to proof. Let them rest for approximately 20-30 minutes, or until they have visibly doubled in size. This warm environment helps the yeast activate and the dough to puff up beautifully, ensuring light and airy buns. Keep an eye on them to prevent over-proofing, which can lead to a less desirable texture.
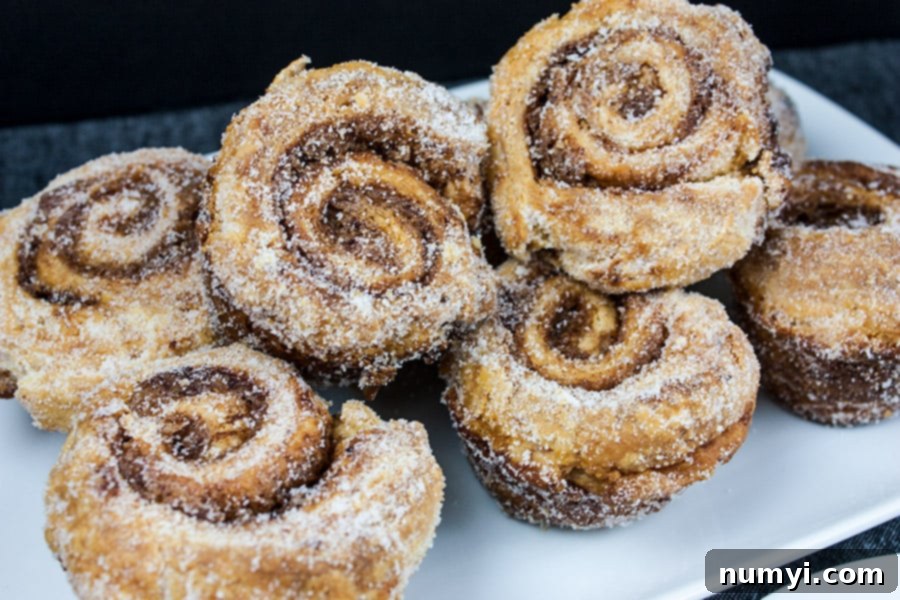
Once your buns have successfully doubled in size, remove them from the oven. Now, it’s time for the real baking. Increase your oven temperature to a hot 425ºF (220ºC). Once the oven is fully preheated, place the buns back in and bake them for an initial 5 minutes at this higher temperature. This blast of heat helps to create those signature crispy outer layers and encourages a good rise. After these first 5 minutes, reduce the oven temperature to 325ºF (160ºC) and continue baking for another 40-45 minutes. This lower temperature allows the buns to bake through evenly without burning the exterior, ensuring a deep golden brown color and fully cooked, tender interiors. Keep an eye on them during the last 10-15 minutes to prevent over-browning.
The Finishing Touch: Sugar Dusting and Serving
Once your morning buns emerge from the oven, resplendent in their deep golden hue, let them cool in the muffin tin for precisely 5 minutes. This brief cooling period is critical. If you allow them to cool completely in the pan, the melting sugars and butter will caramelize and bond stubbornly to the muffin tin, making them incredibly difficult to remove. After 5 minutes, carefully remove each bun from the pan. While they are still warm, roll them generously in superfine granulated sugar. The warmth of the buns helps the sugar adhere and creates a beautifully textured, sweet exterior. Transfer the sugar-coated buns to a wire rack to cool completely, though they are truly at their best when served warm.
Just look at those lovely, intricate peel-apart layers! Each one a testament to the simplified puff pastry method. The crunchy exterior, the soft, buttery interior, and the zesty, sweet cinnamon-orange filling create a symphony of textures and flavors.
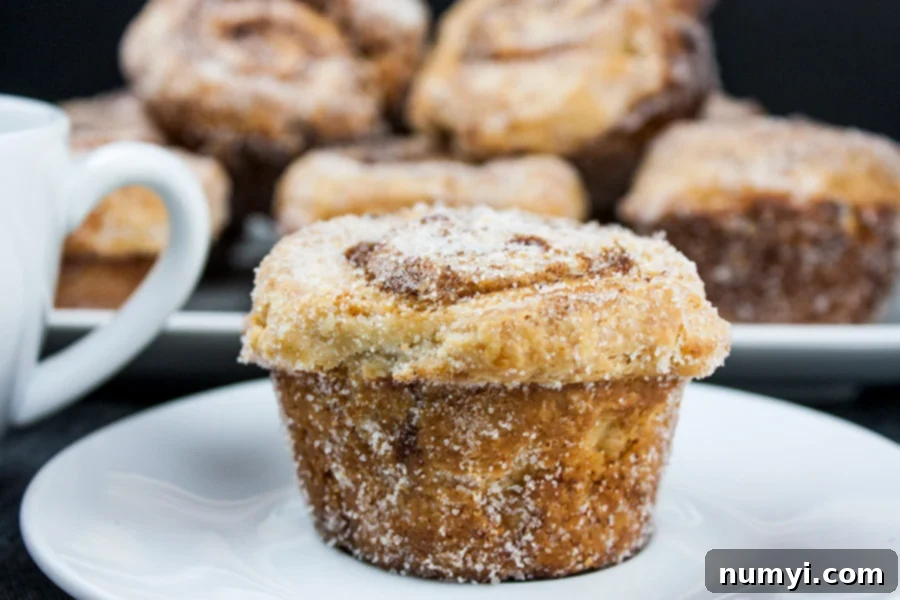
Serve and enjoy these light, flaky, crispy, buttery, and delicately flavored Morning Buns! They are so incredibly good you won’t be able to resist reaching for a second (or third!) helping. Pair them with your favorite coffee or tea for a truly memorable breakfast or brunch experience.
For another delightful breakfast treat, also try our classic Overnight Cinnamon Rolls recipe or our speedy Easy One-Hour Orange Rolls!
Morning Buns Recipe
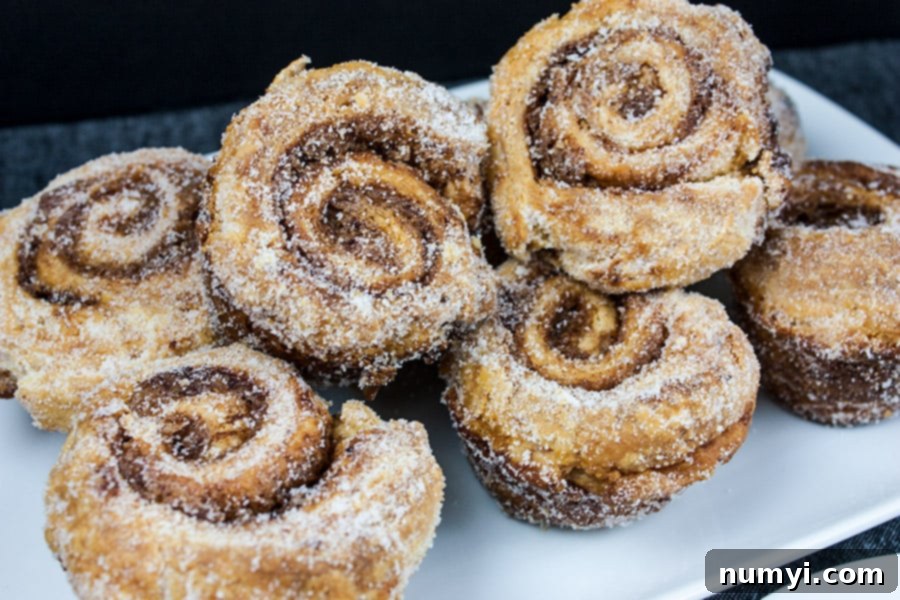
Easy Homemade Morning Buns Recipe
Print
Pin
Rate
Ingredients
For the Dough
- 3 cups all-purpose flour
- 1 tablespoon granulated sugar
- 2 1/4 teaspoons instant rapid-rise yeast
- 3/4 teaspoon salt
- 1 1/2 cups unsalted butter cut into 1/4-inch-thick slices and chilled
- 1 cup sour cream chilled
- 1/4 cup fresh squeezed orange juice chilled
- 3 tablespoons ice water
- 1 large egg yolk
- 3 tablespoons unsalted butter softened (for buttering the muffin pan)
For the Filling
- 1/2 cup granulated sugar
- 1/2 cup dark brown sugar
- 1 tablespoon grated orange zest
- 2 teaspoons ground cinnamon
- 3/4 teaspoon ground cardamom (optional, but recommended)
- 1 teaspoon vanilla extract
For Dusting
- 3/4 cup superfine sugar (for rolling after baking)
Instructions
-
Prepare the Dough:
-
In a large zipper-lock bag, combine the flour, granulated sugar, instant rapid-rise yeast, and salt. Seal the bag and shake to mix thoroughly.
-
Add the chilled butter slices to the bag. Seal, press out the air, and shake to evenly coat the butter with flour. Place the bag on your countertop and roll over it several times with a rolling pin, shaking the bag after each roll, until the butter is pressed into large flakes (about 10 rolls).
-
Transfer the flour-butter mixture to a large mixing bowl. Stir in the chilled sour cream, orange juice, ice water, and egg yolk until just combined and a shaggy dough forms.
-
Turn the dough out onto a lightly floured surface and gently knead until it forms a smooth, cohesive ball.
-
Roll the dough into a 20×12-inch rectangle. Starting from a short end, roll the dough tightly into a cylinder. Gently pat or roll the cylinder flat into a 12×4-inch rectangle. Transfer the dough to a parchment paper-lined rimmed baking sheet, cover loosely with plastic wrap, and freeze for 15 minutes.
-
Prepare the Filling & Pan:
-
Generously butter a 12-cup muffin pan with the 3 tablespoons of softened unsalted butter.
-
In a medium bowl, stir together the granulated sugar, dark brown sugar, orange zest, cinnamon, cardamom (if using), and vanilla extract until well combined.
-
Assemble the Buns:
-
Remove the dough from the freezer and place it on a lightly floured surface. Roll the dough again into a 20×12-inch rectangle. Sprinkle the cinnamon-orange filling evenly over the dough, leaving a ½-inch border around all edges. Lightly press the filling into the dough to help it adhere.
-
Starting from a long end, tightly roll the dough into a cylinder. Pinch the seam firmly to seal the roll.
-
Trim off the rough ends of the dough cylinder and discard.
-
Cut the remaining 20-inch cylinder in half, yielding two 10-inch pieces. Then, cut each 10-inch half into six equal 1 ½-inch pieces, totaling 12 buns.
-
Place each cut dough piece, cut-side down, into the prepared muffin tin. Cover the muffin tin loosely with plastic wrap and refrigerate for at least 4 hours, or ideally, overnight (up to 24 hours).
-
Bake and Finish: Remove the muffin tin from the refrigerator and discard the plastic wrap. Preheat your oven to 125ºF (50ºC), then turn it OFF. Place the buns in the warm, turned-off oven to proof for 20 to 30 minutes, or until doubled in size.
-
Remove the buns from the oven. Increase the oven temperature to 425ºF (220ºC). Once preheated, place the buns back in the oven and bake for 5 minutes.
-
Reduce the oven temperature to 325ºF (160ºC) and continue baking for an additional 40 to 45 minutes, or until the buns are a deep golden brown color.
-
Remove the buns from the oven and let them cool in the muffin tin for 5 minutes. This is important to prevent them from sticking due to caramelized sugar.
-
Carefully remove the warm buns from the muffin tin and roll each one generously in superfine granulated sugar. Place them on a wire rack to cool further.
-
These morning buns are truly best when served warm. Enjoy!
Notes
*For best results, ensure your butter, sour cream, and orange juice are thoroughly chilled for the dough.
*If you don’t have superfine sugar, you can make your own by pulsing regular granulated sugar in a food processor for a few seconds.
Nutrition
Recipe adapted from BrownEyedBaker
