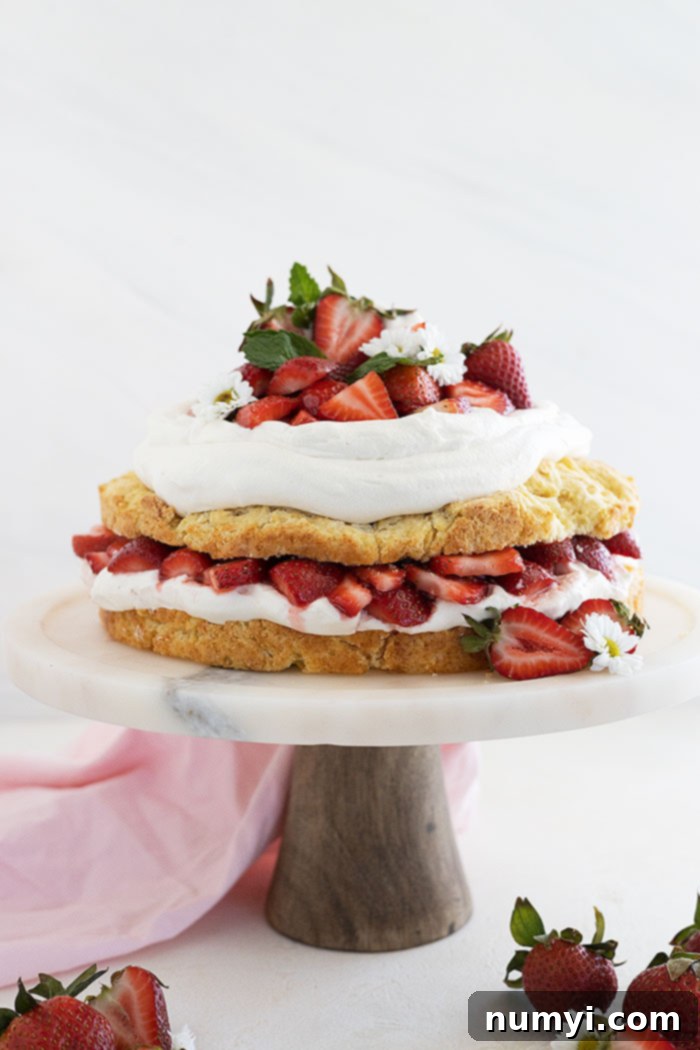
The Ultimate Homemade Strawberry Shortcake Cake: A Classic Summer Dessert Recipe
There’s nothing quite like the taste of summer, and for many, that taste is synonymous with fresh, sweet strawberries. While traditional strawberry shortcake holds a special place in our hearts, this elevated Strawberry Shortcake Cake takes that beloved classic to a whole new level. It features a tender, buttery biscuit-style cake, generously layered with luscious vanilla whipped cream and an abundance of juicy, macerated strawberries. It’s the perfect showstopper dessert for any summertime gathering, easy enough for the home baker, and guaranteed to impress your guests.
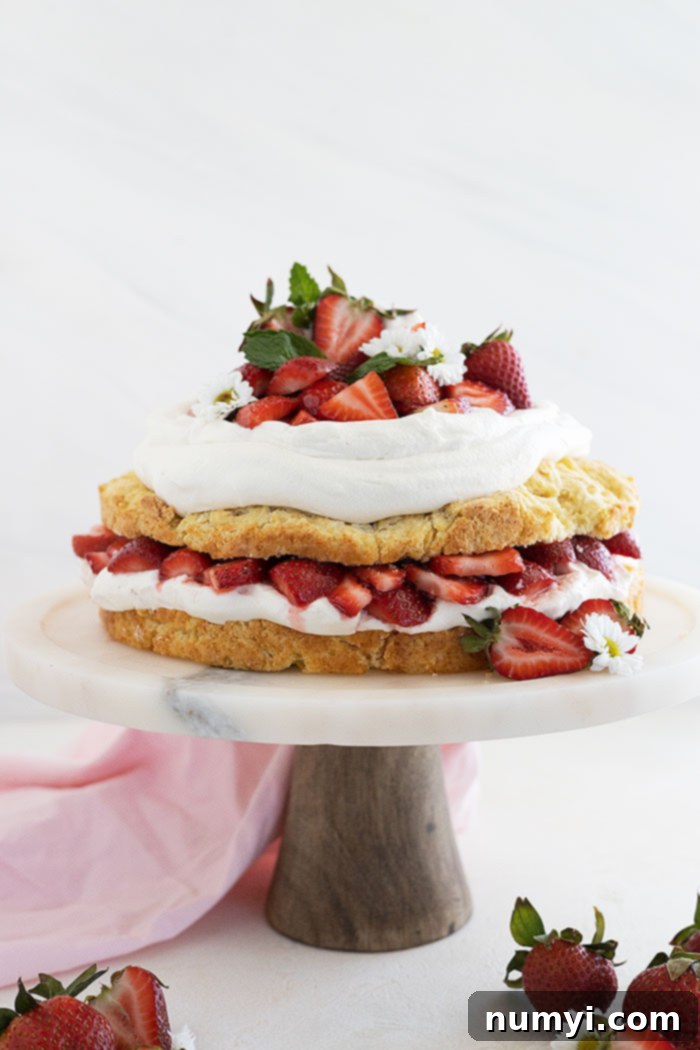
When creating this recipe, I faced a delightful dilemma: should I opt for a light, airy vanilla sponge cake or stick with a more rustic, traditional biscuit base? Ultimately, the decision was clear. To truly capture the essence of classic strawberry shortcake in a grander format, the biscuit cake was the undisputed champion. Its slightly dense, yet incredibly tender and flaky texture is what sets it apart, perfectly absorbing the rich juices from the strawberries without becoming soggy, offering that authentic shortcake experience in every slice. This cake isn’t just a dessert; it’s a celebration of summer’s bounty, crafted with love and simplicity.
Strawberry shortcake has always been one of my go-to summertime desserts. It’s surprisingly simple to make, even when every component is homemade, and the flavors are absolutely unparalleled. If you’re looking for other easy strawberry treats, don’t miss these delightful Strawberry Shortcake Trifle Cups for a convenient handheld option. And for those who prefer the authentic individual shortcakes, my traditional Strawberry Shortcake recipe has you covered!
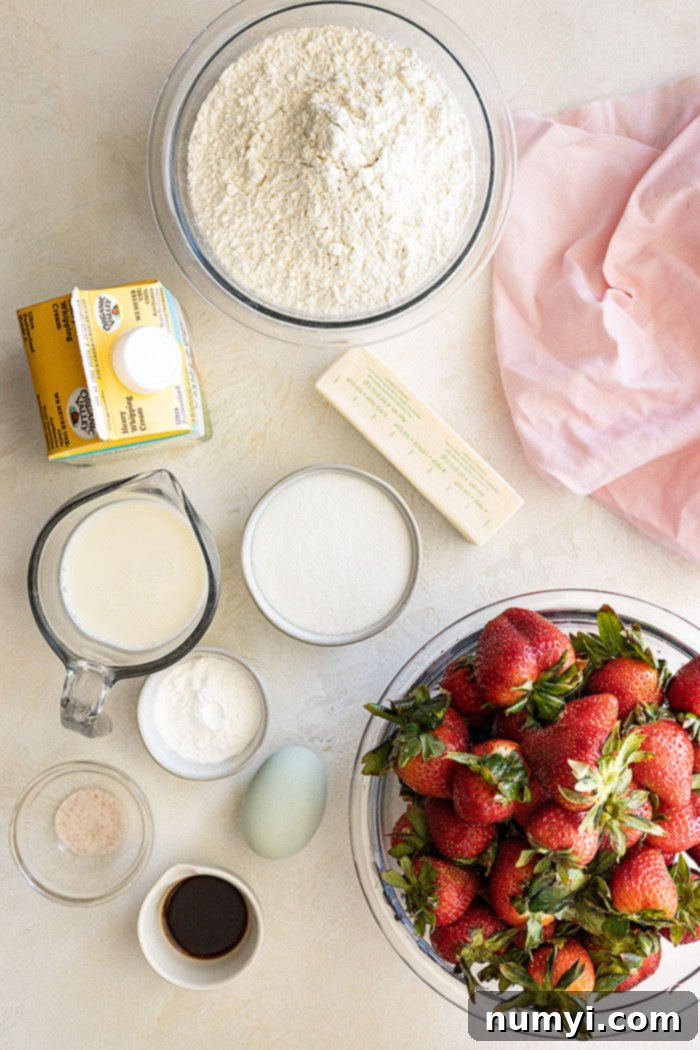
Key Ingredients for Your Strawberry Shortcake Cake
Creating this magnificent Strawberry Shortcake Cake requires just a handful of fresh, high-quality ingredients. Each plays a crucial role in building the layers of flavor and texture that make this dessert so special. Here’s a closer look at what you’ll need:
For the Biscuit Cake:
- All-purpose flour: The foundation of our tender biscuit cake. Using all-purpose flour provides the right structure without making the cake too dense.
- Granulated sugar: Adds a touch of sweetness to the biscuit, balancing the richness of the butter and the tartness of the strawberries.
- Baking powder: This is our primary leavening agent, responsible for giving the biscuit its characteristic rise and light, airy pockets.
- Salt: A pinch of salt is essential to enhance all the other flavors, preventing the cake from tasting flat.
- COLD butter: The secret to flaky biscuits! Cold butter, cut into small pieces, creates steam during baking, separating the layers of dough and resulting in a tender, flaky crumb.
- Large egg: Acts as a binder and adds richness, moisture, and a subtle lift to the cake. Lightly beaten, it incorporates more easily into the dough.
- Milk: Provides necessary moisture to bring the dough together. Use whole milk for the best flavor and texture.
For the Juicy Strawberries:
- Ripe strawberries: The star of the show! Choose bright red, firm berries with green caps for the best flavor. We’ll be slicing and macerating them.
- Granulated sugar: A small amount of sugar is tossed with the sliced strawberries. This process, known as maceration, draws out their natural juices, creating a delicious, syrupy coating that infuses every bite with intense strawberry flavor.
For the Vanilla Whipped Cream:
- Cold heavy whipping cream: The key to light, fluffy whipped cream that holds its shape. Ensure it’s very cold (36-40% butterfat) for optimal whipping volume and stability.
- Powdered sugar: Also known as confectioners’ sugar, it dissolves easily into the cream, providing sweetness without a grainy texture.
- Vanilla extract: Adds a warm, aromatic depth to the whipped cream, complementing the fresh strawberries beautifully. Pure vanilla extract offers the best flavor.
How To Master the Homemade Biscuit Cake
The foundation of this incredible dessert is the tender, flaky biscuit cake. While it might sound intimidating, it’s a straightforward process that yields incredibly rewarding results. Follow these steps for a perfect biscuit every time:
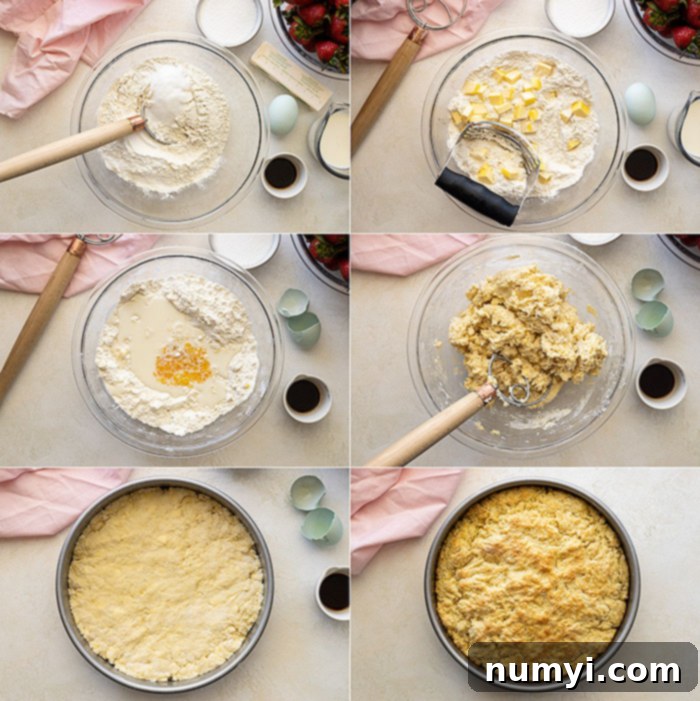
- Prepare Your Oven and Pan: Begin by preheating your oven to 425 degrees F (220°C). This high temperature is crucial for activating the baking powder quickly, leading to a good rise. Lightly grease an 8-inch or 9-inch round cake pan. You can use butter or a non-stick cooking spray. A well-greased pan ensures your cake releases cleanly after baking.
- Combine Dry Ingredients: In a medium-sized mixing bowl, whisk together the all-purpose flour, 3 tablespoons of granulated sugar, baking powder, and salt. Whisking ensures these ingredients are evenly distributed, which is vital for uniform leavening and seasoning throughout the cake.
- Cut in the Cold Butter: This step is critical for a flaky biscuit. Add the cold butter pieces to the dry mixture. Using a pastry blender, two knives, or even your fingertips, cut the butter into the flour until the mixture resembles coarse crumbs. Some pieces should be about the size of small peas. The goal is to incorporate the butter without melting it, so work quickly to keep the butter as cold as possible. These pockets of cold butter will create steam in the oven, giving you that beautiful flaky texture.
- Add Wet Ingredients: Create a small well in the center of your dry ingredients. Pour in the milk and the lightly beaten egg. Gently stir with a spoon or spatula just until the ingredients are combined and all the flour is moistened. Be very careful not to overmix! Overmixing develops the gluten in the flour, resulting in a tough cake rather than a tender one. A few lumps are perfectly fine.
- Press into Pan and Bake: Lightly flour your hands, then gently press the dough evenly into your prepared cake pan. The dough will be soft but manageable. Bake for 18-20 minutes, or until the top is golden brown and a wooden skewer inserted into the center comes out clean. The golden color indicates a beautifully baked crust.
- Cool Partially: Once baked, remove the cake from the oven and allow it to cool partially on a wire rack for about 15-20 minutes. This partial cooling makes the cake easier to handle and slice, and it allows the internal structure to set.
Crafting the Perfect Filling: Strawberries and Whipped Cream
The filling is where the magic truly happens, bringing together the sweet, tangy fruit with the rich, airy cream. These two components are incredibly simple to prepare but make a world of difference in the final taste of your cake.
Preparing the Juicy Strawberries:
The secret to incredibly flavorful strawberries lies in a simple technique called maceration. This process helps to draw out the natural juices, creating a vibrant, syrupy sauce that permeates the biscuit cake.
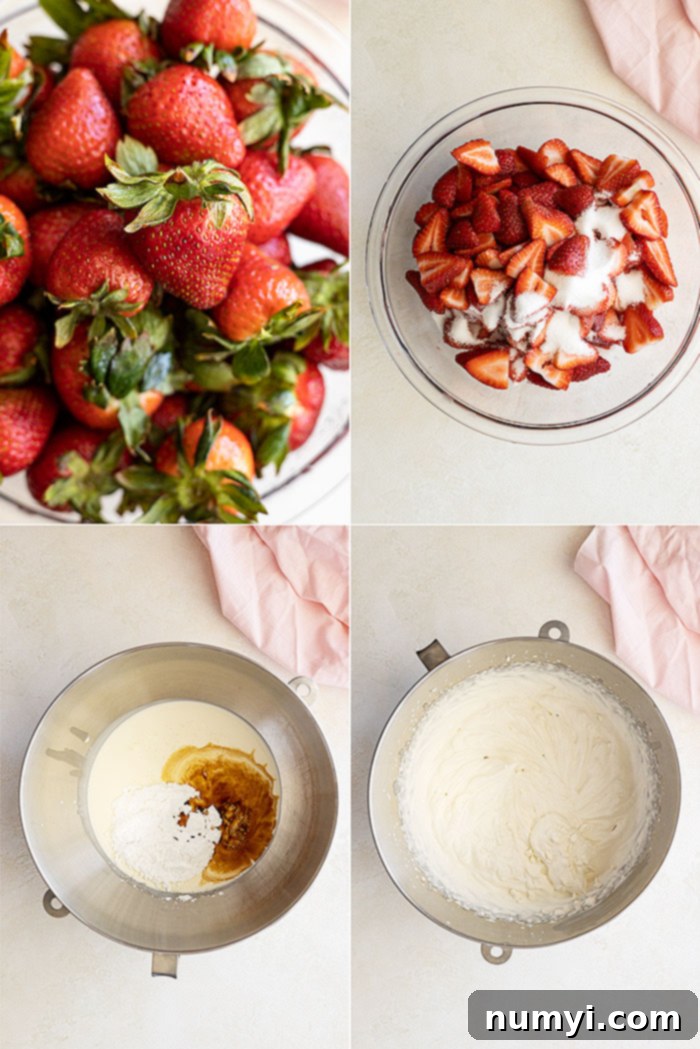
- Slice and Sugar: Begin by gently rinsing your ripe strawberries, removing the green stems, and then slicing them into uniform pieces. Place the sliced strawberries in a medium bowl and toss them with 1/3 cup of granulated sugar. The sugar will interact with the fruit’s natural moisture.
- Let Them Macerate: Set the bowl aside at room temperature for at least 30 minutes, or even up to an hour. This is the “magic” step! As the strawberries sit, the sugar will draw out their delicious juices, forming a luscious, natural syrup. I highly recommend doing this step first, even before starting the biscuit cake, to ensure there’s ample time for those wonderful juices to form. Stir occasionally to ensure all berries are coated.
Whipping Up Vanilla Cream:
Light, fluffy whipped cream is the perfect counterpoint to the biscuit cake and strawberries. Achieving stiff peaks ensures a stable and decadent topping.
- Chill Your Tools: For the best results, make sure your heavy whipping cream, mixing bowl (preferably a metal one), and whisk attachment are all thoroughly chilled. You can place the bowl and whisk in the freezer for 10-15 minutes before you begin. Cold equipment helps the cream whip faster and achieve more volume.
- Whip to Stiff Peaks: In the cold bowl of your stand mixer (or using a hand mixer), combine the very cold heavy whipping cream, powdered sugar, and vanilla extract. Start beating on low speed to prevent splattering, then gradually increase to high speed. Continue beating until stiff peaks form. Stiff peaks mean that when you lift the whisk, the cream stands up straight and holds its shape without drooping.
- A Note on Stability: Please note that this is a classic, non-stabilized whipped cream. While utterly delicious, it will not hold up for extended periods in very warm conditions. If you anticipate serving your cake outdoors on a hot day or need it to last longer, you might consider a recipe for stabilized whipped cream, which often includes gelatin or cream cheese to help it maintain its structure.
How To Assemble Your Stunning Strawberry Shortcake Cake
Bringing all the components together is the most satisfying part! The assembly is straightforward, allowing you to create a beautiful, multi-layered dessert that looks as good as it tastes. Here’s how to construct your masterpiece:
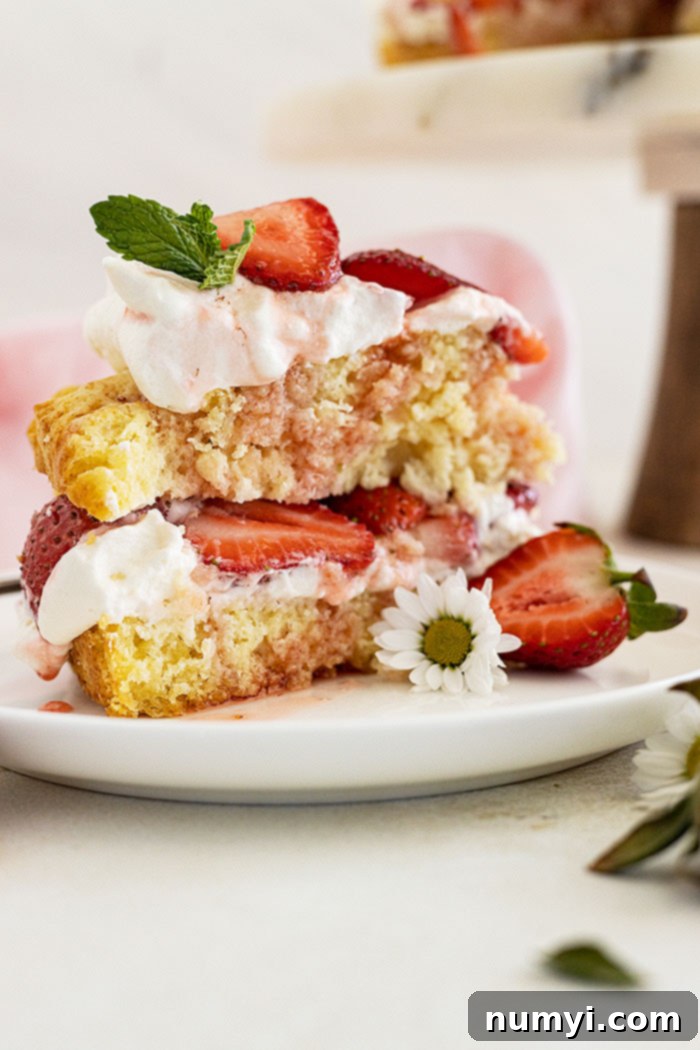
- Prepare the Cake Base: Once your biscuit cake has partially cooled, carefully slice it horizontally in half using a long serrated knife. It’s best to do this while it’s still slightly warm, as it makes slicing easier. Place the bottom half of the cake onto your chosen cake stand or serving platter.
- First Layer of Cream and Strawberries: Spoon about half of your freshly whipped vanilla cream onto the bottom cake layer. Gently spread it out into an even, generous layer, reaching almost to the edges. Next, spoon half of your macerated strawberries over the whipped cream. Don’t forget to drizzle a little of the delicious strawberry juice over this layer – it will soak into the biscuit and add incredible flavor and moisture.
- Add the Top Layer: Carefully place the top half of the biscuit cake over the strawberries and whipped cream. Gently press down slightly to ensure it’s settled.
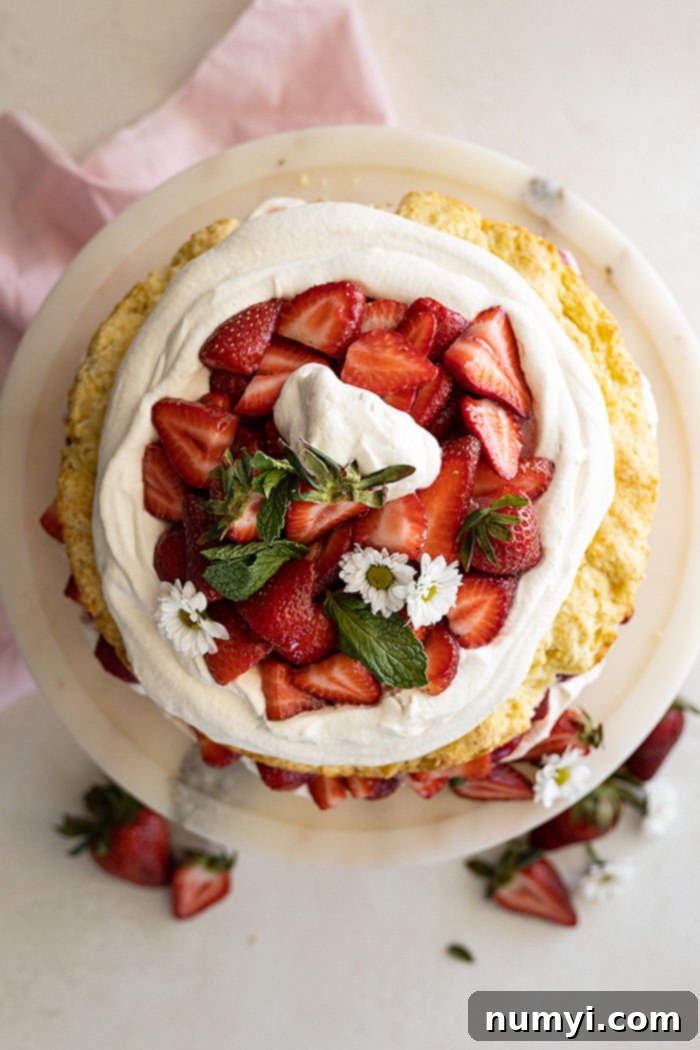
- Final Whipped Cream and Strawberry Topping: Now, spread the remaining whipped cream over the top of the cake. For a lovely presentation and to help contain the final layer of strawberries, you can use the back of a spoon or an offset spatula to create a slight “bowl” or well in the center of the whipped cream. This also adds a nice rustic touch.
- Garnish and Serve: Spoon the remaining macerated strawberries into the whipped cream bowl you’ve created. Drizzle with any remaining strawberry juice if desired for extra moisture and gloss. For an optional flourish, you can garnish with a few fresh mint leaves or whole strawberries. Serve immediately to enjoy the freshest flavors and best texture.

Essential Tips and Creative Suggestions for Your Strawberry Shortcake Cake
Making a delicious Strawberry Shortcake Cake is a joyful experience, and with these tips and tricks, you can ensure your dessert is nothing short of perfect every time. Plus, discover ways to customize it to your taste!
- Selecting the Best Strawberries: The quality of your strawberries directly impacts the flavor of your cake.
- Look for bright red berries: Avoid any with green or white shoulders, as these indicate under-ripeness.
- Firmness is key: They should be firm to the touch, not mushy or soft, which can indicate over-ripeness or damage.
- Check the leaves: The green caps (calyxes) should be fresh and vibrant, not brown or wilted.
- Inspect the container: Always check the bottom of the container for any signs of mold, squished berries, or excessive moisture.
- Smell them: Ripe strawberries have a sweet, distinct aroma. If they don’t smell like much, they likely won’t taste like much either.
- Mastering Homemade Whipped Cream: A truly great whipped cream is light, airy, and holds its shape.
- Use Heavy Whipping Cream: This is non-negotiable! It needs to have a fat content of 36-40%. Anything less (like “light” whipping cream) won’t whip up as well, won’t double in size, and won’t hold its shape.
- Keep it COLD: This is the absolute golden rule. Cold cream whips faster and achieves greater volume and stability. Chill your bowl and whisk attachment in the freezer for 10-15 minutes before you start.
- Don’t Over-Whip: Whip until stiff peaks form. Over-whipping can lead to a grainy texture or even turn your cream into butter! Stop as soon as the peaks hold their shape.
- Embrace the Rustic Charm of Biscuit Cake: Unlike a perfectly smooth sponge cake, a biscuit cake has a wonderful, rustic quality. Your slices are not going to be ultra-neat and tidy, and that’s part of its charm! The slightly crumbly, tender texture is what allows it to soak up all those delicious strawberry juices, delivering that authentic shortcake experience. Don’t strive for perfection in appearance; aim for deliciousness.
- Creative Flavor Variations: Don’t be afraid to experiment and personalize your shortcake!
- Citrus Zest: Stir in 1-2 teaspoons of fresh lemon or orange zest with the strawberries to add a bright, aromatic lift that beautifully complements the fruit.
- Berry Medley: While strawberries are classic, you can mix in other fresh berries like raspberries, blueberries, or sliced blackberries for a “mixed berry” shortcake.
- Sweet Enhancements: Add 3-4 tablespoons of good quality strawberry jam or preserves to the macerated strawberries for an extra layer of concentrated fruit flavor and a thicker syrup. A splash of vanilla or almond extract with the strawberries can also deepen their sweetness.
- Liqueur Boost: For an adult twist, add a tablespoon or two of a complementary liqueur, such as Grand Marnier (orange), Chambord (raspberry), or a strawberry liqueur, to the macerating strawberries.
- Biscuit Cake Enhancements: You can add extra touches to your biscuit cake before baking for more flavor and visual appeal.
- Crusty Top: For a slightly sweeter, crustier top, brush the unbaked biscuit dough with a little heavy cream and sprinkle generously with coarse sugar (like turbinado or demerara sugar) before baking.
- Vanilla in the Dough: Add a splash (about 1 teaspoon) of vanilla extract to the biscuit dough along with the milk and egg for an extra layer of subtle flavor.
Frequently Asked Questions (FAQs)
Yes, absolutely! While it’s best assembled just before serving, many components can be prepared in advance to save time on the day you plan to serve it. The biscuit cake can be baked up to 3 days in advance; just make sure to wrap it tightly in plastic wrap once cooled to prevent it from drying out. The sliced and sugared strawberries can be prepared up to 1 day in advance and stored in an airtight container in the refrigerator. Similarly, the whipped cream can be made up to 1 day ahead, stored covered in the refrigerator. This allows for quick assembly when you’re ready to serve.
This cake is truly at its peak when served immediately after assembly. However, if you have leftovers or need to store it for a short period before serving, it can be kept covered in the refrigerator for up to 5 hours while still maintaining its best appearance and texture. For longer storage, leftovers should be covered tightly with plastic wrap or placed in an airtight container and refrigerated for up to 3 days. The biscuit cake may soften slightly over time as it absorbs the strawberry juices, but it will still be delicious.
While fresh, ripe strawberries are highly recommended for the best flavor and texture, you can use frozen strawberries in a pinch. If using frozen, thaw them completely in a colander over a bowl to catch the excess liquid. You might want to discard some of this initial liquid as it can be quite watery. Then proceed with the recipe, tossing them with sugar. Be aware that thawed frozen strawberries tend to be softer and release more liquid, so the final texture will be different and the sauce might be thinner.
The most common reasons for whipped cream not stiffening are: 1) The cream wasn’t cold enough. Ensure it’s straight from the refrigerator and your bowl/whisk are chilled. 2) Using cream with insufficient fat content (must be heavy whipping cream, 36-40% butterfat). 3) Over-whipping can also cause it to collapse if you go past stiff peaks. If it separates, you might be heading towards butter! Ensure you stop right at the stiff peak stage.
More Great Summertime Desserts to Enjoy
If you’ve fallen in love with this Strawberry Shortcake Cake, you’re sure to enjoy these other delightful desserts that are perfect for warm weather and sunny days:
- Berry Coconut Trifle
- No Churn Strawberry Ice Cream
- Brownie Ice Cream Cake
- Tres Leches Cake
- Grilled Peaches
HUNGRY FOR MORE? Don’t miss out on delicious new recipes and baking inspiration! Subscribe to my newsletter and follow along on Pinterest, Facebook, and Instagram for all my latest updates, tips, and culinary adventures!
Strawberry Shortcake Cake
Ingredients
STRAWBERRIES
- 2 pounds (908g) fresh strawberries
- ⅓ cup (75g) granulated sugar
BISCUIT CAKE
- 2¾ cups (390g) all purpose flour
- 3 tablespoons sugar
- 1 tablespoon baking powder
- ½ teaspoon salt
- ½ cup (113g) COLD butter, cut into small pieces
- 1 cup (235ml) milk
- 1 large egg, lightly beaten
WHIPPED CREAM
- 2 cups (475ml) COLD heavy whipping cream
- ⅓ cup (40g) powdered sugar
- 1 tablespoon vanilla
Instructions
STRAWBERRIES
-
Remove the stem and slice the strawberries. Combine with the ⅓ cup of sugar in a medium bowl, set aside to macerate for at least 30 minutes, allowing juices to form.
BISCUIT CAKE
-
Preheat oven to 425°F (220°C). Grease an 8″ or 9″ round cake pan thoroughly; set aside.
-
In a medium bowl, combine the flour, 3 tablespoons sugar, baking powder, and salt. Whisk well. With a pastry blender or two knives, cut the COLD butter into the flour mixture until it resembles coarse crumbs, with some pieces still pea-sized.
-
Make a well in the center of the dry ingredients and add the milk and lightly beaten egg. Stir just until combined and all flour is absorbed, being careful not to overmix. Pat the dough gently into an even layer in the prepared pan with lightly floured hands. Bake for 18-20 minutes or until lightly golden brown. Cool partially on a wire rack before slicing.
WHIPPED CREAM
-
In the bowl of your stand mixer (chilled for best results), combine the COLD heavy whipping cream, powdered sugar, and vanilla extract. Beat on high speed until stiff peaks form.
ASSEMBLY
-
Carefully cut the partially cooled biscuit cake in half horizontally. Place the bottom half on a cake stand or serving platter. Top with half of the whipped cream, spreading it evenly. Then, spoon half of the macerated strawberries over the cream, drizzling with a little of their juice. Top with the second cake half. Spread the remaining whipped cream on top, creating a slight well or ‘bowl’ to hold the rest of the strawberries. Spoon the remaining strawberries on top. Serve immediately for optimal freshness.
Notes
- MAKE-AHEAD: The biscuit cake can be made up to 3 days in advance (ensure to wrap well with plastic wrap to prevent it from drying out). The strawberries can be sliced and sugared up to 1 day in advance, and the whipped cream can also be prepared up to 1 day in advance. Store both the strawberries and whipped cream in the refrigerator in airtight containers.
- STORAGE: This cake is best served immediately after assembly. However, it can be stored covered in the refrigerator for up to 5 hours and still look and taste great. Leftovers should be covered tightly and stored in the refrigerator for up to 3 days. The cake will soften slightly over time from the strawberry juices, which many find even more delicious!
Nutrition
