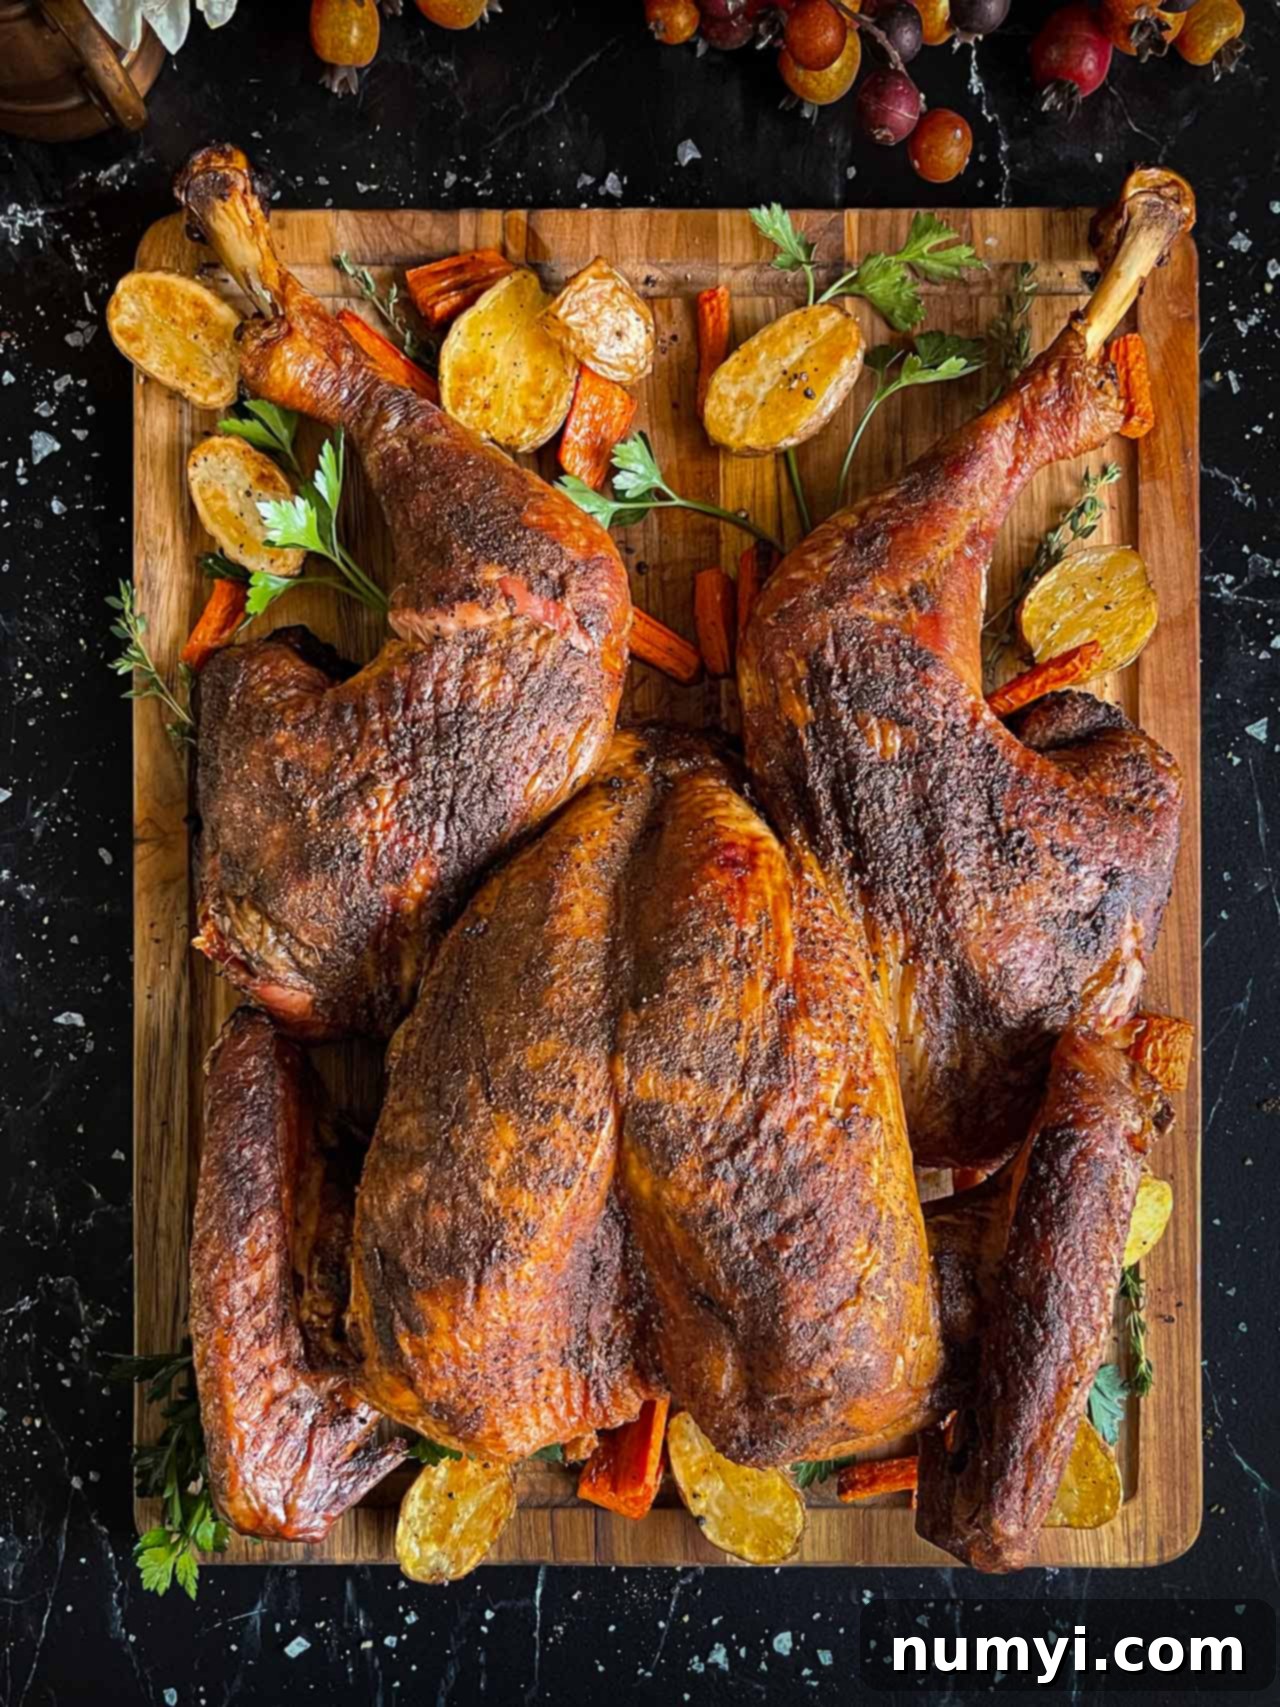
The Ultimate Dry Brined Spatchcock Turkey Recipe: Crispy Skin, Juicy Meat, and Faster Cooking
Prepare to revolutionize your holiday feasts with this incredible Dry Brined Spatchcock Turkey recipe. Forget the dry, bland birds of the past; this method delivers a turkey that is not only faster to cook but boasts unbelievably crispy, golden-brown skin and incredibly tender, juicy meat. It’s the culinary centerpiece that will have your friends and family raving for years to come.
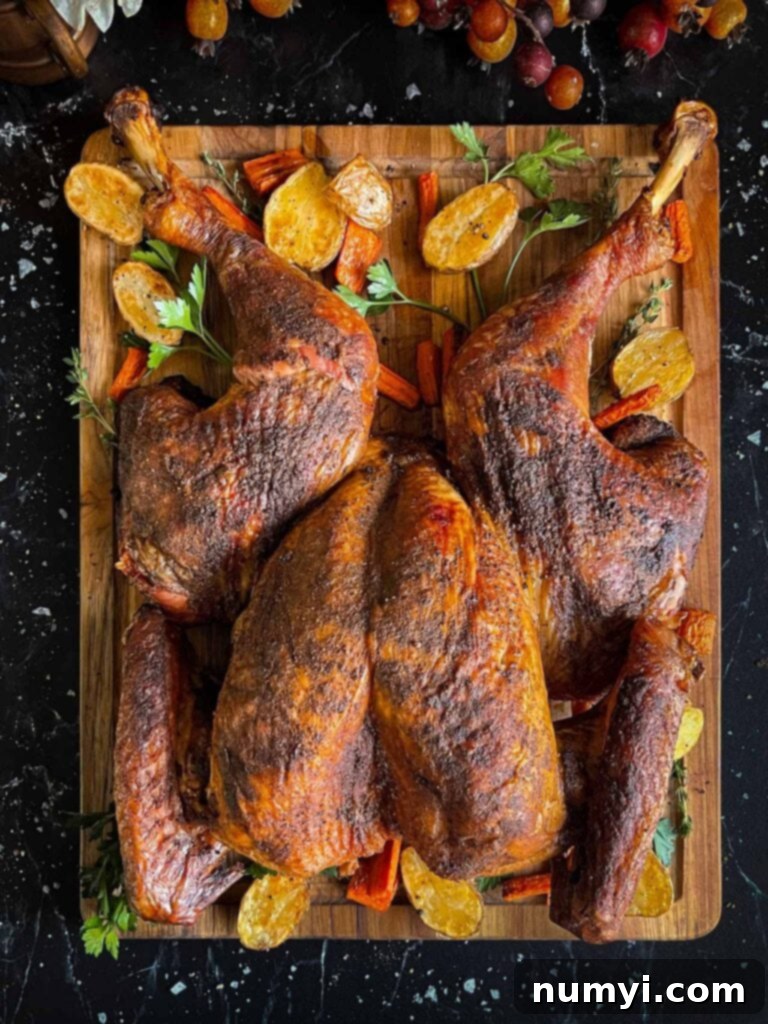
Imagine serving a holiday turkey that consistently earns gasps of delight and requests for your secret recipe. This dry-brined spatchcock turkey is that secret weapon. Beyond its mouth-watering flavor and texture, it shaves hours off the traditional cooking time, giving you more freedom to enjoy the festivities rather than being glued to the kitchen.
Why This Recipe Works: A Culinary Game-Changer
The ability to present a perfectly cooked turkey in just a couple of hours during the busiest time of the year is reason enough to try this recipe. But the benefits extend far beyond speed:
- Unforgettable Flavor: The dry brine technique infuses the meat with a profound, aromatic flavor that goes far deeper than just the surface. Each bite will be a revelation, making eyebrows go up in surprise and satisfaction.
- Unparalleled Juiciness: Dry brining works wonders for the turkey’s moisture retention. The salt helps the meat’s proteins bind water more tightly, preventing them from shrinking and squeezing out moisture during cooking. The result is a bird that’s exceptionally tender and juicy, even the often-dry white meat.
- Crispiest Skin Ever: This is where dry brining truly shines over wet brining. By drawing moisture out of the skin and allowing the turkey to air-dry in the refrigerator overnight, you create the ideal conditions for an incredibly crispy, crackling skin that is golden brown and utterly irresistible.
- Significantly Faster Cooking: Spatchcocking (removing the backbone and flattening the bird) increases the surface area exposed to heat, allowing the turkey to cook more evenly and dramatically reduce cooking time compared to a traditional roast. This means less time in the oven or smoker and more time enjoying your guests.
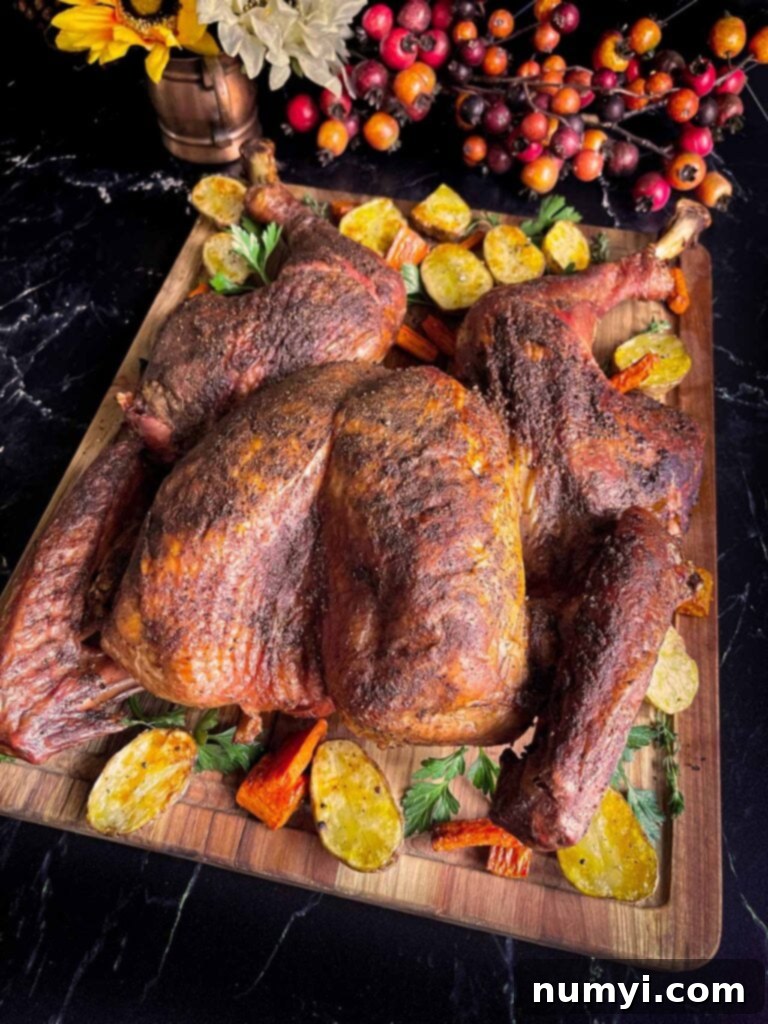
This method frees you from the frantic rush often associated with holiday meal preparation. You’ll have more time to focus on perfecting your side dishes, mingling with loved ones, or simply relaxing and savoring the holiday spirit. Isn’t that what the holidays are truly about?
If you’re new to spatchcocking or dry brining, this is the perfect recipe to dive in. We guarantee it won’t be your last time preparing a turkey this way. It’s a method that consistently delivers superior results with less stress. For those planning a full holiday spread, consider pairing this magnificent turkey with our tried-and-true recipes like homemade green bean casserole, fluffy mashed potatoes, rich southern cornbread dressing, and buttery crescent rolls. And for the day after? You absolutely must whip up a leftover Thanksgiving pie – it’s almost as exciting as the main event!
Why Should I Dry Brine Turkey? The Science of Succulence
Dry brining your turkey performs several miraculous feats, transforming a potentially ordinary bird into an extraordinary one. The primary benefit, as we all know, is flavor. But the mechanism behind it is truly marvelous.
When you apply a dry brine (often referred to as a dry rub), the salt on the surface of the turkey draws out moisture through a process called osmosis. This moisture then mixes with the salt and other spices, creating a concentrated liquid that is then reabsorbed back into the turkey’s meat. This deep penetration means that the flavor isn’t just skin-deep; it permeates every fiber of the meat. You’ll never again experience that common disappointment of a turkey that tastes great on the outside but is bland on the inside.
Furthermore, the salt in the brine also changes the structure of the muscle proteins in the turkey. It essentially helps the proteins unwind and become better at holding onto moisture. What does this mean for your cooked bird? It means the turkey’s muscles are less likely to contract and squeeze out water during the high heat of cooking, resulting in significantly juicier meat. Science truly is delicious!
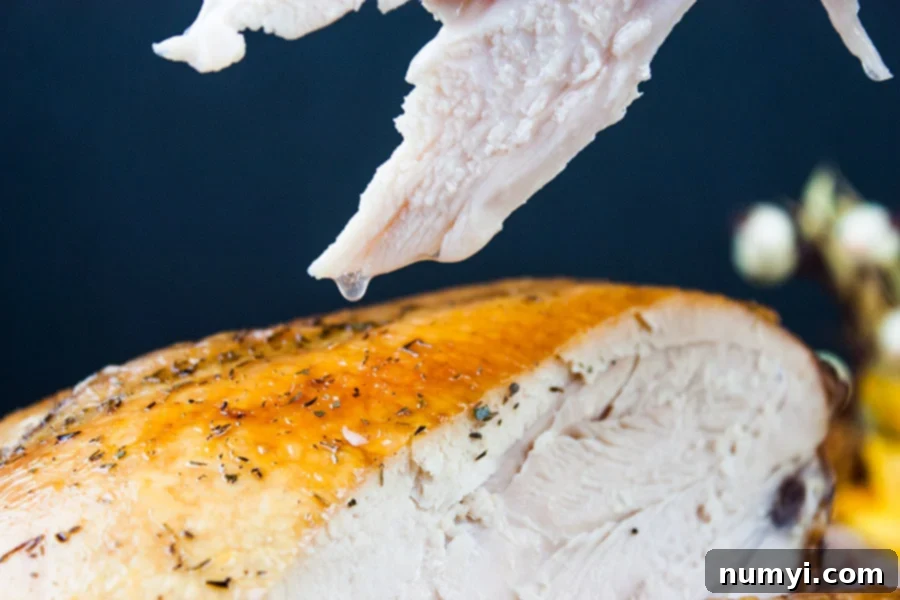
While a wet brine can also produce juicy results, it has a notable drawback: it introduces extra moisture, which can prevent the skin from getting truly crispy. For that coveted, crackling skin, dry brining is the superior choice. If you desire the ultimate turkey experience—a gloriously moist interior with a stunningly crispy, golden-brown exterior—dry brining is the undisputed champion. It’s the method that will leave your guests utterly speechless.
Don’t Sweat The Recipe is supported by its readers. We may earn a commission if you purchase through a link on our site. Learn more.
Dry Brine Ingredients: The Flavor Foundation
The essence of any successful brine, wet or dry, lies in the salt. Beyond that, the choice of seasonings allows for wonderful customization to suit your palate. For this particular Thanksgiving-inspired recipe, we opted for a classic blend that evokes the warm, comforting flavors of the season.
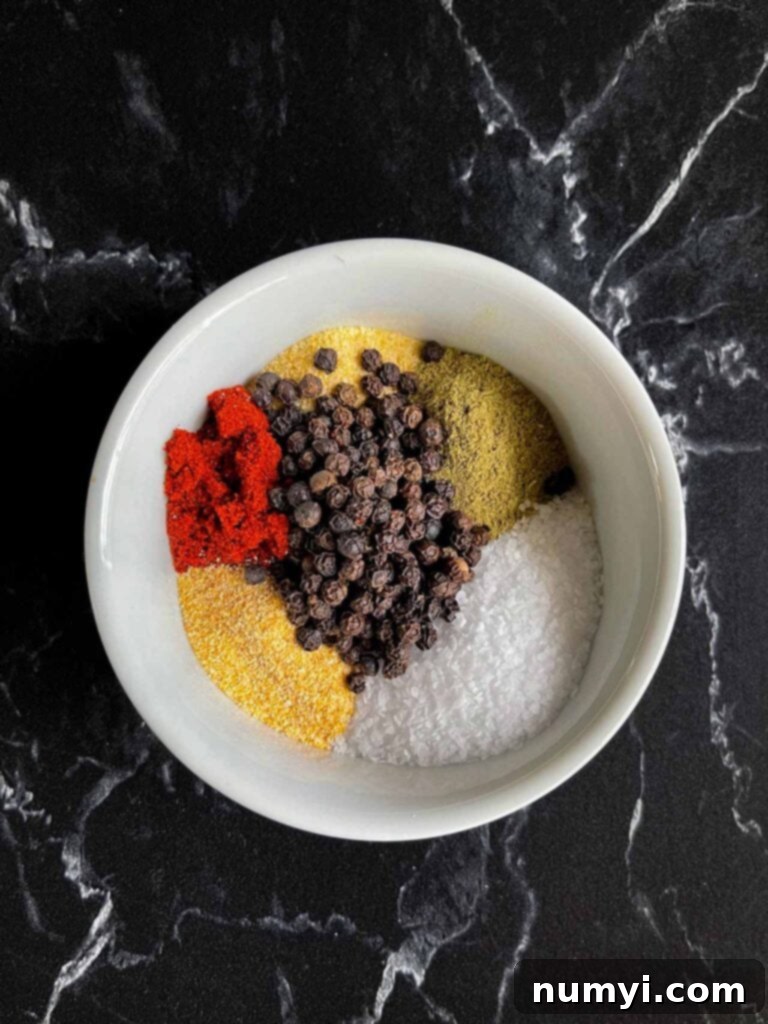
- Kosher Salt: This is the absolute cornerstone of our dry brine. Its coarse texture is ideal for drawing out moisture and facilitating flavor penetration without being overly salty when used correctly.
- Poultry Seasoning: A traditional blend often featuring thyme, sage, marjoram, and rosemary. These herbs are the quintessential flavors of Thanksgiving, adding earthy and aromatic notes that perfectly complement turkey.
- Paprika: Contributes a beautiful, rich reddish-orange hue to the turkey skin and offers a mild, sweet peppery flavor that enhances the overall spice profile.
- Black Peppercorns: Grinding fresh peppercorns provides a vibrant, pungent heat that you simply can’t get from pre-ground pepper. It adds a crucial layer of spice.
- Garlic Powder: A staple in almost any savory rub, garlic powder provides a deep, savory, umami-rich base flavor.
- Onion Powder: Similar to garlic powder, onion powder adds another layer of aromatic savory flavor, creating a well-rounded and complex rub.
To create the perfect dry brine, simply combine all these ingredients. For optimal results and maximum flavor penetration, place them in a spice grinder and process for approximately one minute until a fine, uniform powder is achieved. This ensures that the spices are evenly distributed and can adhere better to the turkey’s surface.
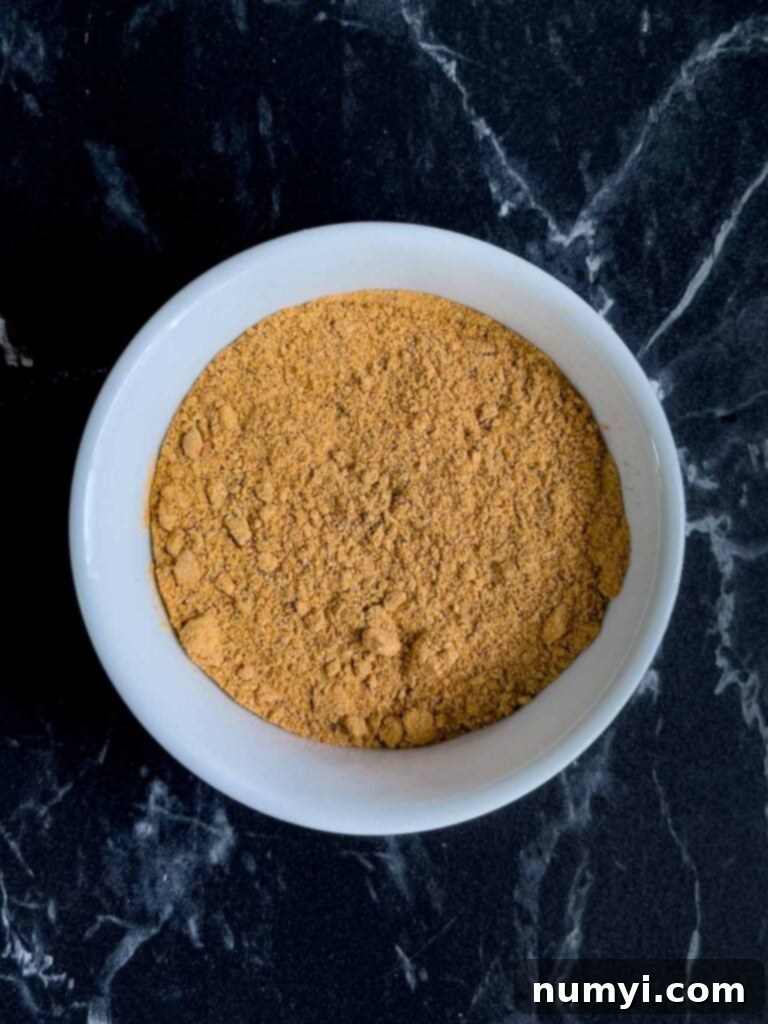
Don’t have a spice grinder? No problem! Just substitute black peppercorns with pre-ground black pepper and mix all the ingredients thoroughly in a small bowl until well combined. While a grinder provides a finer consistency, a hand-mixed rub will still deliver fantastic results.
NOTE
If you don’t own a spice grinder, we highly recommend investing in one. They are inexpensive (often under $20) and incredibly versatile, useful for grinding whole spices, coffee beans, or making custom seasoning blends. It’s a small but mighty kitchen tool that makes a fabulous and practical gift!
How To Prepare Spatchcock Turkey: Step-by-Step
Our recommended dry brining process for this recipe involves 48 hours of brining followed by an overnight (up to 24 hours) drying period in the refrigerator. This extended drying time is crucial for achieving that ultimate crispy skin. However, if time is a constraint, a 24-hour brine will still yield excellent results.
NOTE
If you’re starting with a frozen turkey, ensure it is completely thawed before you begin the dry brining process. The safest and most recommended method, according to the USDA, is to thaw it in the refrigerator. A good rule of thumb is to allow one full day of thawing for every 4-5 pounds of turkey weight.
- Unpack and Prep: Remove the turkey from its packaging and place it on a large baking sheet for easy handling. Locate and remove any giblets or neck from the cavity; you can save these for stock or gravy, or simply discard them.
- Pat Dry: Using paper towels, thoroughly pat the entire turkey dry, inside and out. Removing as much surface moisture as possible is key for the brine to adhere properly and for the skin to crisp up later.
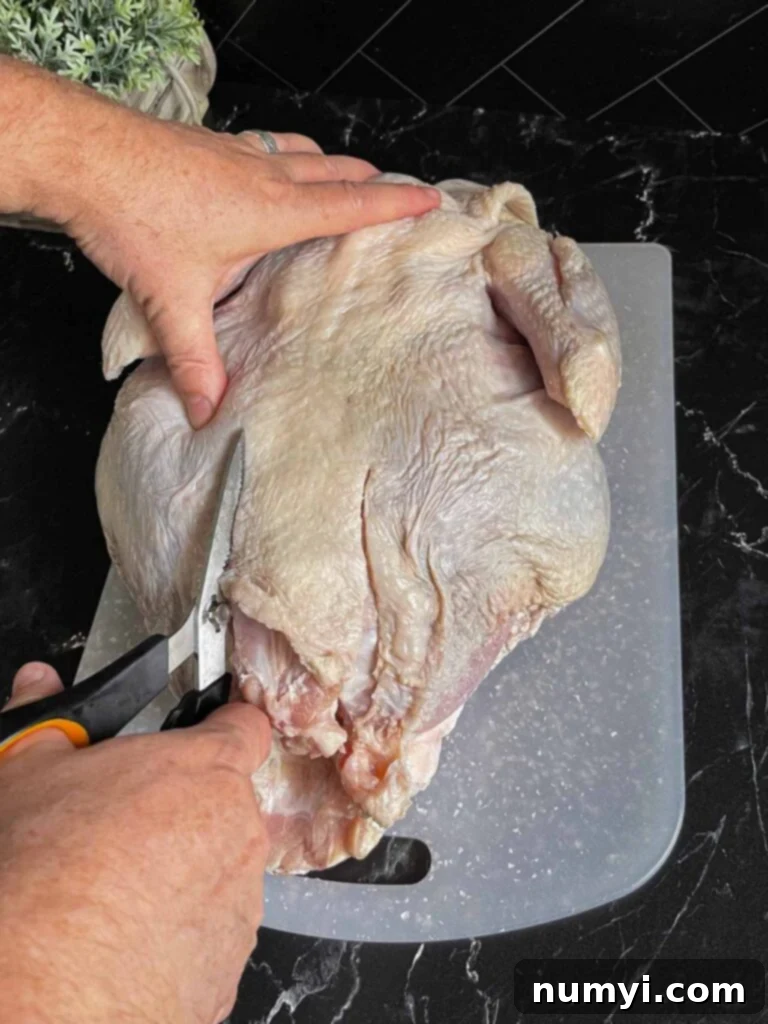
- Spatchcocking – The Backbone Removal: Transfer the dried turkey to a large, sturdy cutting board, breast-side down. Locate the backbone running down the center. Using heavy-duty kitchen shears, carefully cut along both sides of the backbone, through the ribs, from the tail to the neck. If you find this difficult, you can make an initial incision through the flesh with a knife to guide your shears. Once both cuts are made, remove the backbone. (Don’t throw it away! It’s excellent for making rich turkey stock.)
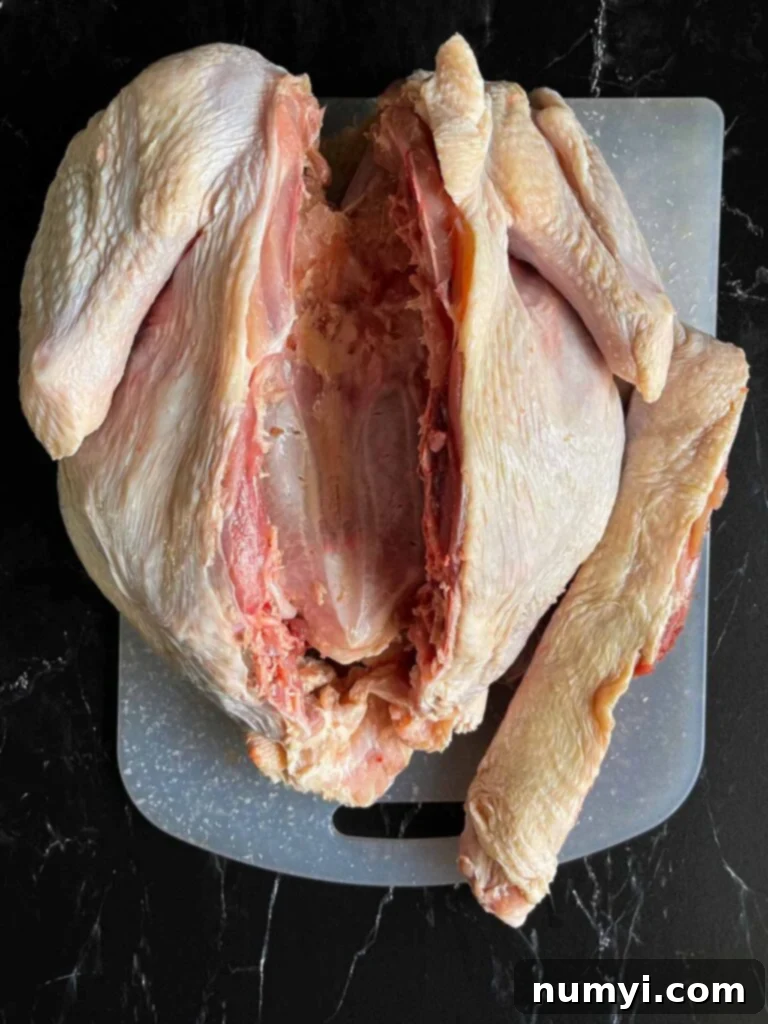
- Clean and Trim: After removing the backbone, use paper towels to dab up any remaining moisture in the cavity. You may also notice some excess skin around the edges; trim this off for a cleaner presentation.
- Spatchcocking – Flatten the Bird: Turn the turkey breast-side up on the cutting board. With the breast bone facing you, use the heels of your hands to press down firmly and evenly on the breastplate, cracking the breastbone and flattening the bird. You’ll hear a distinct crack. If it’s too difficult, you can score the breastbone lightly with the back of a sturdy kitchen knife to help it get started before pressing down.
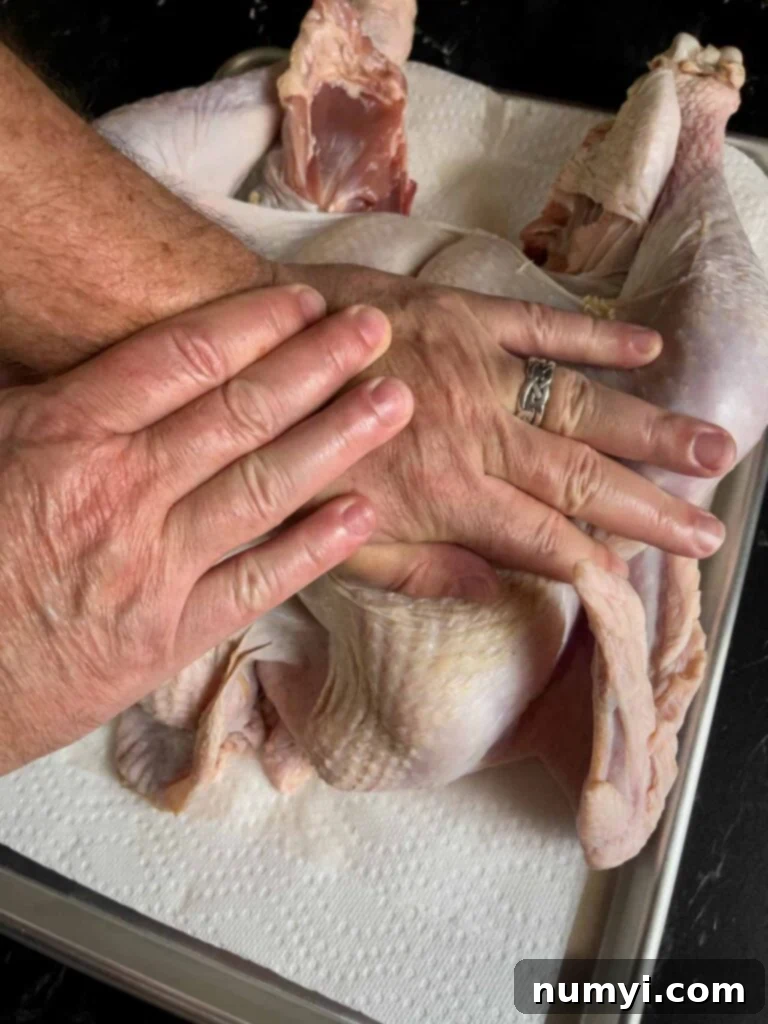
- Apply the Dry Brine: Lay down several large sheets of plastic wrap on a baking sheet. This creates a barrier and helps contain the dry brine during application. Place the turkey breast-side down on the prepared baking sheet. Sprinkle about one-third of your prepared dry brine mixture evenly over the exposed cavity side of the bird.
- Flip and Coat: Turn the turkey back over, breast-side up. Distribute the remaining dry brine evenly over the top of the bird, paying special attention to the thickest parts of the breast, thighs, and legs. Ensure good coverage without over-applying in any one area.
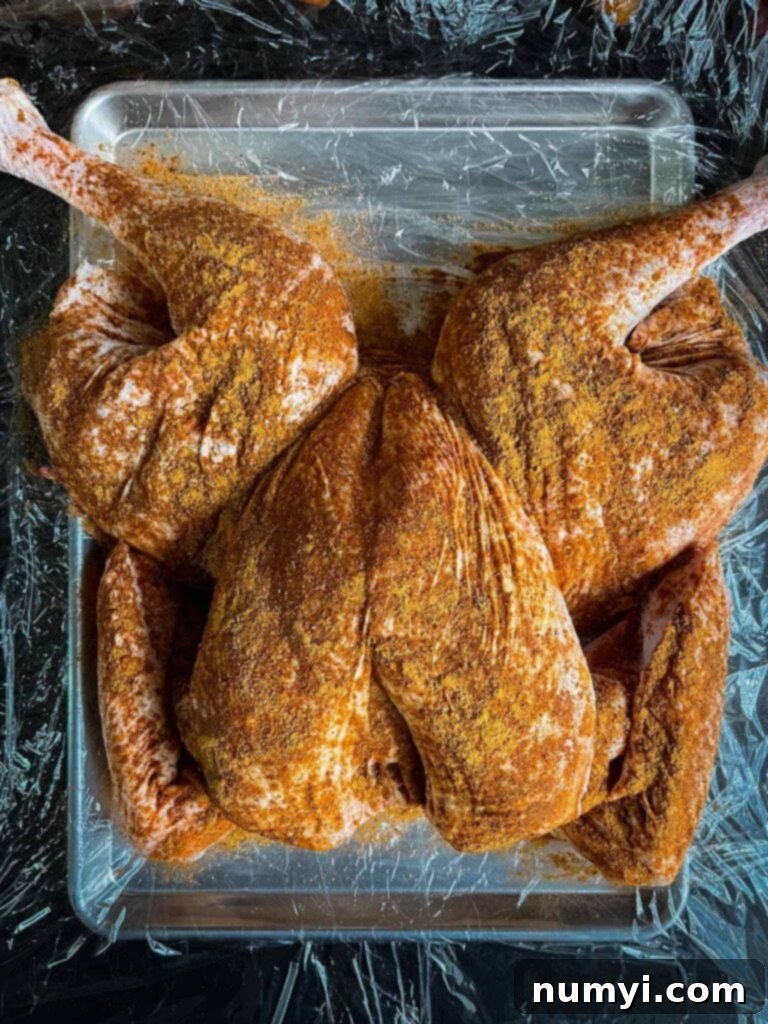
- Brine and Rest: Tightly wrap the entire turkey, still on the baking sheet, in plastic wrap. Transfer it to the refrigerator and allow it to dry brine for 48 hours. This allows the salt and spices to work their magic, deeply flavoring the meat.
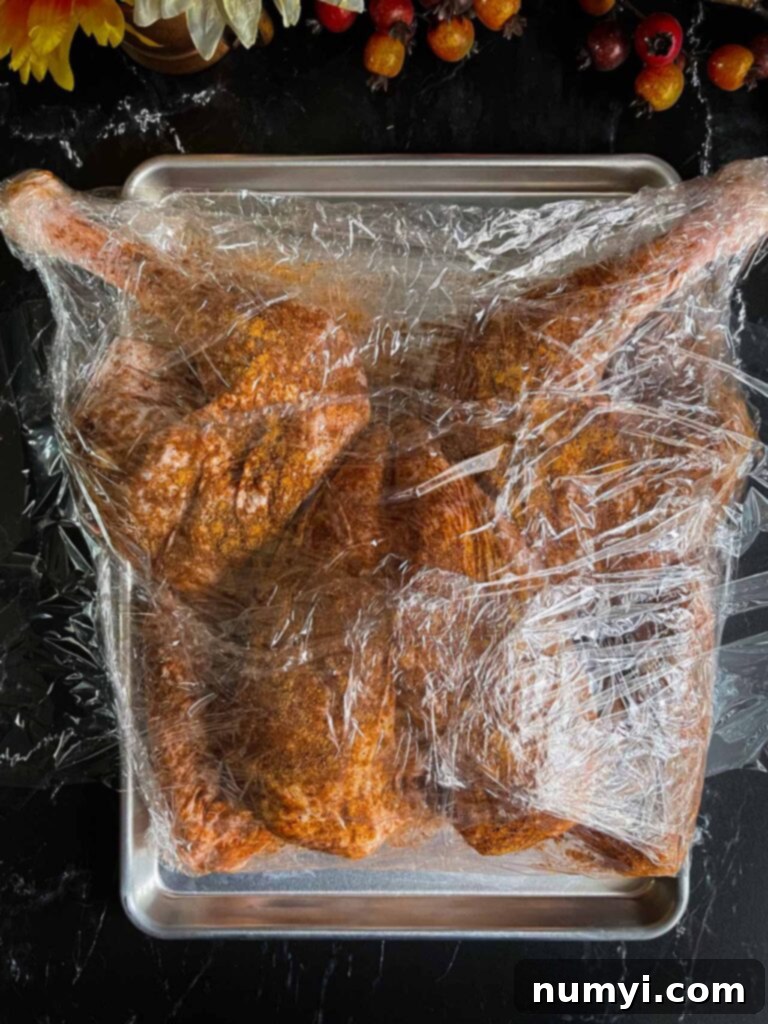
- Air Dry for Crispy Skin: After the 48-hour brining period, remove the plastic wrap. Gently dab away any pooled moisture on the turkey’s surface with paper towels. Place the unwrapped turkey back into the refrigerator to air dry overnight, for up to 24 hours. This crucial step dehydrates the skin, ensuring it will be incredibly crispy when cooked.
How To Cook Spatchcock Turkey: Your Method, Your Choice
Now for the satisfying part: cooking your perfectly prepped turkey! One of the great advantages of a spatchcocked bird is its versatility. You can cook it beautifully in an electric grill/smoker, a conventional oven, or even on a kettle grill. Before cooking, remove the turkey from the refrigerator and let it sit at room temperature for about an hour. This helps it cook more evenly.
Spatchcock Turkey In An Electric Grill Or Smoker
Using an electric grill or smoker is an excellent way to impart a wonderful smoky flavor and free up your oven for other holiday dishes.
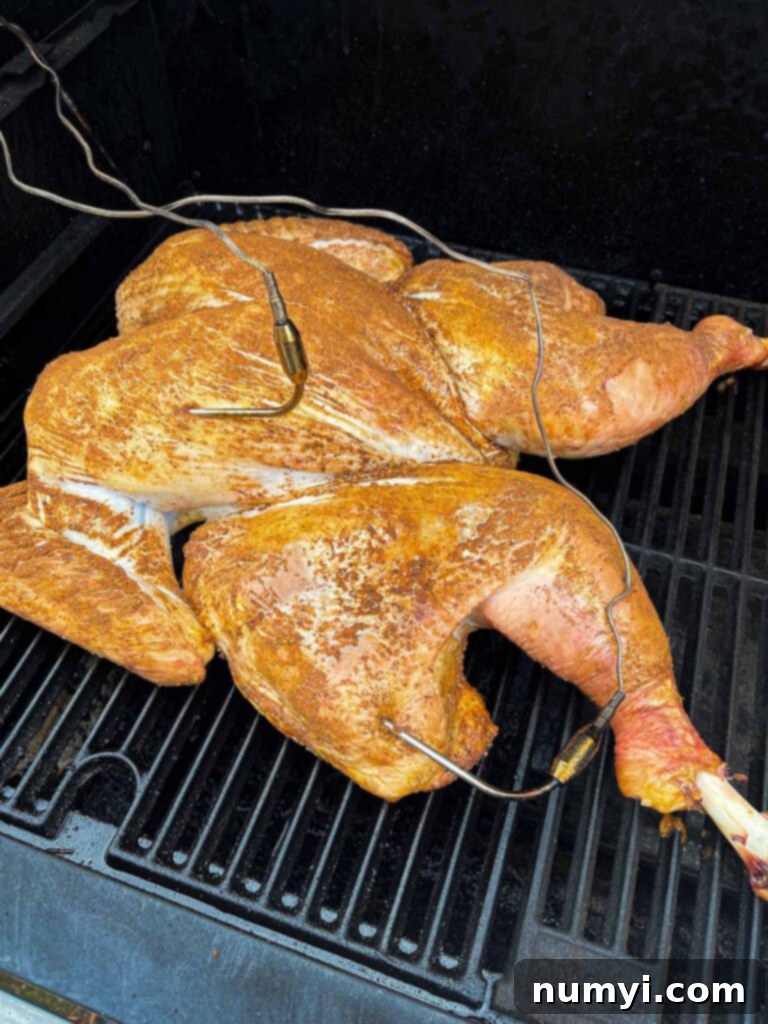
- Preheat your electric grill or smoker to 350 degrees F (175 degrees C).
- Carefully place the spatchcocked turkey directly on the grill grates. For best results, tuck the wing tips underneath the bird to prevent them from burning, and position the turkey so the breast side is facing away from the primary heat source to ensure even cooking and prevent the breast meat from drying out.
- Cook for approximately two hours. The most critical factor is the internal temperature, not the cooking time. Use a reliable meat thermometer to check the thickest part of the thigh, ensuring it reaches 165 degrees F (74 degrees C).
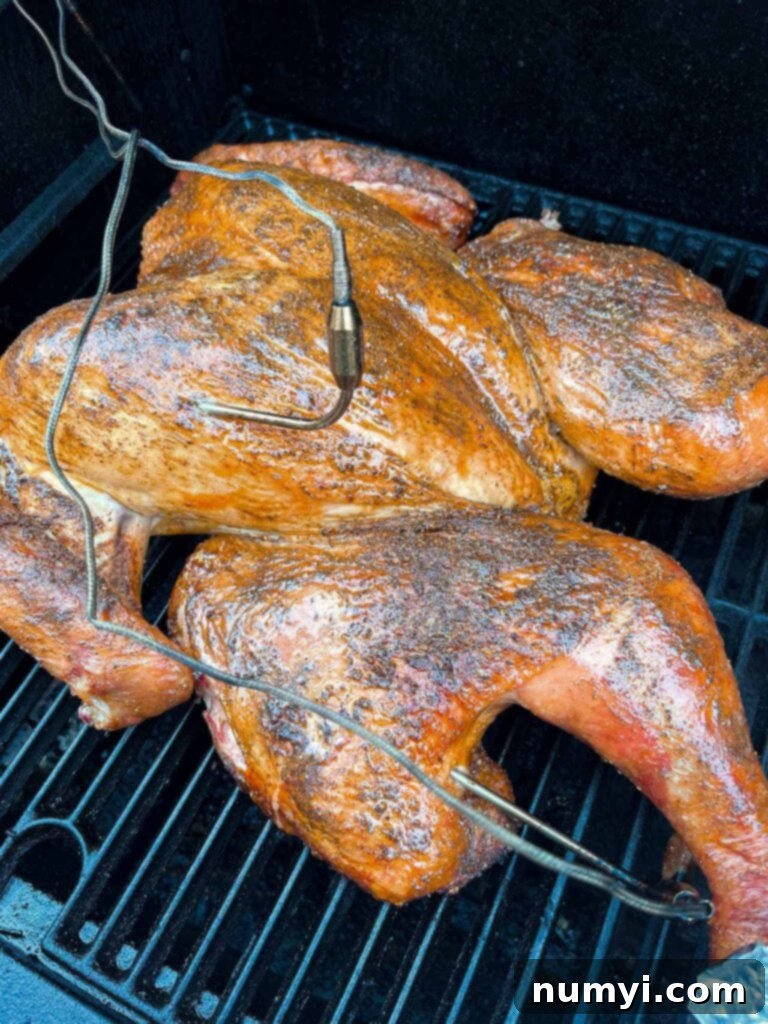
- Once the target temperature is reached, carefully remove the turkey from the grill/smoker.
- Allow the turkey to rest on a cutting board, loosely tented with foil, for at least 20 minutes before carving. This resting period is crucial for the juices to redistribute throughout the meat, ensuring maximum tenderness and flavor.
Spatchcock Turkey In The Oven
Cooking your spatchcock turkey in a conventional oven is straightforward and reliable, perfect for those who prefer indoor cooking.
- Preheat your oven to 350 degrees F (175 degrees C).
- Place the spatchcocked turkey on a wire rack set over a foil-lined rimmed baking sheet or in a large roasting pan. Ensure the pan is large enough to accommodate the flattened bird. Tuck the wing tips under the bird to protect them from overcooking.
- Roast for approximately two hours. As always, monitor the internal temperature carefully with a meat thermometer or an instant-read thermometer. The thickest part of the thigh (without touching the bone) should reach 165 degrees F (74 degrees C).
- Remove the turkey from the oven and allow it to rest, loosely tented with foil, for at least 20 minutes before carving.
Spatchcock Turkey On A Kettle Grill (Weber Style)
For a beautiful char and smoky flavor, a kettle grill can be an excellent choice. This method is best for turkeys around 14 pounds or less, as larger birds may not fit comfortably. You will need to set up your grill for indirect cooking.
- Arrange your charcoal for indirect heat. This typically involves banking the hot coals to one side or dividing them on two sides with a drip pan in the middle. Aim to maintain a grill temperature of around 350 degrees F (175 degrees C).
- Place the spatchcocked turkey on the grill grates directly over the drip pan, ensuring the breast side is facing away from the direct heat of the coals.
- Cook, continuously monitoring the grill temperature. Use the vents to adjust airflow and maintain your target temperature.
- If you notice any parts of the bird (like the wing tips or leg tips) are browning too quickly or getting too much direct heat, you can shield them with small pieces of aluminum foil to prevent burning.
- Cook for approximately two hours, or until the internal temperature in the thickest part of the thigh registers 165 degrees F (74 degrees C) with a meat thermometer.
- Once cooked, remove the turkey from the grill and let it rest for at least 20 minutes, loosely tented with foil, before carving.
Finishing Up: Carving and Serving Your Masterpiece
After your spatchcocked turkey has rested sufficiently (allowing the juices to redistribute for ultimate tenderness), it’s time to carve and present your masterpiece. I typically begin by carefully removing the legs, wings, and thighs. Then, I detach each breast and slice them cleanly into generous portions. For the dark meat from the thighs, I often debone it and chop it into smaller, flavorful morsels.
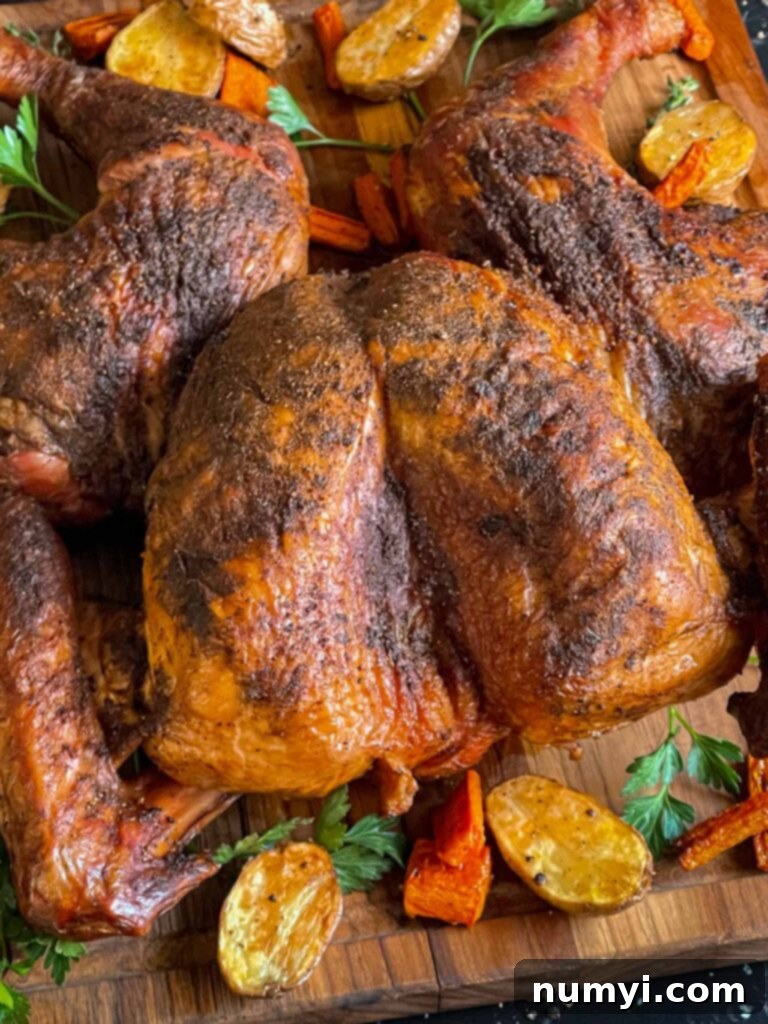
As for the drumsticks? I prefer to leave them whole. There’s something undeniably satisfying about holding a large, crispy-skinned turkey leg in one hand and a festive drink in the other!
If preparing a turkey has historically been a source of stress or disappointment for you, this dry-brined spatchcock turkey recipe is your ultimate solution. It removes all the guesswork, promising a result that is consistently spectacular. The skin will be a glorious crispy, golden brown, and the meat will be incredibly moist, juicy, and bursting with flavor. Your friends and family will not only sing your praises but will likely declare it the best turkey they’ve ever tasted.
This spatchcock turkey recipe is designed to make your future Thanksgiving and Christmas feasts not only easier and more efficient but also profoundly more delicious and enjoyable for everyone involved.
Tips for a Perfect Turkey
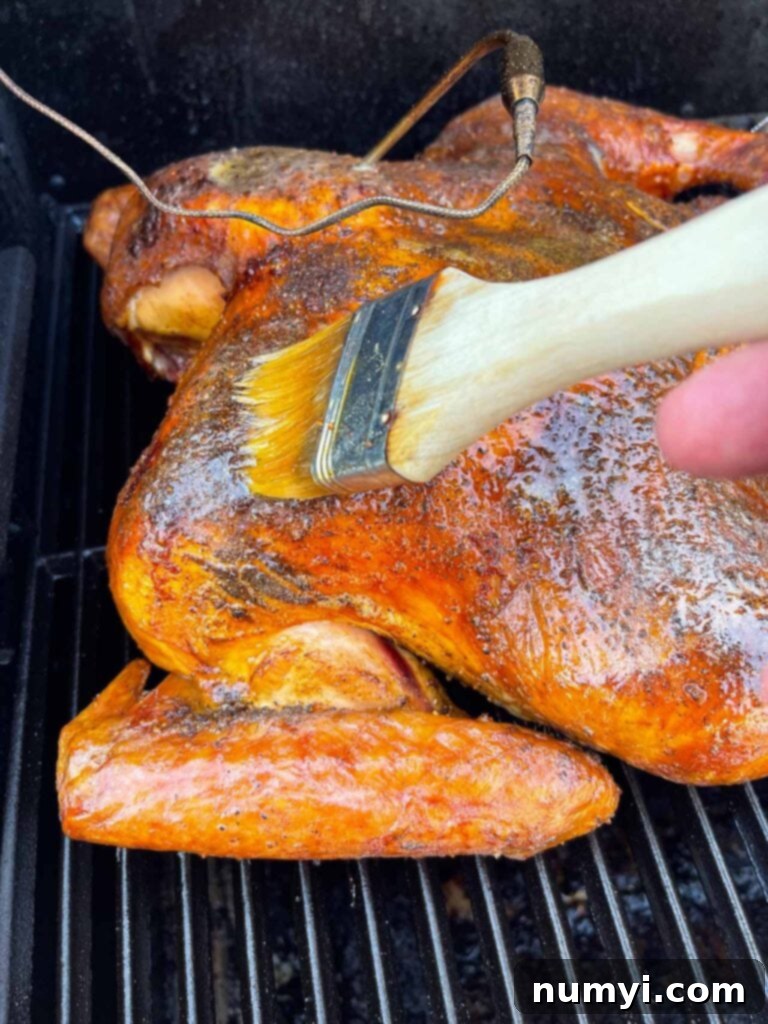
- Basting for Extra Flavor: As the turkey approaches its final cooking temperature and the skin begins to crisp beautifully, consider brushing it with some melted butter. For an even more aromatic touch, infuse the butter with fresh herbs like thyme and sage to create a delicious herb butter basting liquid.
- Cook to Temperature, Not Time: While a 12-14 pound spatchcocked turkey typically cooks in about 2 hours at 350°F (175°C), this is just an estimate. Always rely on an accurate meat thermometer. The thickest part of the thigh should read 165°F (74°C). Account for an additional 30-45 minutes between resting and carving before serving, and plan your meal timing accordingly.
- Prevent Burning: If you notice the tips of the legs or wings browning too quickly, simply wrap them loosely in aluminum foil for the remainder of the cooking time to prevent them from burning.
- Double-Check Temperature: It’s common practice to check the temperature in the thickest part of the thigh. However, for added assurance, I also recommend using your instant-read thermometer in the thickest part of the breast. Remember to avoid touching any bones, as this can give an inaccurate reading.
- Adjust for Size: A larger turkey will naturally require a longer cooking time, while a smaller bird will cook faster. A general rule of thumb for a spatchcocked turkey is approximately 10 minutes per pound, but always prioritize the internal temperature.
Variations on Your Turkey Masterpiece
Once you’ve mastered the basic dry brined spatchcock turkey, you can easily adapt the flavors to create exciting new variations:
- Cajun Kick: For those who love a bit of heat, try adding a generous amount of your favorite Cajun seasoning to the dry brine mixture. This will infuse the turkey with a vibrant, spicy flavor that’s perfect for a bold holiday twist.
- Whole Dry-Brined Turkey: If you prefer the traditional aesthetic of a whole, un-spatchcocked roasted turkey but still want the benefits of dry brining, check out our other dry-brined turkey recipe. It uses the same fantastic brining method to deliver a succulent, flavorful bird with that classic “Norman Rockwell” presentation. It’s an excellent option for those who want beautiful carving opportunities at the table.
- Herb-Crusted Delight: Experiment with additional fresh herbs. Finely chop fresh rosemary, thyme, or sage and mix them into your dry brine. You can also press them directly under the skin of the breast for a burst of fresh herbal flavor.
- Citrus Infusion: Add finely grated citrus zest (orange, lemon, or a mix) to your dry brine. The citrus oils will infuse the skin and outer meat layers with a bright, aromatic flavor that pairs beautifully with turkey.
FAQs: Frequently Asked Questions
Spatchcocking is a poultry preparation method where the backbone is removed, and the breastbone is cracked, allowing the bird to be flattened. This technique promotes faster and more even cooking, and results in incredibly crispy skin.
A 12-14 lb spatchcocked turkey typically takes roughly 2 hours to cook at 350 degrees Fahrenheit (175 degrees C). Cooking time will vary based on the turkey’s size and your specific cooking equipment, so always rely on a meat thermometer.
Always check the temperature with an instant-read thermometer in the thickest part of the thigh, ensuring the probe does not touch the bone, as this can lead to an inaccurate reading. You can also check the thickest part of the breast.
A spatchcocked turkey is fully cooked when the internal temperature of the thickest part of the thigh reaches 165 degrees Fahrenheit (74 degrees C).
Once the turkey meat has cooled completely, place it in an airtight container and store it in the refrigerator for up to three days for optimal freshness. For longer storage, see freezing instructions below.
Other Fabulous Turkey Recipes To Try
Smoked Turkey Breast Easy And Perfect
Simple Succulent Dry Brined Roast Turkey
Easy Creamy Turkey Tetrazzini
Are you on Pinterest? Click the button below to add this recipe to one of your boards!
Dry Brined Spatchcock Turkey Recipe
Print
Pin
Rate
Ingredients
Dry Rub
- 2 tbsp Kosher salt
- 1 tbsp Black peppercorns
- 1 tbsp Paprika
- 2 tsp Poultry seasoning
- 1 tsp Garlic powder
- 1 tsp Onion powder
Turkey
- 14 lb Turkey
Instructions
-
Combine dry brine ingredients in a spice grinder and grind until powdered.2 tbsp Kosher salt, 1 tbsp Black peppercorns, 1 tbsp Paprika, 2 tsp Poultry seasoning, 1 tsp Garlic powder, 1 tsp Onion powder
-
(If you do not have a spice grinder, substitute black peppercorns with black pepper. Mix in a small bowl well to combine)
-
Spatchcock the turkey. With heavy duty kitchen shears cut along each side of the backbone, removing it. Flip the turkey over and using the heels of your palm, crack the breastbone and lay flat.14 lb Turkey
-
Turn back over and rub approximately 1/3 the dry rub on the underside of the turkey.
-
Flip back over, breast side up, and rub remaining dry brine over the turkey, concentrating on the breast, thigh, and leg areas.
-
Wrap the turkey in plastic wrap and refrigerate for 24-48 hours.
-
After the brining time, remove the plastic wrap, dab up any residual moisture that may have pooled, and refrigerate overnight, up to 24 hours.
-
Cook at 350 degrees F (on/in your preferred heat source) for approximately 2 hours or until the deepest part of the thigh reads 165 degrees F with a meat thermometer or instant-read thermometer.
-
Remove and allow the turkey to rest for at least 20 minutes before carving.
-
Serve and enjoy with your favorite side dishes.
Notes
Cook to temperature, not time. 165 degrees F in the deepest part of the thigh (without touching the bone), and the turkey is ready.
Storing – Store cooled leftover turkey in an air-tight container in the refrigerator for up to three days.
Freezing – Allow the meat to cool completely, then freeze in a freezer-safe container for up to three months. To thaw in the refrigerator overnight.
