The Ultimate Guide to Baking a Smooth & Creamy Homemade Cheesecake
Forget the fear, embrace the flavor! Crafting a perfect, silky-smooth cheesecake at home is not just achievable, it’s surprisingly simple with the right techniques. This isn’t just another recipe; it’s your definitive guide to creating a dessert that will impress every time, leaving your guests wondering if you secretly imported it from a high-end bakery. Imagine a rich, dense, yet incredibly creamy cheesecake, perfectly balanced in sweetness, with a golden graham cracker crust, ready to be topped with your favorite fresh fruit or a vibrant berry coulis. This classic dessert is the epitome of elegance and comfort, and we’re here to show you exactly how to achieve that sublime texture and exquisite taste without any intimidation. Let’s dive into the secrets of homemade cheesecake perfection.

Rich, smooth, creamy, and absolutely sublime – everyone needs a reliable, basic cheesecake recipe in their culinary repertoire, and this one is guaranteed to become your go-to favorite. This recipe demystifies the process, breaking down each step to ensure a flawless result, even for novice bakers. Prepare yourself for a dessert experience that is both luxurious and comforting, a true testament to the simple joy of homemade treats.
Looking for more delightful dessert ideas? Give our Strawberry Shortcake recipe a try. You won’t regret the sweet, summery indulgence!
Why This Cheesecake Recipe Guarantees Perfection
Achieving that coveted smooth, crack-free cheesecake isn’t just about following steps; it’s about understanding the “why” behind them. This recipe incorporates fundamental baking principles that set it apart, ensuring consistent success and a truly exceptional dessert.
The Magic of Room Temperature Ingredients
This is perhaps the most crucial tip for any cheesecake: your cream cheese, eggs, and heavy cream absolutely must be at room temperature. Cold cream cheese is stiff and difficult to beat smoothly, leading to lumps in your batter and a grainy texture in the final product. Room temperature ingredients, on the other hand, emulsify beautifully, creating a uniform, airy, and incredibly smooth batter. This smooth batter is the foundation of a perfectly creamy cheesecake, preventing undesirable textures and ensuring even baking.
The Essential Water Bath: Preventing Cracks and Promoting Creaminess
The water bath, or “bain-marie,” is your best friend when baking cheesecake. While it might seem like an extra step, it’s instrumental in creating that signature smooth, creamy texture and preventing those dreaded cracks on the surface. Here’s how it works: The hot water surrounding the springform pan creates a moist, consistent, and gentle cooking environment. This prevents the cheesecake from baking too quickly, which can cause the edges to dry out and the center to expand and then contract too rapidly, leading to unsightly cracks. The gentle, even heat ensures the custard-like filling sets slowly and uniformly, resulting in a velvety-smooth finish from edge to center.
The Art of Gentle Mixing: Avoiding Over-Aeration
While beating the cream cheese until light and fluffy is important, once the eggs and heavy cream are introduced, the key is to mix just until combined. Overmixing the batter, especially after adding the eggs, incorporates too much air. This excess air expands during baking, causing the cheesecake to puff up significantly, only to collapse and crack as it cools. Gentle mixing, coupled with frequent scraping down of the bowl, ensures all ingredients are thoroughly incorporated without introducing excessive air, preserving the dense, creamy texture we crave.
Step-by-Step Preparation for Your Dream Cheesecake
Pan Preparation: The Foundation of Success
Before you even think about mixing ingredients, meticulous pan preparation is essential. Start by spraying your 8-inch springform pan generously with non-stick baking spray, or line the bottom with a circle of parchment paper for easy release. Then, and this is critical for the water bath, wrap the bottom and sides of the springform pan with two layers of heavy-duty aluminum foil. Ensure the foil is tightly crimped around the edges, forming a secure seal to prevent any water from seeping into your crust during baking. Simultaneously, have a large roasting pan ready. This roasting pan must be large enough to comfortably accommodate the springform pan without its sides touching, allowing for even water circulation around the cheesecake.
Crafting the Perfect Graham Cracker Crust
The crust provides a delightful textural contrast to the creamy filling. In a medium-sized bowl, combine 1 1/2 cups of fine graham cracker crumbs, 1/3 cup of melted butter, and 1 tablespoon of granulated sugar. Mix these ingredients thoroughly until the crumbs are evenly moistened and just start to clump together when pressed. This ensures a sturdy yet tender crust. Once mixed, press the graham cracker mixture firmly and evenly into the bottom of the prepared springform pan and extend it about one-third of the way up the sides. Use the bottom of a glass or your knuckles to create a compact, even layer. Place the pan in the refrigerator to chill while you prepare the cheesecake batter; this helps the crust set and prevents it from crumbling.
Craving another tangy treat? Don’t miss our Easy Key Lime Pie recipe!
Mixing the Velvety Cheesecake Batter
Now for the heart of the cheesecake: the creamy filling. With an electric mixer set to medium-low speed, beat the softened cream cheese for a full 3 minutes. This initial beating ensures the cream cheese is perfectly smooth and free of any lumps. Next, add the granulated sugar and continue beating, increasing the speed to medium-high. Beat for approximately 5 minutes until the mixture becomes light, fluffy, and completely smooth. This step is crucial for incorporating just the right amount of air for a light texture without over-aerating.
Add the large eggs one at a time, beating on low speed just until each egg is combined. Avoid overmixing here. Then, pour in the room temperature heavy cream and mix until it’s fully incorporated. Throughout this process, make sure to frequently scrape down the sides and the very bottom of your mixing bowl with a spatula. This prevents any unmixed pockets of ingredients and ensures a uniform batter. Finally, add the pure vanilla extract and mix briefly until just combined, imparting that classic, aromatic flavor.
Baking with a Water Bath: The Gentle Touch
Carefully pour the smooth cheesecake batter into your prepared, chilled springform pan. Gently tap the pan on the counter a few times to release any large air bubbles. Place the springform pan into the larger roasting pan. Now, carefully transfer both pans to the middle rack of your preheated oven (350°F). Once inside the oven, very carefully fill the roasting pan with boiling water until it reaches about halfway up the sides of the springform pan. Exercise extreme caution to avoid splashing any hot water into the cheesecake batter, as this can affect its texture. The water bath will now work its magic, ensuring your cheesecake bakes evenly and beautifully.
The Cooling Process: Patience is a Virtue
Bake the cheesecake for approximately 45 minutes to 1 hour. Baking times can vary depending on your oven, so rely on visual cues. The cheesecake is done when the edges appear set, but the center still has a slight, gentle jiggle when the pan is lightly shaken. There should be no visible wet spots. Remember, the cheesecake will continue to cook slightly as it cools. Once baked, turn off the oven and prop the oven door open slightly, allowing the cheesecake to cool gradually inside the warm oven for about an hour. This slow, controlled cooling helps prevent cracks caused by sudden temperature changes. After an hour, carefully remove the springform pan from the water bath and place it on a wire rack to cool completely to room temperature. This usually takes several hours.
The Essential Chill: Setting and Flavor Development
Once the cheesecake has completely cooled to room temperature on the wire rack, cover it loosely with plastic wrap and transfer it to the refrigerator. This chilling phase is absolutely critical for the cheesecake to fully set, firm up, and allow its flavors to meld and deepen. Refrigerate for at least 4 hours, but for the very best texture and taste, overnight chilling is highly recommended. Only remove the cheesecake from the springform pan once it is thoroughly chilled.
For a fun twist on cheesecake, be sure to try our Chocolate Covered Cheesecake Bites! They’re perfect for parties!
Serving Suggestions and Delicious Cheesecake Variations
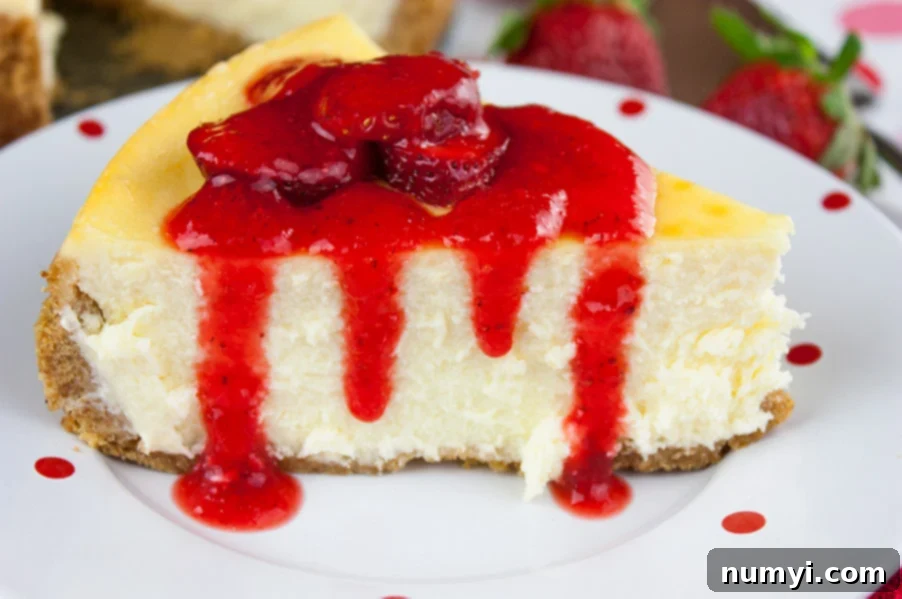
While this smooth and creamy cheesecake is absolutely divine on its own, it also serves as a perfect canvas for a variety of toppings and flavor variations. You can enjoy it plain, allowing its rich, custardy flavor to shine, or elevate it with a homemade fresh strawberry coulis (the elegant French name for fruit sauce). We highly recommend both ways – sometimes simplicity is key, other times a burst of fruit is exactly what’s needed.
Classic Toppings to Enhance Your Cheesecake
- Fresh Strawberry Coulis: As outlined in the recipe, a simple blend of fresh strawberries, sugar, and lime zest creates a bright, refreshing contrast to the rich cheesecake.
- Mixed Berry Topping: A medley of blueberries, raspberries, and blackberries, either fresh or lightly simmered into a compote, adds vibrant color and flavor.
- Chocolate Ganache: Drizzle warm chocolate ganache over the top for a decadent treat.
- Caramel Sauce: A swirl of homemade or store-bought caramel sauce, perhaps with a sprinkle of sea salt, offers a rich, buttery sweetness.
- Whipped Cream and Fresh Fruit: A dollop of freshly whipped cream and a few fresh fruit slices (kiwi, mango, or peaches) provide a light, refreshing finish.
Creative Cheesecake Flavor Variations
This basic recipe is incredibly versatile. Don’t be afraid to experiment!
- Lemon Zest Infusion: Add the zest of 1-2 lemons to the cream cheese batter for a brighter, zesty flavor.
- Espresso Delight: Mix in 1-2 teaspoons of instant espresso powder (dissolved in a tiny bit of hot water) to the batter for a subtle coffee flavor that pairs beautifully with chocolate.
- Pumpkin Spice Dream: For a fall-inspired twist, add 1/2 cup of pumpkin puree and 1-2 teaspoons of pumpkin pie spice to the batter.
- Mini Cheesecakes: Bake in a muffin tin with paper liners for individual portions – adjust baking time significantly (around 20-30 minutes).
- Chocolate Swirl: Swirl melted chocolate into the finished batter before baking for a marbled effect.
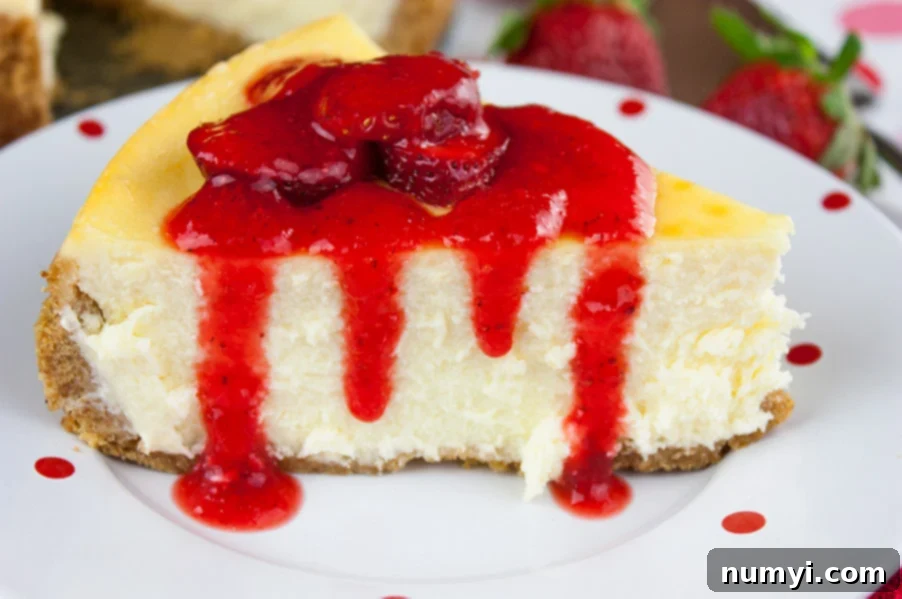
Serve and indulge in this smooth and creamy cheesecake drizzled with fresh strawberry sauce! Every bite promises a delightful experience, a perfect blend of texture and flavor that will make any occasion feel special.
Smooth and Creamy Cheesecake Recipe

Smooth and Creamy Cheesecake Recipe
Print
Pin
Rate
Ingredients
Crust
- 1 1/2 cups graham cracker crumbs
- 1 tablespoon granulated sugar
- 1/3 cup butter, melted
Cheesecake
- 24 oz cream cheese, softened to room temperature (3 – 8oz packages)
- 1 cup granulated sugar
- 3 large eggs, room temperature
- 1 teaspoon pure vanilla extract
- 1 cup heavy cream, room temperature
Fresh Strawberry Sauce
- 1 1/2 cups fresh strawberries, cleaned and sliced
- 1/4 cup granulated sugar
- 1 lime, zested
Instructions
-
Preheat oven to 350 degrees F (175°C).
Pan Prep
-
Wrap the bottom of an 8-inch springform pan with two layers of heavy-duty aluminum foil, ensuring a tight seal to prevent water seepage. Set aside a large roasting pan that the springform pan fits in without touching the sides. This will be used for a water bath during cooking.
Spray the interior of the springform pan with non-stick baking spray or line the bottom with parchment paper.
Crust
-
In a medium-size bowl, mix 1 1/2 cups of graham cracker crumbs, 1/3 cup melted butter, and 1 tablespoon of sugar until moistened and it starts to come together. Then, press the mixture firmly into the bottom of the springform pan and about 1/3 of the way up the sides. Place the pan in the refrigerator while you prepare the cheesecake batter.
Cheesecake
-
With an electric mixer on medium-low speed, beat the softened cream cheese for 3 minutes. Add the granulated sugar, then continue beating, increasing the speed to medium-high until the mixture is light and fluffy (about 5 minutes). It should be completely smooth.
-
Add the large eggs one at a time, beating on low speed just until each egg is combined. Add the room temperature heavy cream and mix until incorporated. Be sure to scrape down the bowl and the paddle several times during the whole process, ensuring you scrape the very bottom of the bowl as well. Finally, add the vanilla extract and mix until just incorporated.
-
Pour the smooth batter into the prepared springform pan. Place the springform pan inside the larger roasting pan. Carefully place both pans into the oven on the middle rack. Carefully fill the roasting pan with boiling water about halfway up the sides of the springform pan, being sure not to splash hot water into the cheesecake batter.
-
Bake the cheesecake for 45 minutes to 1 hour (all ovens are different). The edges should appear set, and the center should jiggle slightly but have no wet spots; it will continue to cook as it cools. Turn off the oven, prop the door open, and allow the cheesecake to cool gradually inside the oven for 1 hour. Then, carefully remove the springform pan from the water bath and place it on a wire rack to cool completely to room temperature.
-
Once completely cool, cover loosely with plastic wrap and refrigerate for at least 4 hours before serving. For best results, chill overnight.
Fresh Strawberry Sauce
-
Process the fresh strawberries, granulated sugar, and lime zest in a food processor or blender until completely smooth. (A stick blender works great for this, minimizing cleanup!)
-
Refrigerate the sauce for at least 1 hour before serving. This sauce is best served cold.
