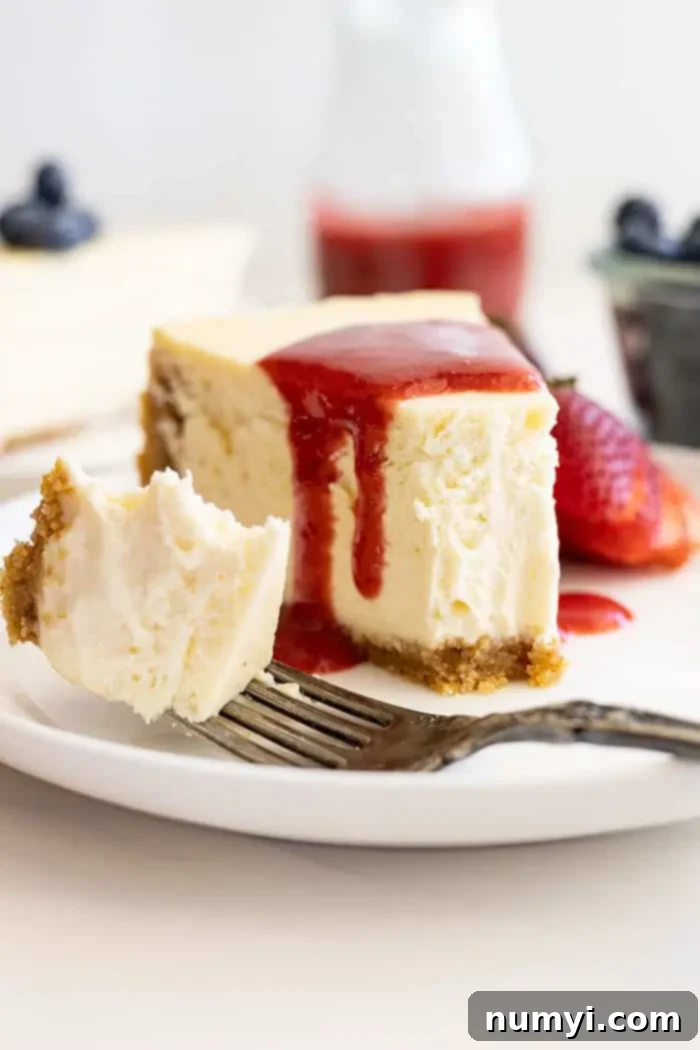
The Best Classic Baked Vanilla Cheesecake Recipe: Smooth, Creamy, and Crack-Free
Indulge in the ultimate classic dessert with this incredible vanilla cheesecake recipe. It’s smooth, unbelievably creamy, and utterly delicious, whether enjoyed plain or topped with your favorite sauces and fruits. Don’t let the idea of a water bath intimidate you – it’s the secret to achieving that perfect, crack-free texture every time!
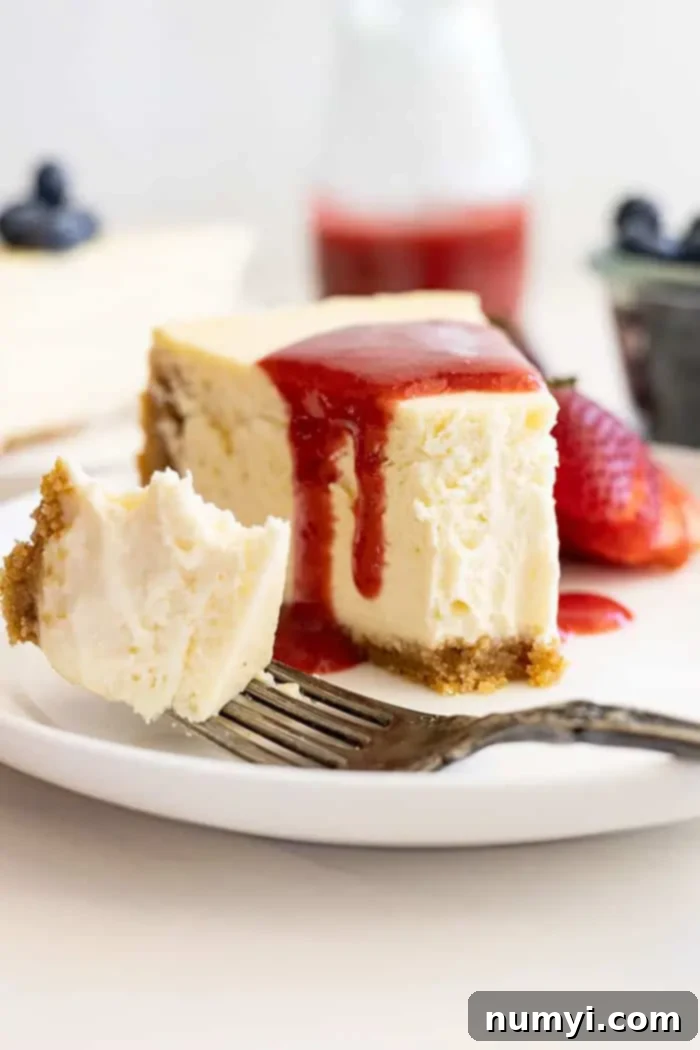
Unlocking the Secret to a Perfect Baked Vanilla Cheesecake
There’s something truly special about a classic recipe, and a simple vanilla cheesecake stands as one of the most beloved and timeless desserts. For years, I, like many home bakers, hesitated to tackle baked cheesecakes, mainly due to the perceived complexity of the water bath. I experimented with numerous “no-water-bath” recipes, hoping to bypass this step, but the results were always disappointing. They often ended up with unsightly cracks or a texture that just wasn’t quite right – lacking that signature silky, dense, yet melt-in-your-mouth creaminess that defines a truly great cheesecake.
But here’s the amazing truth: the water bath isn’t nearly as daunting as it seems! In fact, it’s surprisingly simple and undeniably crucial for achieving cheesecake perfection. It’s what transforms a good cheesecake into an exceptional one. While I’ve enjoyed making plenty of no-bake cheesecakes, such as my popular No-Bake Vanilla Cheesecake or the rich and decadent Dark Chocolate Peanut Butter No-Bake Cheesecake, nothing compares to the traditional, velvety texture of a properly baked cheesecake. If you’re craving that authentic, melt-in-your-mouth experience, this classic baked vanilla cheesecake recipe is precisely what you need.
This recipe demystifies the process, guiding you through each step to ensure a flawless result. From selecting the right ingredients to mastering the gentle bake and cooling process, you’ll gain the confidence to create a dessert that will impress everyone. Say goodbye to cracked tops and uneven textures, and get ready to bake a vanilla cheesecake that is consistently smooth, rich, and utterly divine.
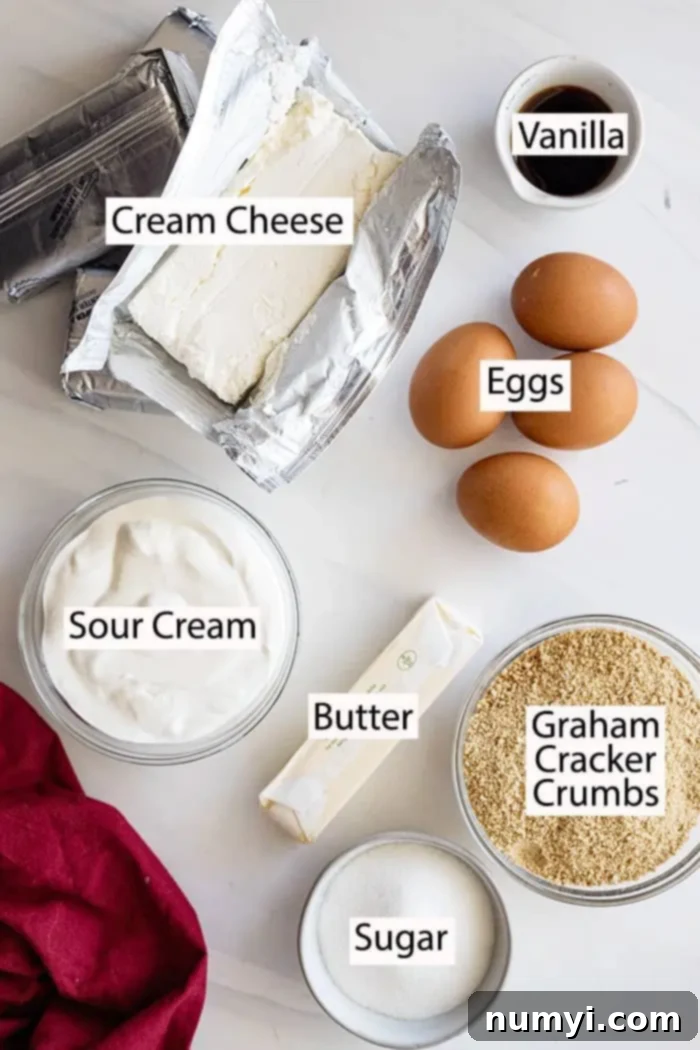
Essential Ingredients for Your Perfect Vanilla Cheesecake
Crafting an exquisite vanilla cheesecake starts with high-quality ingredients. Each component plays a vital role in achieving the desired flavor and texture. Here’s a detailed look at what you’ll need and why:
- GRAHAM CRACKER CRUMBS, BUTTER, SUGAR, & SALT: These form the foundation of our cheesecake – a classic, buttery, and slightly sweet graham cracker crust. The melted butter binds the crumbs and sugar together, creating a firm base that complements the creamy filling. For readers outside the US, digestive biscuits are an excellent substitute for graham crackers, offering a similar texture and flavor profile. A small pinch of salt in the crust balances the sweetness, adding a delightful sweet-and-salty note; feel free to omit it if you prefer.
- CREAM CHEESE: This is the star ingredient! It is absolutely crucial to use full-fat, block-style cream cheese. Avoid spreadable cream cheese found in tubs, as these often contain added ingredients and stabilizers that can alter the cheesecake’s texture and consistency, leading to a less stable and often runnier filling. Similarly, reduced-fat cream cheese is not recommended as it lacks the richness and fat content essential for a truly creamy, decadent cheesecake. Ensure your cream cheese is at room temperature for smooth, lump-free mixing.
- SOUR CREAM: The addition of sour cream is a game-changer. It helps to lighten the texture of the cheesecake slightly, preventing it from becoming overly dense and heavy. It also contributes a subtle tang that perfectly balances the sweetness of the sugar and the richness of the cream cheese, adding depth and complexity to the overall flavor. Like the cream cheese, use full-fat sour cream at room temperature for best results.
- GRANULATED SUGAR: In this recipe, one cup of granulated sugar strikes the perfect balance. It provides ample sweetness without overwhelming the delicate vanilla and cream cheese flavors. You want the cheesecake to be sweet enough to feel like a dessert, but not so sugary that it becomes cloying.
- VANILLA: Vanilla is paramount for a classic vanilla cheesecake. Good quality vanilla extract will infuse your cheesecake with a warm, aromatic flavor. For an even more intense and luxurious vanilla experience, consider using vanilla bean paste or the seeds scraped directly from a fresh vanilla bean. These options will impart beautiful specks of vanilla throughout the filling and a richer, more complex aroma.
- EGGS: Eggs act as a crucial binding agent, providing structure and helping the cheesecake to set beautifully. They contribute to the smooth, custardy texture. It’s important to add them one at a time and mix them gently to avoid incorporating too much air, which can lead to cracks in the finished cheesecake. Ensure eggs are also at room temperature.
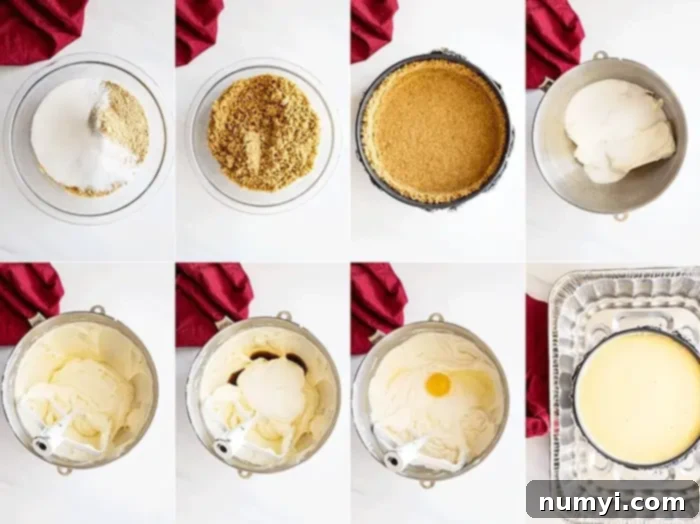
Step-by-Step Guide: How To Make a Flawless Vanilla Cheesecake
Creating a perfect vanilla cheesecake is a rewarding process, and breaking it down into manageable steps makes it even easier. Follow these detailed instructions for a smooth, creamy, and crack-free dessert:
The Perfect Crust
- Prepare Your Pan: First, preheat your oven to 350°F (175°C). Then, prepare your 9-inch springform pan. It’s essential to wrap the outside of the pan securely with several layers of heavy-duty aluminum foil. This creates a barrier, preventing any water from the water bath from seeping into your crust and making it soggy.
- Mix the Crust Ingredients: In a medium-sized bowl, combine the graham cracker crumbs, granulated sugar, melted butter, and a pinch of salt (if using). Mix these ingredients thoroughly until the crumbs are evenly moistened and resemble wet sand.
- Form the Crust: Press the mixture firmly and evenly into the bottom of the prepared springform pan. Extend the crust about halfway up the sides of the pan. Packing it tightly is key here; it ensures a sturdy crust that won’t crumble when you slice your cheesecake.
- Pre-bake the Crust: Bake the crust in the preheated oven for 10 minutes. This pre-baking step helps to set the crust, making it crisp and flavorful, and prevents it from becoming soggy once the filling is added.
Crafting the Silky Filling
- Beat Cream Cheese and Sugar: In the bowl of a stand mixer fitted with the paddle attachment (or using a hand mixer), beat the room-temperature cream cheese and granulated sugar together on medium-low speed. Continue mixing until the mixture is completely smooth and creamy, with no lumps of cream cheese remaining. Be sure to stop and scrape down the sides and bottom of the bowl frequently to ensure everything is thoroughly combined. This prevents pockets of unmixed ingredients.
- Incorporate Sour Cream and Vanilla: Reduce the mixer speed to low. Add the room-temperature sour cream and vanilla extract (or paste/bean). Mix just until combined, again scraping down the sides of the bowl often. The goal is to mix thoroughly but gently to avoid incorporating excess air.
- Add Eggs Gradually: With the mixer still on low speed, add the large eggs one at a time. Mix each egg just until it is barely combined with the batter before adding the next. Overmixing the eggs is a common cause of cracks in cheesecake, as it incorporates too much air, which expands during baking and then collapses upon cooling. Remember to scrape down the sides one final time to ensure a homogenous mixture.
- Prepare for Baking: Gently pour the smooth cheesecake filling into your prepared (and pre-baked) graham cracker crust. Smooth the top with a spatula if needed.
The Indispensable Water Bath
The water bath (or bain-marie) is not just an optional step; it’s the ultimate secret to a moist, smooth, and crack-free cheesecake. Cheesecake loves a humid environment, and a water bath provides just that.
- Heat Water: While preparing your filling, heat several cups of water in a kettle or saucepan until it’s hot but not necessarily boiling.
- Set Up the Water Bath: Place a large roasting pan (or any oven-safe pan significantly larger than your springform pan) in your preheated oven. Carefully set your foil-wrapped springform pan containing the cheesecake filling into the center of the roasting pan.
- Pour Hot Water: With extreme caution, pour the hot water into the roasting pan, ensuring it comes halfway up the sides of your springform pan. The steam created by this hot water circulates in the oven, providing the humid environment that prevents the cheesecake’s surface from drying out too quickly and forming cracks. This gentle, even heat also ensures the cheesecake bakes slowly and uniformly.
- Bake: Bake the cheesecake in the water bath for approximately 1 hour and 10 minutes. The center should still have a slight jiggle when gently shaken, but the edges should be set.
The Art of Cooling
Proper cooling is just as important as the baking process to prevent cracks and achieve the perfect texture.
- Slow Oven Cool Down: Once the baking time is complete, turn off the oven but do not remove the cheesecake. Instead, crack the oven door slightly open (you can use a wooden spoon to keep it ajar). Allow the cheesecake to remain in the cooling oven for at least one hour. This gradual cooling prevents sudden temperature changes, which are a major culprit for cracks.
- Room Temperature Cool Down: After an hour in the cooling oven, carefully remove the cheesecake from the water bath (discard the water). Immediately run a thin, sharp knife around the perimeter of the cheesecake, between the cheesecake and the springform pan. This vital step prevents the cheesecake from sticking to the sides and cracking as it contracts during cooling. Allow the cheesecake to cool completely at room temperature for at least 2 hours.
- Refrigeration: Once cooled to room temperature, transfer the cheesecake to the refrigerator. Cover it loosely with plastic wrap. Refrigerate for a minimum of 6 hours, or ideally overnight. This extended chilling time is crucial for the cheesecake to fully set, firm up, and develop its optimal creamy texture and flavor.
- Serving: To serve, carefully release the outer ring of the springform pan. Slice the cheesecake into 16 generous portions with a warm, sharp knife (wipe the knife clean between slices for neat cuts). Enjoy!
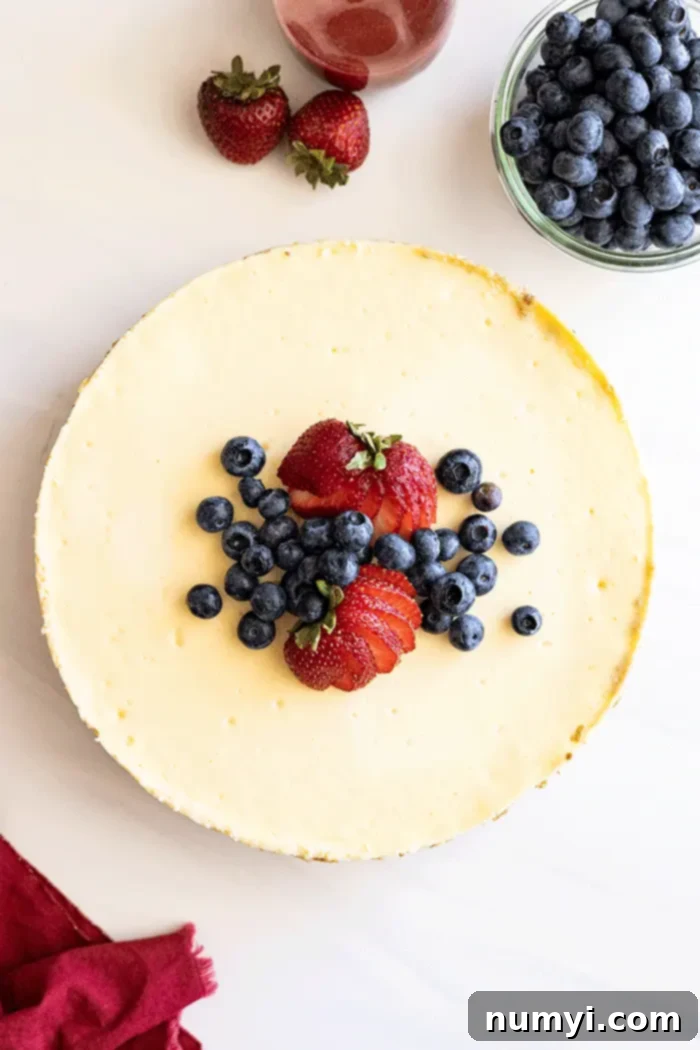
Frequently Asked Questions (FAQs) About Vanilla Cheesecake
Cracks are a common frustration for cheesecake bakers, but they are often preventable. Here are the main reasons why your cheesecake might crack:
- Skipping the Water Bath: Baked cheesecakes thrive in a humid environment. A dry oven causes the surface of the cheesecake to bake and set too quickly, leading to tension that results in cracks as the cheesecake cools and contracts. The water bath provides the necessary moisture.
- Overmixing the Batter: Introducing too much air into the cheesecake batter, especially when adding eggs, can cause cracks. Air bubbles expand during baking and then collapse dramatically upon cooling, creating fissures on the surface. Always mix cheesecake batter on low speed.
- Sudden Temperature Shock: Drastic changes in temperature are detrimental to cheesecake. Removing it immediately from a hot oven into a cooler kitchen environment can cause it to cool too rapidly, leading to cracking. Slow cooling in the oven is vital.
- Not Loosening the Edges: As cheesecake cools, it naturally contracts. If the cheesecake is stuck to the sides of the springform pan, this contraction can pull at the surface, causing it to tear and crack. Running a knife around the edge immediately after removing it from the oven helps prevent this.
Don’t despair if your cheesecake develops cracks! It will still taste absolutely delicious. The easiest way to “fix” a cracked cheesecake is to cleverly conceal the imperfections. Generously cover the top with fresh fruit, a luscious fruit sauce (like strawberry or cherry), whipped cream, chocolate ganache, or a simple sour cream topping. These toppings will beautifully hide any cracks and add another layer of flavor and appeal to your dessert.
Freezing cheesecake is a great way to prepare it in advance or save leftovers. Here’s how to do it properly:
- Allow the cheesecake to cool completely to room temperature and then chill thoroughly in the refrigerator for at least 6 hours (or overnight).
- Carefully remove the outer ring of the springform pan.
- Wrap the entire cheesecake tightly in a couple of layers of plastic wrap, ensuring no air can get in.
- Follow with a layer of heavy-duty aluminum foil for extra protection against freezer burn.
- Freeze for up to 3 months. To thaw, simply transfer the wrapped cheesecake to the refrigerator overnight.
A perfectly baked cheesecake should have edges that are set and slightly puffed, while the very center (about a 2-3 inch circle) should still have a slight jiggle when you gently shake the pan. If the entire cheesecake is firm and no longer jiggles, it’s likely overbaked, which can lead to a dry texture or cracks. An instant-read thermometer inserted an inch from the edge should register around 150°F (65°C).
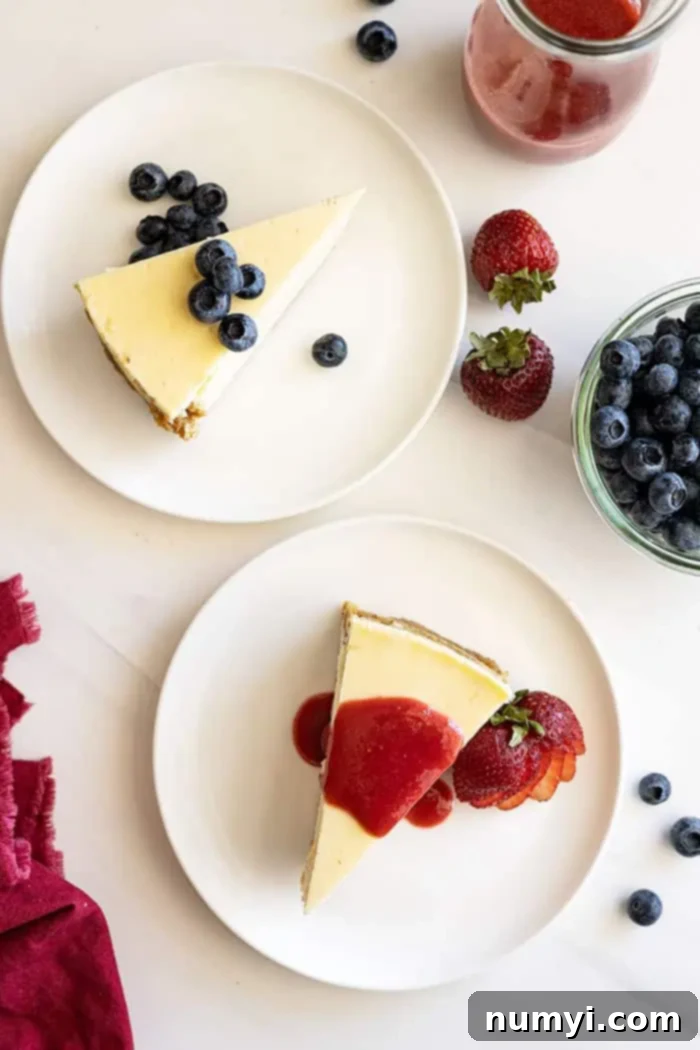
Expert Tips for Cheesecake Perfection
Achieving a picture-perfect and delicious vanilla cheesecake consistently comes down to a few key techniques. Keep these expert tips in mind for flawless results every time:
- Always Use Full-Fat, Block-Style Cream Cheese and Sour Cream: This cannot be stressed enough. The fat content is crucial for the rich flavor and creamy texture of a traditional baked cheesecake. Reduced-fat versions or spreadable cream cheese lack the necessary structure and richness.
- Ensure All Ingredients Are at Room Temperature: This is fundamental for a smooth, lump-free batter. Room temperature ingredients (cream cheese, sour cream, eggs) emulsify much more easily and evenly, creating a uniform mixture without overmixing.
- Scrape the Sides and Bottom of the Mixing Bowl Often: As you mix, ingredients can cling to the sides or bottom of the bowl. Frequent scraping ensures all components are fully incorporated, preventing pockets of unmixed sugar or cream cheese.
- Mix on Low Speed and Avoid Overmixing: When making cheesecake filling, never go above speed 1 or 2 on your mixer. High speeds incorporate too much air into the batter, which is a primary cause of cracks. Mix only until ingredients are just combined.
- Embrace the Water Bath: The water bath is your best friend for a crack-free cheesecake. It creates a humid environment in the oven, promoting even, gentle baking and preventing the top from drying out and cracking. It truly makes a significant difference in the final texture.
- Avoid Sudden Temperature Changes: Cheesecakes are sensitive to abrupt temperature shifts. Once baking is complete, turn off your oven, crack the door slightly (with a wooden spoon), and allow the cheesecake to cool slowly inside the oven for at least an hour. This gradual cooling process is crucial for preventing cracks.
- Run a Sharp Knife Around the Edges After Baking: As the cheesecake cools, it naturally contracts. If it’s stuck to the pan, this contraction will cause it to pull and crack. Immediately after removing the cheesecake from the oven, gently run a thin, sharp knife around the entire perimeter of the cheesecake to loosen it from the springform pan.
- Chill Thoroughly: Patience is a virtue when it comes to cheesecake. After cooling at room temperature, the cheesecake requires at least 6 hours (ideally overnight) of refrigeration to fully set. This chilling time allows the flavors to meld and the texture to firm up to that perfect, sliceable consistency.
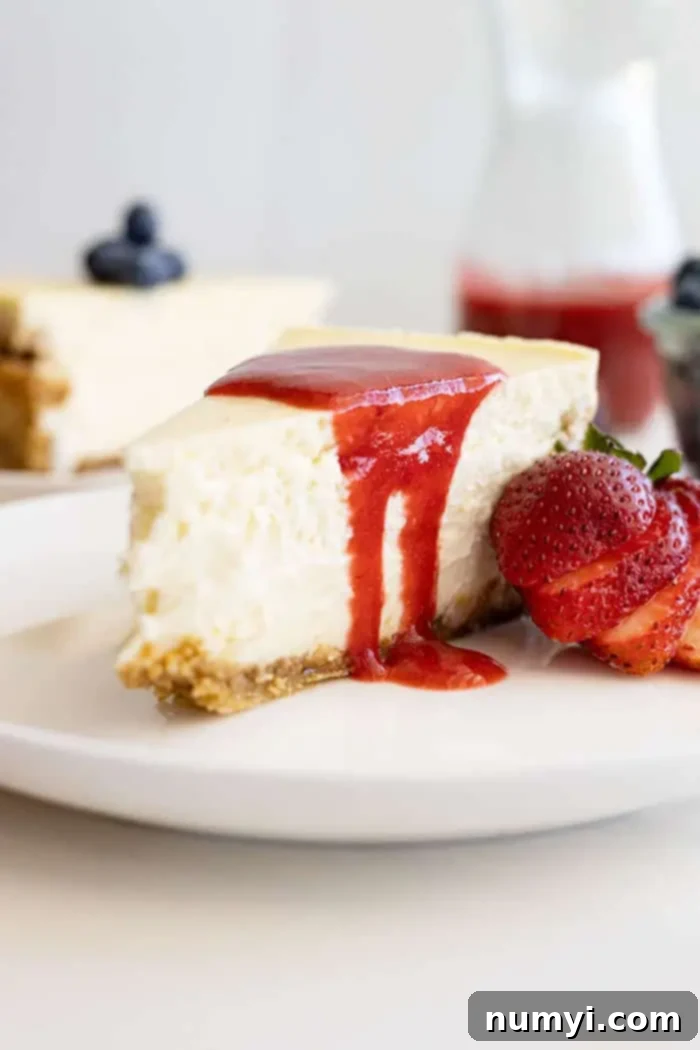
Delicious Toppings to Elevate Your Vanilla Cheesecake
While this classic vanilla cheesecake is absolutely divine on its own, it also serves as a perfect canvas for a myriad of delicious toppings. Here are some fantastic options to elevate your dessert, whether you want to add flavor, texture, or even cleverly conceal any minor cracks:
- Simple Sour Cream Topping: This is a wonderful, easy option that adds a slight tang and extra creaminess. It’s particularly effective for camouflaging any cracks that might have formed. To make it, simply combine 2 cups of room-temperature full-fat sour cream with 1/2 cup of confectioners’ sugar and 1/2 teaspoon of vanilla extract. Gently spread this mixture evenly over the top of your completely cooled and chilled cheesecake.
- Fresh Fruit or Fruit Sauces: A vibrant array of fresh berries (strawberries, blueberries, raspberries) or sliced peaches provides a beautiful contrast in color and flavor. You can also make a simple fruit compote or sauce by simmering fruit with a little sugar and lemon juice. Classic choices like strawberry sauce or cherry pie filling are always a hit.
- Homemade Lemon Curd: For a bright and zesty kick, a dollop of homemade lemon curd offers a delightful citrusy counterpoint to the rich vanilla.
- Whipped Cream: Light and airy homemade whipped cream (especially good if it’s homemade!) is a classic and simple topping that adds a touch of elegance. You can pipe it on top or simply dollop it for a rustic look.
- Chocolate Ganache: For chocolate lovers, a decadent chocolate ganache poured over the top creates a rich, glossy finish that is simply irresistible.
- Salted Caramel Sauce: Drizzle your cheesecake with a luscious salted caramel sauce for a sweet and savory indulgence that pairs wonderfully with vanilla.
- Nut Toppings: A sprinkle of toasted pecans, walnuts, or even crushed candied nuts can add a delightful crunch and nutty flavor.
Don’t forget to serve your cheesecake chilled for the best flavor and texture. A warm, sharp knife wiped clean between each slice will ensure beautiful, clean cuts every time.
HUNGRY FOR MORE? Subscribe to my newsletter and follow along on Pinterest, Facebook, and Instagram for all my latest updates!
Vanilla Cheesecake
16
Malinda Linnebur
Save Recipe
Saved!
35 minutes
1 hour
10 minutes
9 hours
10 hours
45 minutes
Prevent your screen from going dark
Ingredients
CRUST:
-
2 cups (245g) graham cracker crumbs (about 16 full sheets) -
½ cup (113g) butter, melted -
⅓ cup (65g) granulated sugar -
¼ teaspoon salt
CHEESECAKE:
-
4 (8 ounce) (226g) block-style full-fat cream cheese, at room temperature -
1 cup (200g) granulated sugar -
1 cup (240g) full-fat sour cream, at room temperature -
1 tablespoon vanilla -
4 large eggs, at room temperature
Instructions
CRUST:
-
Preheat oven to 350°F (175°C). Wrap a 9″ springform pan with heavy-duty foil to prevent water from leaking into the cheesecake; set aside.
-
In a medium bowl combine the graham cracker crumbs, butter, sugar, and salt. Press into prepared pan and halfway up the sides. Pack this firmly so it doesn’t crumble when slicing. Bake for 10 minutes.
CHEESECAKE:
-
In the bowl of a stand mixer fitted with the paddle attachment mix the cream cheese and sugar on medium speed until smooth and creamy. Scrape sides often.
-
Mix in the sour cream and vanilla on low speed. Scrape sides often.
-
Add the eggs, one at a time, mixing on low speed just until combined. Don’t overmix. Scrape the sides often.
-
Pour filling into crust. Place a large roasting pan in the oven and set the cheesecake in the middle. Carefully pour hot water in the roasting pan. Pour enough to come halfway up the springform pan. Bake for 1 hour 10 minutes. Turn off the oven and crack the door. DO NOT remove the cheesecake or disturb the cheesecake for 1 hour.
-
Remove from the oven and run a sharp knife around the pan to loosen the cheesecake. Allow to cool for 2 hours at room temperature then for a minimum of 6 hours in the refrigerator. To serve remove outer ring and slice into 16 slices.
Notes
- STORAGE: Store cheesecake covered in the refrigerator for up to 10 days.
- FREEZER-FRIENDLY: Wrap completely cooled cheesecake in plastic wrap then in heavy-duty foil. Freeze for up to 3 months.
- WATER BATH: If you don’t have a large enough roasting pan, place a large pan of water beneath the cheesecake while baking to provide humidity.
Nutrition
Calories: 304kcal |
Carbohydrates: 43g |
Protein: 4g |
Fat: 13g |
Saturated Fat: 6g |
Polyunsaturated Fat: 1g |
Monounsaturated Fat: 4g |
Trans Fat: 0.2g |
Cholesterol: 71mg |
Sodium: 256mg |
Potassium: 92mg |
Fiber: 1g |
Sugar: 27g |
Vitamin A: 345IU |
Vitamin C: 0.1mg |
Calcium: 48mg |
Iron: 1mg
Did you make this?Let me know by sharing a picture and tagging @countryside_cravings on Instagram
