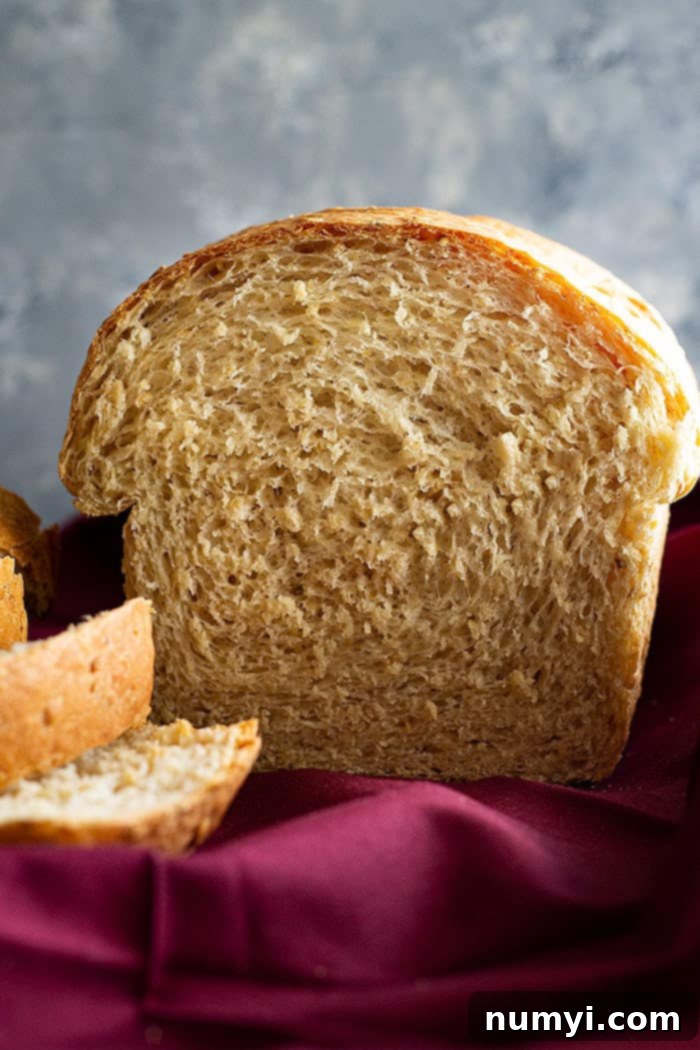
Delicious Homemade Oatmeal Sandwich Bread: The Ultimate Recipe for Hearty Sandwiches & Toast
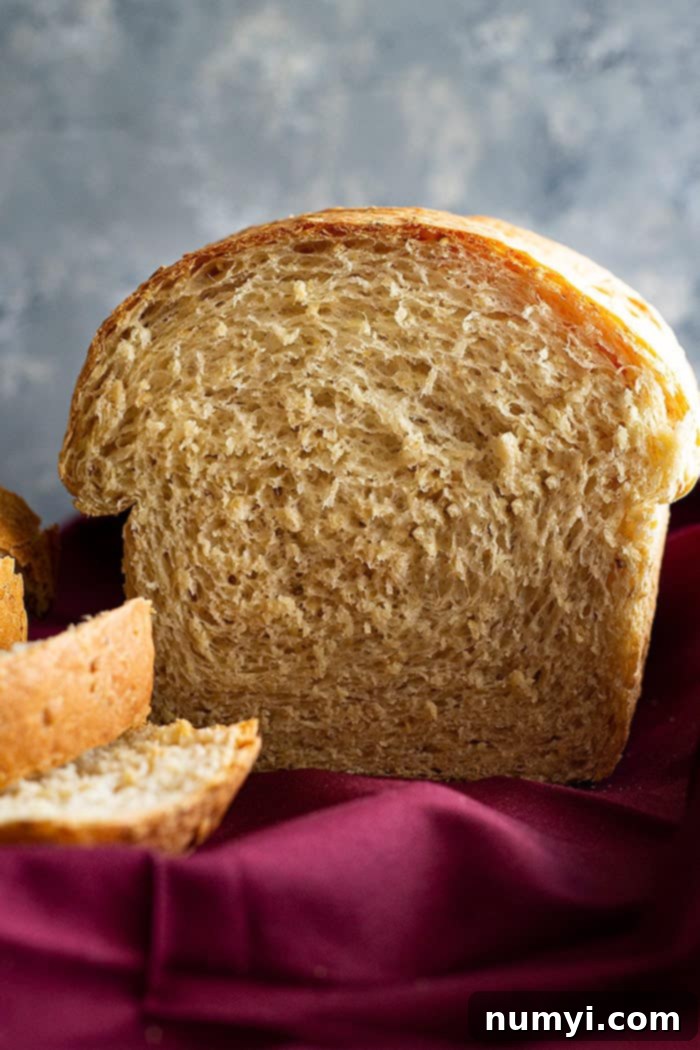
There’s a special kind of magic that fills a home with the scent of freshly baked bread. It’s a warmth, a comfort, and a promise of deliciousness that few other things can offer. And when that bread is homemade oatmeal sandwich bread, you’re in for a real treat! This isn’t just any loaf; it’s a hearty, wholesome bread bursting with a subtle oaty flavor and a wonderfully chewy texture that elevates every sandwich and makes for the absolute best toast imaginable.
While we adore our Soft White Sandwich Bread for its classic appeal, and often pair our dinners with delightful Honey Wheat Rolls or aromatic Rosemary Parmesan Bread, this oatmeal variation brings something truly unique to the table. It’s a fantastic way to introduce more wholesome grains into your diet without sacrificing flavor or texture. If you’re looking to break away from the ordinary and add a touch of rustic charm to your daily meals, this oatmeal bread recipe is exactly what you need.
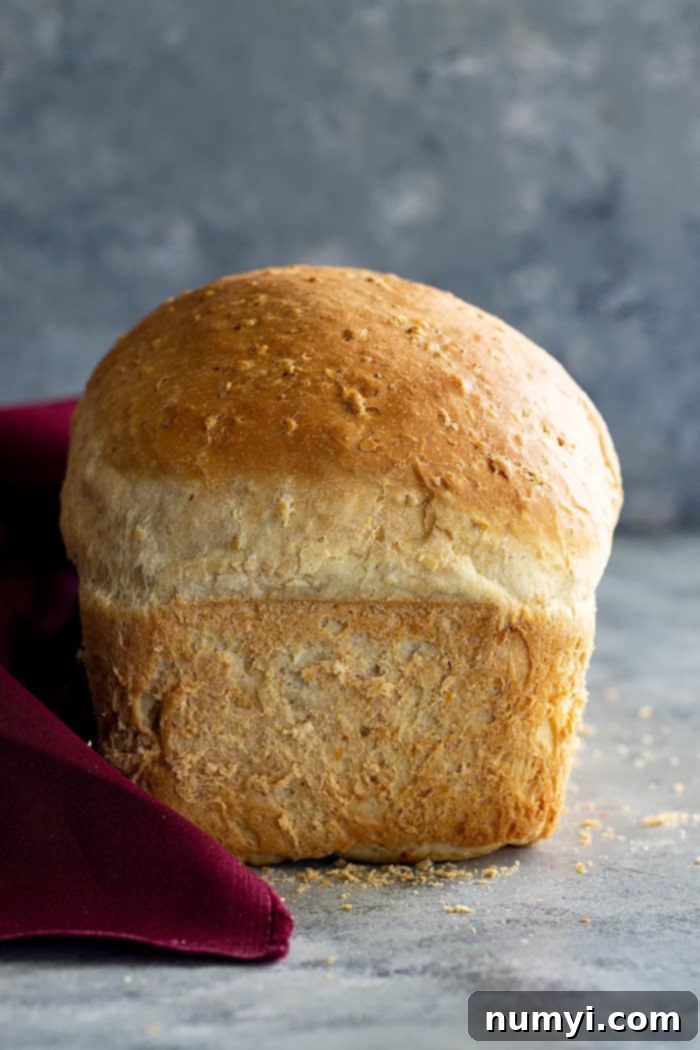
Why You’ll Love This Homemade Oatmeal Sandwich Bread
What makes this specific loaf so special, you ask? It’s all in the oats! The addition of oatmeal transforms a simple bread recipe into a truly extraordinary one. Here’s why this oatmeal sandwich bread will quickly become a household favorite:
- Unforgettable Flavor: The oats infuse the bread with a mild, nutty, and subtly sweet flavor that is incredibly comforting and distinct from traditional white bread. It’s wholesome without being overpowering.
- Perfect Texture: Oats contribute a delightful chewiness and a slightly coarser crumb that is still incredibly soft and moist. It holds up beautifully to all sorts of fillings, from delicate deli meats to robust spreads.
- Enhanced Heartiness: This is a bread that truly satisfies. Its hearty nature makes it ideal for substantial sandwiches and provides a satisfying base for your morning toast, keeping you fuller for longer.
- Health Benefits: Oats are known for their fiber content, which aids digestion and can contribute to heart health. Baking with oats is a simple way to add more whole grains to your diet.
- Versatile for Every Meal: Whether it’s the foundation of a classic lunch sandwich, a thick slice of buttered toast for breakfast, or a side for your dinner, this bread is wonderfully versatile.
So, if you’re looking to add a new favorite to your baking repertoire, it’s time to embrace the wholesome goodness of this homemade oatmeal sandwich bread!
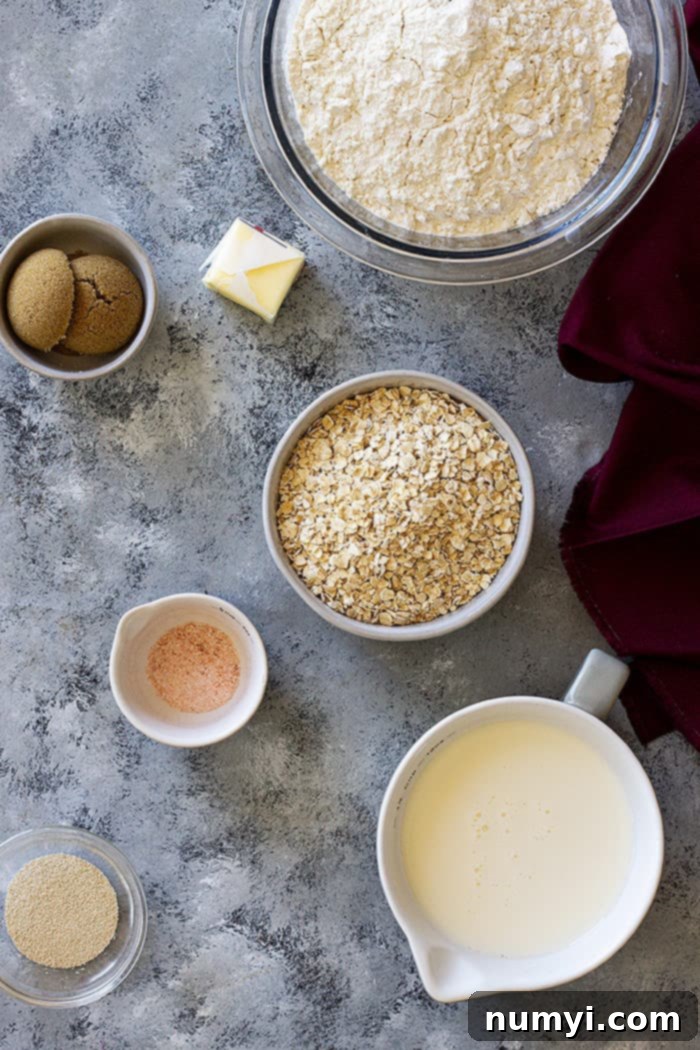
Essential Ingredients for Your Oatmeal Sandwich Bread
Every great bread begins with quality ingredients. For this oatmeal sandwich bread, each component plays a crucial role in achieving that perfect taste and texture. Understanding their purpose will help you master this recipe.
- Milk: Warm milk is vital for dissolving the yeast, providing moisture, and contributing to a tender crumb. It also enhances the overall flavor, making the bread richer and more appealing. We recommend using milk warmed to about 110°F (43°C) – warm enough to activate the yeast, but not so hot that it kills it.
- Brown Sugar: This isn’t just for sweetness! Brown sugar serves multiple functions: it acts as food for the yeast, helping it activate and produce carbon dioxide for a good rise; it adds a subtle caramel-like flavor that complements the oats beautifully; and it aids in giving the crust a lovely golden-brown color. You can substitute with regular granulated sugar, a touch of molasses, or even honey if preferred.
- Yeast: The heart of bread making! Active dry yeast is what makes your bread rise, giving it its airy texture and increasing its volume. It’s also responsible for that distinct, irresistible aroma and flavor of homemade bread. Ensuring your yeast is fresh and active (by proofing it) is the first key step to successful baking.
- Flour: For this recipe, we highly recommend using bread flour. Its higher protein content leads to stronger gluten development, resulting in a bread with excellent structure, a chewier texture, and a better rise. While all-purpose flour can be substituted, you might find the bread slightly less chewy and voluminous.
- Oats: The star of the show! Oats provide that signature nutty flavor and a wonderful added texture. We prefer quick-cooking oats for a more uniform, slightly finer texture throughout the bread. However, old-fashioned rolled oats can also be used; they will result in larger, more distinct pieces of oatmeal in the crumb, which some people absolutely love for an even heartier feel. It’s truly a matter of personal preference.
- Salt: Often underestimated, salt is incredibly important in bread baking. It doesn’t just add flavor; it also regulates yeast activity, preventing the dough from rising too quickly. Without salt, bread can taste bland, have an overly strong yeasty smell, and develop large, undesirable holes in the crumb.
- Butter: Softened butter contributes richness, flavor, and helps keep the bread wonderfully tender and moist. It enriches the dough, resulting in a softer crust and a more luxurious interior.
Step-by-Step Guide: How to Make Oatmeal Sandwich Bread
Baking homemade bread might seem intimidating, but with this detailed guide, you’ll be shaping and baking like a pro in no time. Follow these steps for a perfect loaf of oatmeal sandwich bread:
- 1. Activate Your Yeast: This initial step is crucial. Combine your warm milk, brown sugar, and active dry yeast in the bowl of your stand mixer. Let it sit for 5-10 minutes. If your mixture becomes foamy and bubbly, your yeast is active and ready to work its magic. If not, your yeast might be old or the milk temperature was off, and it’s best to start with new yeast.
- 2. Form the Dough: Add the remaining ingredients (flour, oats, softened butter, and salt) to the foamy yeast mixture. Stir them together until they just combine into a shaggy dough. If using a stand mixer, switch to the dough hook attachment. If kneading by hand, turn the dough out onto a clean work surface.
- 3. Knead Until Smooth and Elastic: Kneading develops the gluten in the flour, which gives the bread its structure.
- With a Stand Mixer: Knead on a low speed (usually speed 1 or 2) for about 8-10 minutes. The dough should become smooth, elastic, and pull away from the sides of the bowl.
- By Hand: This will take a bit longer, typically 15-20 minutes. Knead by pushing the dough away with the heels of your hands, then folding it back, rotating, and repeating. The dough is ready when it passes the “windowpane test” (you can stretch a small piece thin enough to see light through it without tearing) and springs back when gently poked. For visual guidance, this America’s Test Kitchen video on hand kneading is very helpful.
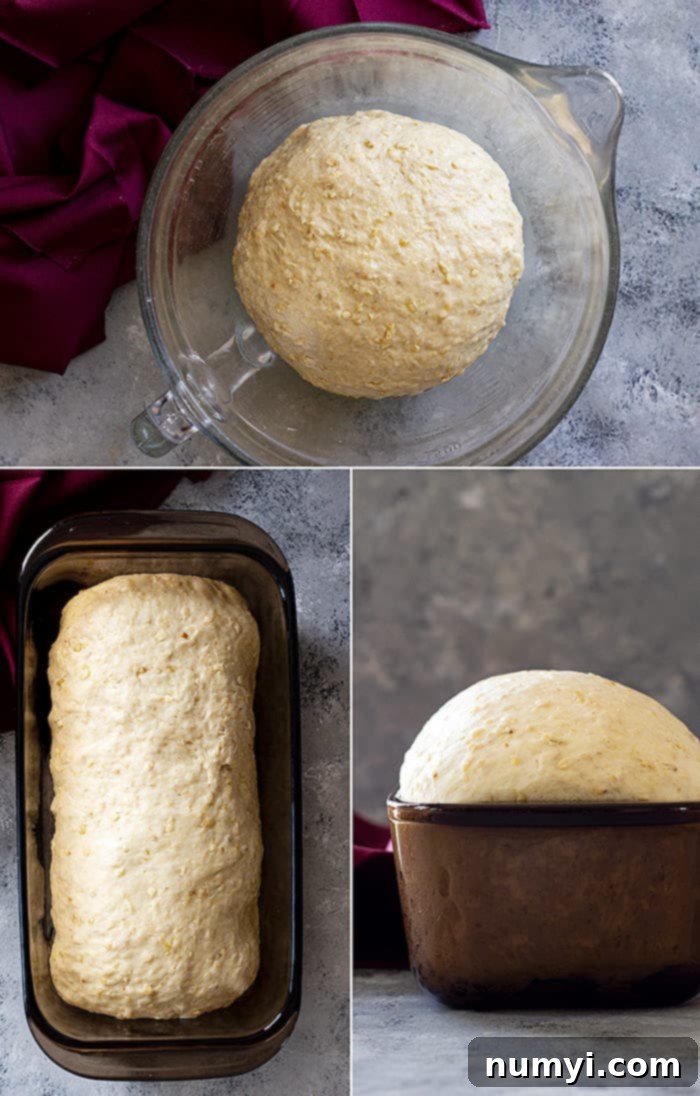
- 4. First Rise (Bulk Fermentation): Lightly grease a large bowl, place the kneaded dough in it, turning once to coat. Cover the bowl loosely with plastic wrap or a damp kitchen towel. Let the dough rise in a warm, draft-free place until it has doubled in size. This usually takes 1 to 1.5 hours, depending on your room temperature. This rise allows the flavor to develop and creates a light, airy texture.
- 5. Punch Down and Shape: Once the dough has doubled, gently “punch it down” to release the accumulated gases. Turn the dough out onto a lightly floured surface (avoid adding too much extra flour, as this can make the bread dense). Briefly knead it a few times to evenly distribute the gases. Then, shape the dough into a tight loaf. A common method is to flatten it into a rectangle, fold the longer sides towards the middle, and then roll it up tightly, pinching the seam closed.
- 6. Second Rise (Proofing): Grease a 9×5-inch loaf pan and place the shaped dough seam-side down into it. Cover loosely again with plastic wrap or a damp towel. Let it rise in a warm spot for another 45-60 minutes, or until it has almost doubled in size and looks puffy. It should pass the “poke test” – if you gently poke it with a floured finger, the indentation should slowly spring back.
- 7. Bake to Golden Perfection: Preheat your oven to 350°F (175°C). Bake the loaf for approximately 30-35 minutes, or until the crust is golden brown and the internal temperature reaches 200-210°F (93-99°C). If you tap the bottom of the baked loaf, it should sound hollow.
- 8. Cool Completely: Once baked, immediately remove the bread from the pan and place it on a wire rack to cool completely. This is crucial for preventing a soggy bottom and allowing the crumb to set properly. Slicing too early can result in a gummy texture.
Frequently Asked Questions & Expert Tips
Can I use a bread machine for this recipe?
Absolutely! Bread machines are fantastic for simplifying the process. While our recipe is designed for conventional baking, you can certainly adapt it. Just add the ingredients to your bread machine according to your manufacturer’s instructions for a “basic” or “whole wheat” cycle, usually liquid first, then dry ingredients, and yeast last. The exact order might vary, so always refer to your machine’s manual.
Can bread dough be made ahead of time?
Yes, you can prepare the dough in advance! After you have completed the kneading step and the first rise, gently punch down the dough. Place it in a lightly greased bowl, cover it tightly with plastic wrap, and refrigerate for up to 15 hours. When you’re ready to bake, remove the dough from the refrigerator and let it come to room temperature (this usually takes about 1.5-2 hours, depending on how cold your kitchen is) before continuing with the shaping and second rise steps as directed in the recipe.
Glass bread pan or a metal bread pan? Which is better?
The type of bread pan you use can definitely affect your crust! Both glass and metal pans conduct heat differently:
- Glass Bread Pans: Glass heats up slower than metal but retains heat for longer. This typically results in a bread with a softer, lighter, and less crispy crust. If you prefer a lighter, more tender crust, a glass pan is a good choice. However, sometimes bread can take slightly longer to bake in glass, so monitor it carefully.
- Metal Bread Pans: Metal, especially darker-colored metal pans, heats up quickly and transfers heat efficiently. This produces a bread with a crispier, browner crust. If you love a good, sturdy, golden-brown crust, a dark metal pan is often preferred. Lighter metal pans will yield results somewhere in between. For this oatmeal sandwich bread, a metal pan often gives that ideal robust crust.
Creative Uses for Your Delicious Homemade Oatmeal Sandwich Bread
Beyond being a stellar sandwich bread, this versatile loaf can be enjoyed in so many delicious ways. Its hearty nature and delightful flavor make it perfect for:
- Any Sandwich: Seriously, this bread is a game-changer for sandwiches! It’s sturdy enough to hold generous fillings without getting soggy, making it exceptional for a classic BLT, a piled-high turkey sandwich, a wholesome veggie sandwich, or a melty grilled cheese.
- The BEST Toast: If you thought regular toast was good, wait until you try toast made from this oatmeal bread. The slightly chewy texture becomes wonderfully crisp on the outside while remaining soft on the inside, making it the perfect vehicle for butter, jam, or your favorite spread.
- Avocado Toast: Elevate your avocado toast game! The nutty flavor of the oatmeal bread pairs beautifully with creamy avocado and a sprinkle of everything bagel seasoning or red pepper flakes.
- Homemade Croutons: Cut stale slices into cubes, toss with olive oil and seasonings, and bake until crispy. These oatmeal bread croutons will add a delightful texture and flavor to your salads and soups.
- Flavorful Breadcrumbs: Don’t let any scraps go to waste! Process dried oatmeal bread into breadcrumbs for coating chicken or fish, topping casseroles, or making meatballs.
- Incredible French Toast: Its hearty crumb absorbs the custard mixture wonderfully, leading to a golden, fluffy, and flavor-packed French toast. A perfect brunch treat!
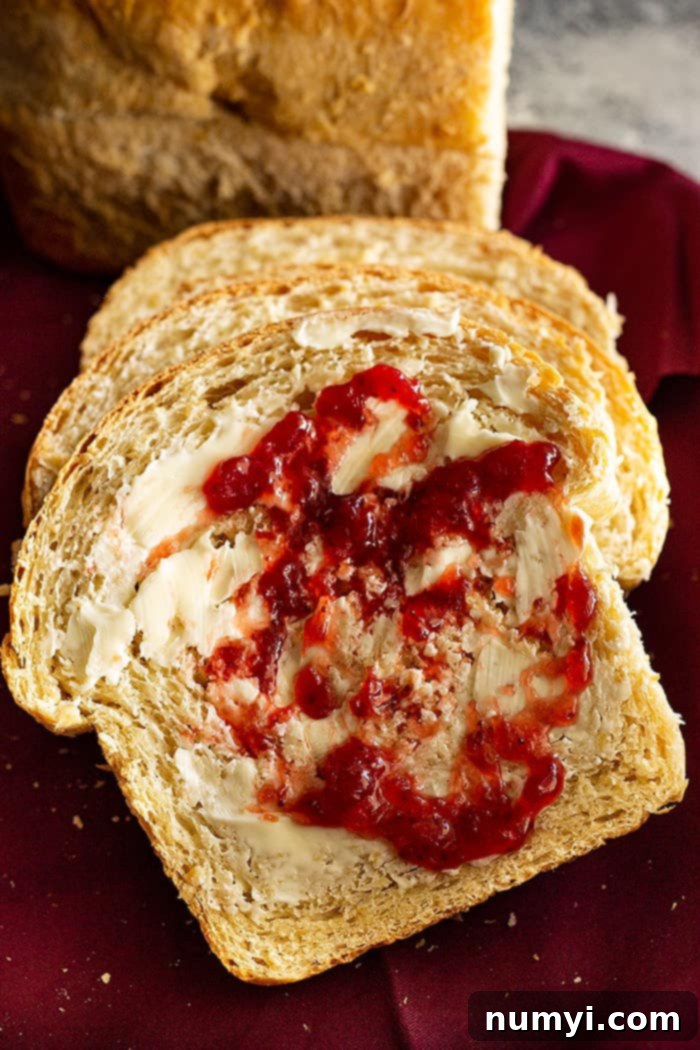
Make Your Oatmeal Bread Extra Special
Want to add a little something extra to your homemade loaf? Here are a couple of simple tricks to make your oatmeal sandwich bread even more appealing:
- Shiny Crust with Toasted Oats: Just before baking, brush the top of your loaf with a beaten egg (an egg wash). This will give your bread a beautiful golden shine. While the egg wash is still wet, sprinkle generously with extra quick-cooking or old-fashioned oats for a rustic, textured topping. The egg wash acts as glue, ensuring the oats stick perfectly during baking.
- Rustic Flour Dusting: For a charming, artisanal look, lightly spray the top of your loaf with a little water just before placing it in the oven. Then, dust it with a light coating of flour. This creates a slightly crusty, beautifully textured exterior that looks straight out of a European bakery.
HUNGRY FOR MORE? Don’t miss out on our latest recipes and baking tips! Subscribe to my newsletter and follow along on Pinterest, Facebook, and Instagram for all my latest updates!
Oatmeal Sandwich Bread
Ingredients
- 1¼ cups (295ml) warm milk (about 110°F)
- 3 tablespoons packed brown sugar
- 1½ teaspoons active dry yeast
- 2½ cups (330g) bread flour
- 1 cup (95g) quick cooking oats
- 2 tablespoons butter, softened
- 1 teaspoon salt
Instructions
-
Whisk together the milk, yeast, and sugar in the bowl of your stand mixer and let stand for 5 minutes or until mixture is foamy.
-
Add remaining ingredients and stir to combine then switch to the dough hook. Knead on low speed (speed 1 or 2) for about 10 minutes or until the dough is smooth and elastic. Lightly grease a bowl and place dough in the bowl to rise. Cover loosely with plastic wrap. Let rise in a warm area until doubled in size.
-
Grease a 9×5 loaf pan and set aside.
-
Punch the dough down and turn out onto a work surface. Don’t add flour at this point. Knead the dough a few times to remove any trapped air bubbles and roll into a small rectangle. Roll the dough and pinch the seam to seal. Place in prepared pan.
-
Cover loosely with plastic wrap and let rise in a warm area until almost doubled in size. Bake in a 350°F oven for 30 minutes or until golden brown and sounds hollow when you tap on it. Allow bread several minutes before slicing.
Notes
- Storage: Store completely cooled bread tightly wrapped in plastic wrap at room temperature for up to 5 days or in the refrigerator for up to 10 days.
- Make-Ahead: After you have kneaded the dough place in a lightly greased bowl and cover tightly with plastic wrap. Place in the refrigerator for up to 15 hours. Remove from the refrigerator and allow the dough to come to room temperature (about 2 hours) before continuing with the recipe.
- Freezer Friendly: Let the dough rise 1 time then punch the dough down and shape into a loaf. Freeze in a disposable bread pan or in a ziploc bag. Freeze for up to 3 months. To use remove from freezer and thaw completely at room temperature (about 4-5 hours) then bake as directed. Or freeze completely cooled loaves by wrapping tightly in plastic wrap and freeze for up to 3 months.
- Nutrition facts: Since different brands of ingredients have different nutritional information, the information shown is just an estimate.
Nutrition
