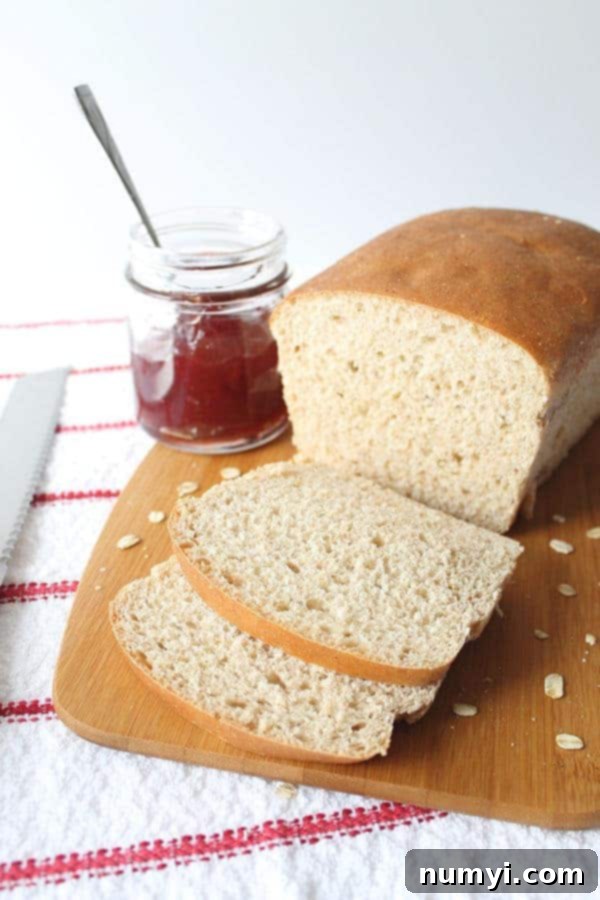
Bake the Best Homemade Whole Wheat Oatmeal Bread: Your Ultimate Guide
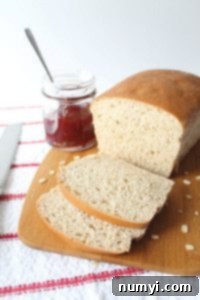
There’s nothing quite like the comforting aroma and taste of freshly baked bread, and this **Whole Wheat Oatmeal Bread** is truly in a league of its own. Imagine sinking your teeth into a slice, perfect for anything from a classic peanut butter and jelly sandwich to a hearty turkey and cheese masterpiece. Brimming with wholesome fiber and boasting an incredibly rich taste and satisfying texture, this simple yet rewarding bread recipe will quickly become your go-to. Once you experience the unparalleled goodness of homemade, you’ll find it nearly impossible to go back to store-bought loaves!
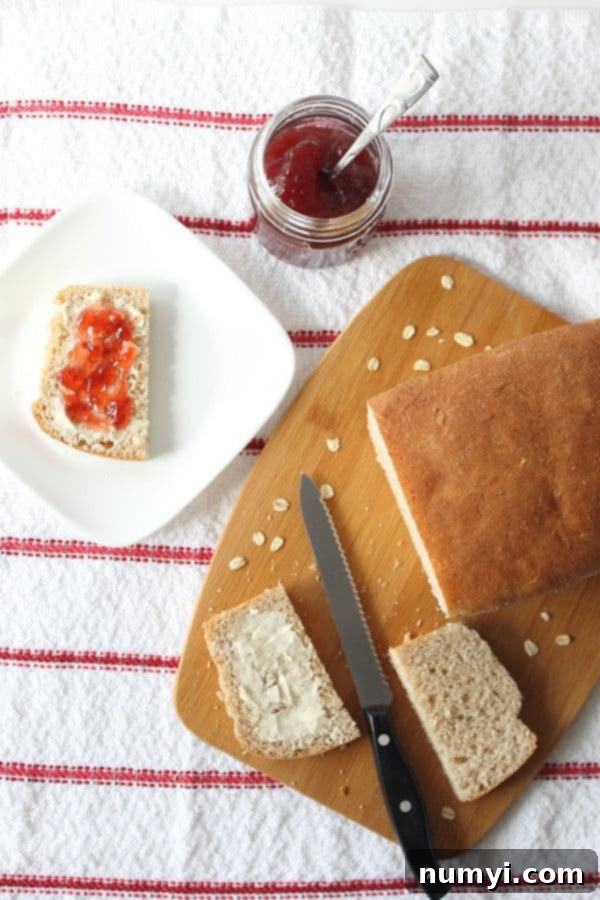
Why You’ll Fall in Love with This Homemade Whole Wheat Oatmeal Bread
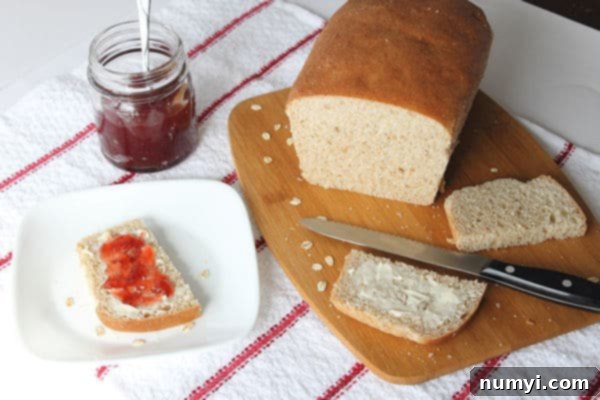
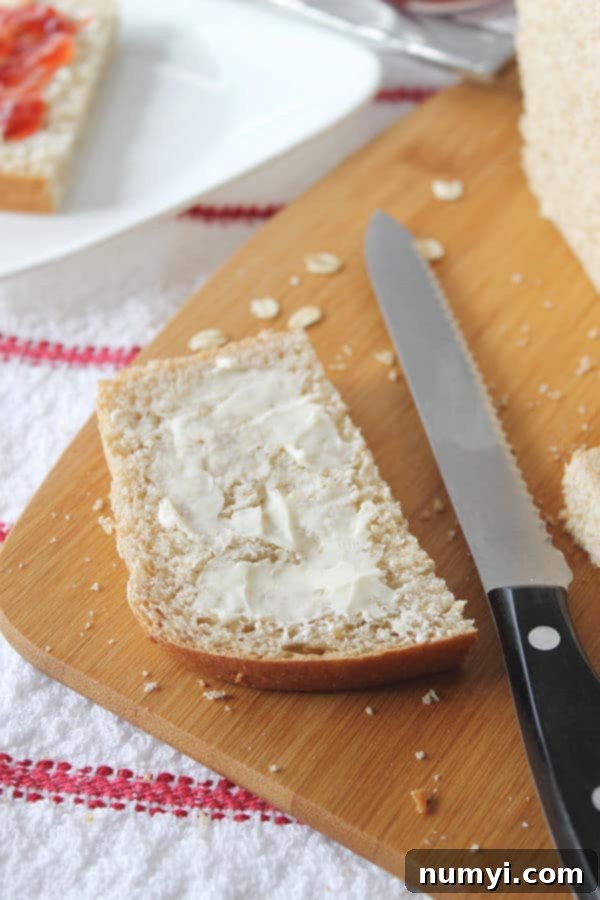
That signature scent of warm, yeasty bread wafting through your kitchen is just the beginning of the magic. This whole wheat oatmeal bread isn’t just a treat for your senses; it’s a versatile staple that truly elevates any meal. Whether you crave a substantial turkey sandwich for lunch, a perfectly crisp piece of toast slathered with creamy peanut butter and sweet fruit jelly for breakfast, or a wholesome accompaniment to your favorite soup, this bread delivers every time.
What makes this particular loaf so exceptional is its unique balance. It strikes a delightful note of slight sweetness, derived from natural honey, while maintaining a wonderfully hearty and satisfying texture from the whole wheat and oats. This combination makes it incredibly adaptable – equally at home with savory fillings or sweet spreads. But let’s be honest, the moment it emerges golden-brown and warm from the oven, its irresistible charm is at its peak. Few things compare to that first bite of a freshly baked slice!
I genuinely believe that everyone should experience the joy of baking their own bread. Many people find the idea intimidating, conjuring fears of failed yeast, improper kneading, or a loaf that simply refuses to rise. However, I’m here to tell you that bread making is far more approachable than you might think. It’s a therapeutic, hands-on practice that offers immense satisfaction and, over time, can save you a considerable amount of money compared to buying bread regularly. Moreover, you control every ingredient, ensuring a wholesome and delicious product for your family. So, let’s banish those fears and get ready to transform simple ingredients into a beautiful, fragrant loaf!
Essential Ingredients for Your Perfect Whole Wheat Oatmeal Bread
The beauty of bread lies in its simplicity, often requiring just a few basic ingredients. However, this recipe incorporates a couple of thoughtful additions that contribute significantly to the rich flavor profile and wonderful texture we all adore. You’ll be working with a foundational blend that delivers both nutrition and incredible taste.
Here’s what you’ll need to gather:
- Warm Milk: The ideal temperature is crucial for activating your yeast, typically around 105-115°F (40-46°C). It provides the necessary liquid and adds a subtle richness to the dough.
- Dry Active Yeast: This is the magical leavening agent that makes your bread rise, giving it that soft, airy interior. Ensuring it’s active is the first step to a successful bake.
- Egg: Adds richness, helps with structure, and contributes to the golden crust and tender crumb.
- Honey: Not only provides a natural, gentle sweetness that complements the oats and whole wheat, but it also acts as food for the yeast and helps achieve a beautiful golden-brown crust.
- Melted Butter: Introduces a lovely depth of flavor and moisture, resulting in a more tender and luxurious loaf.
- Salt: Essential for enhancing the bread’s flavor, it also plays a role in regulating yeast activity and strengthening the gluten structure.
- Old-Fashioned Oats: These are the star of our “oatmeal” bread, adding a wonderful chewiness, nutty flavor, and a significant boost of fiber.
- Bread Flour: With its higher protein content, bread flour is key for developing strong gluten, which gives the bread its characteristic elasticity and structure, allowing for a good rise.
- Whole Wheat Flour: This provides the wholesome, earthy flavor and nutrient density that makes this bread so healthy. It’s packed with fiber, vitamins, and minerals, making your loaf more satisfying and nutritious.
Feel free to unleash your creativity and experiment with this base recipe! For instance, during the autumn months, a touch of pumpkin pie spice or ground cinnamon would infuse your bread with a warm, seasonal aroma. You could also consider adding a handful of raisins or dried cranberries for extra bursts of sweetness, or perhaps some flax seeds for an added nutritional punch and a slightly different texture. Chopped nuts like walnuts or pecans could also be a delightful addition, bringing a pleasant crunch. What special ingredient would you add to make your homemade bread uniquely yours?
Mastering Homemade Bread: A Step-by-Step Guide
Baking bread at home is a process that’s both scientific and artful. Don’t be discouraged by multi-step recipes; each stage plays a crucial role in developing the flavor, texture, and rise of your perfect loaf. We’ll guide you through each step, ensuring you understand the ‘why’ behind the ‘how’, making your baking journey both educational and enjoyable.
Step 1: Preparing and Proofing the Yeast – The Foundation of Your Loaf
The first and arguably most critical step in yeast bread making is activating your yeast. In a small bowl, combine your dry active yeast with the warmed milk. It’s vital that the milk is warm, not hot (which would kill the yeast) or cold (which wouldn’t activate it effectively). Aim for a temperature between 105-115 degrees F (40-46 degrees C). Give it a gentle stir to ensure the yeast is fully submerged, then set it aside for about 5 to 10 minutes.
During this time, the yeast will begin to feed on the sugars in the milk, producing carbon dioxide and causing the mixture to become foamy and bubbly. This bubbling indicates that your yeast is alive and active – a clear sign you’re on the right track! If, after 10 minutes, your mixture doesn’t show any signs of activity (no foam or bubbles), it means your yeast has expired or the milk temperature was off. In this case, it’s best to discard the mixture and start fresh with new yeast and correctly warmed milk to ensure your bread rises properly.
Step 2: Mixing and Kneading the Dough – Developing Structure and Flavor
Once your yeast is proofed and ready, turn your attention to the main dough. In the bowl of a stand mixer fitted with the paddle attachment (or a large mixing bowl if kneading by hand), add the egg, honey, melted butter, salt, and old-fashioned oats. Mix these ingredients thoroughly until well combined. Next, pour in your proofed yeast and milk mixture, followed by both the bread flour and the whole wheat flour.
Begin mixing on a low speed until all the ingredients come together and a shaggy dough forms. Then, switch to the dough hook attachment (if using a stand mixer) and increase the speed to medium-low, kneading for a full 10 minutes. If kneading by hand, turn the dough out onto a lightly floured surface and knead vigorously for 10-15 minutes.
During kneading, you’ll observe the dough transforming. It should start to form a cohesive ball, pulling away cleanly from the sides of the bowl (or your hands). The goal is to develop the gluten, which gives the bread its structure and elasticity. A well-kneaded dough will feel smooth, elastic, and springy. To test if it’s sufficiently kneaded, perform the “windowpane test”: pull a small piece of dough and stretch it thinly. If you can stretch it enough to see light through it without tearing, your gluten is well developed.
Troubleshooting: If your dough feels too wet and sticky, clinging stubbornly to the bowl or your hands, add a small amount of flour (about a tablespoon at a time) and continue kneading until it becomes slightly sticky to the touch but manageable. Conversely, if the dough appears too dry and stiff, add a tiny bit of warm milk (a teaspoon at a time) until the desired consistency is achieved.
Once kneaded, gently shape the dough into a ball and place it in a lightly greased bowl, turning it once to coat. Cover the bowl tightly with plastic wrap or a clean tea towel and let it rest in a warm area for 15-20 minutes. This short rest allows the gluten to relax, making the dough easier to handle for the next step.
Step 3: Shaping and Second Rise – Preparing for the Oven
After the initial rest, turn your dough out onto a lightly floured or greased surface. Gently flatten it out to release some of the trapped gases (this is called “degassing” and helps create a finer, more even crumb). To shape your loaf, take one of the long edges of the flattened dough and fold it towards the center. Then, take the opposite long edge and fold it over the first fold, creating a cylinder. Gently tuck in the ends and roll the dough into a tight, uniform log shape. This meticulous shaping ensures a well-formed loaf that rises evenly in the pan.
Carefully place the shaped dough log into a greased 8 ½ by 4 ½-inch loaf pan. Cover the pan with a clean tea towel and allow the dough to undergo its second rise, also known as proofing. This process should take place in a warm, draft-free environment until the dough has doubled in size and looks visibly puffy. To check if it’s ready, gently poke the dough with a floured finger; if the indentation slowly springs back, it’s ready for the oven. If it springs back quickly, it needs more time. If it collapses, it’s over-proofed, though for a rustic loaf, this might still yield a decent result.
Step 4: Baking Your Golden Loaf – The Grand Finale
While your bread is undergoing its second rise, preheat your oven to 350 degrees F (175 degrees C). It’s crucial that the oven is fully preheated to the correct temperature before the bread goes in, as this provides an initial burst of heat that encourages a good “oven spring” (the final rapid rise of the dough as it bakes).
Once the oven is ready and your dough has doubled, carefully place the loaf pan into the preheated oven. Bake for approximately 15-20 minutes, or until the top of the bread is a beautiful golden brown. To confirm doneness, you can also gently tap the bottom of the loaf; it should sound hollow. For an even more precise measurement, an instant-read thermometer inserted into the center of the loaf should register between 190-210 degrees F (88-99 degrees C).
After baking, remove the bread from the oven and let it cool in the loaf pan for about 5 minutes. This brief resting period allows the crust to set and the internal structure to stabilize. Then, carefully remove the bread from the pan and transfer it to a wire rack to cool completely. Cooling on a rack is essential to prevent the bottom of the bread from becoming soggy due to trapped steam. Although it’s tempting to slice into a warm loaf, letting it cool thoroughly improves its texture and makes for cleaner slices. Patience is key for the perfect slice!
Frequently Asked Questions About Baking Whole Wheat Oatmeal Bread
Proofing (the rising process) is crucial for a light and airy loaf. My favorite method for a consistent rise is the “warm oven trick.” I preheat my oven to its lowest setting, usually around 175 degrees F (80 degrees C), then turn it OFF. I place my covered dough into this gently warmed oven. The residual heat creates the perfect environment for yeast activity, helping the dough to proof faster and more reliably, especially in cooler kitchens. Another tip: you can place your dough in a microwave with a cup of boiling water next to it – the steam and warmth create a fantastic proofing chamber. Just remember to keep it covered to prevent a skin from forming!
Absolutely not! While a stand mixer can certainly make the kneading process quicker and less physically demanding, it is by no means essential. For centuries, bread was made by hand, and many bakers still prefer the tactile experience of hand-kneading. If you don’t have a stand mixer, simply use a large, sturdy bowl to mix your ingredients until they come together, then turn the dough out onto a lightly floured countertop or a clean, greased surface. Knead the dough with your hands, pressing, folding, and stretching it, until it becomes smooth, elastic, and wonderfully springy – typically 10-15 minutes of continuous work. Hand-kneading is a fantastic workout and deeply satisfying!
Beyond being incredibly delicious, Whole Wheat Oatmeal Bread is indeed a healthier choice, primarily because it’s rich in fiber, both from the whole wheat flour and the oats. Fiber is essential for digestive health, helping to regulate bowel movements and prevent constipation. It also contributes to satiety, meaning it helps you feel full longer, which can be beneficial for weight management. Additionally, the whole grains provide sustained energy release, avoiding the blood sugar spikes often associated with refined white breads. Oats are particularly known for their beta-glucans, a type of soluble fiber that can help lower cholesterol levels. So yes, it’s good for eating 😉, and great for your overall well-being!
Expand Your Baking Skills: More Bread Recipes To Try
The journey of bread making is a rewarding one. The more you practice, the more intuitive the process becomes, and soon enough, you might find yourself exclusively making your own bread – a truly satisfying culinary achievement!
- Irish Soda Bread: A quick bread requiring no yeast, perfect for beginners.
- Rosemary Parmesan Bread: A fragrant and savory loaf, ideal with Italian dishes.
- Beer Bread: Another easy no-yeast bread with a unique flavor.
- Soft White Sandwich Bread: The classic, fluffy bread every home baker should master.
- Classic Oatmeal Sandwich Bread: A comforting and hearty option for everyday meals.
Indulge Your Sweet Tooth: Additional Sweet Bread Recipes
If you enjoy a hint of sweetness in your baked goods, these delightful sweet bread recipes are sure to inspire you. They’re perfect for breakfast, brunch, or a comforting treat with a cup of coffee or tea.
- Double Chocolate Zucchini Muffin Bread: A decadent way to enjoy your vegetables!
- Cinnamon Swirl Bread: A beloved classic, wonderful toasted.
- Zucchini Carrot Bread: Moist, flavorful, and packed with goodness.
- Cinnamon Swirled Pumpkin Bread: The ultimate fall treat.
- Pumpkin Bread with Cream Cheese Caramel Icing: A truly indulgent and irresistible loaf.
Thank you so much for exploring this recipe and guide! I hope you thoroughly enjoy your bread-making adventure and find immense satisfaction in creating this delicious Whole Wheat Oatmeal Bread. Don’t hesitate to reach out if you have any questions or need further tips!
HUNGRY FOR MORE? Subscribe to my newsletter and follow along on Pinterest, Facebook, and Instagram for all my latest updates!
Whole Wheat Oatmeal Bread
Ingredients
- 3/4 cup warm milk 110 degrees F (43°C)
- 1 package dry active yeast (2 1/4 teaspoons)
- 1 large egg
- 3 tablespoons honey
- 2 tablespoons unsalted butter melted
- 1/2 teaspoon fine sea salt
- 1/3 cup old fashioned oats (rolled oats)
- 1 1/4 cup bread flour (plus more for dusting)
- 1 cup whole wheat flour
Instructions
-
Activate Yeast: In a small bowl, combine the dry active yeast and the warmed milk (105-115°F). Give it a quick stir to dissolve the yeast, then set it aside for 5-10 minutes. The mixture should become foamy and bubbly, indicating the yeast is active. If it doesn’t bubble, your yeast may be expired, and you’ll need to start with a new batch.
-
Combine Dough Ingredients: In the bowl of your stand mixer (fitted with the paddle attachment initially, then switch to a dough hook), add the egg, honey, melted butter, salt, and old-fashioned oats. Mix these ingredients well until thoroughly combined. Now, pour in your proofed yeast and milk mixture, along with both the bread flour and whole wheat flour. Mix on a low speed until all the ingredients are just combined and a shaggy dough forms.
-
Knead and First Rise: Switch to the dough hook attachment and knead the dough for 10 minutes on medium-low speed. While kneading, the dough should gradually form a ball and pull away from the sides of the bowl. If the dough is too wet and sticky, add a tablespoon of bread flour at a time until it’s slightly tacky but manageable. If it’s too dry, add a teaspoon of warm milk. Continue kneading until the dough is smooth and elastic. Lightly grease a large bowl, place the dough in it, turning once to coat, then cover with plastic wrap or a tea towel. Let it rest and rise in a warm, draft-free area for 15-20 minutes.
-
Shape and Second Rise: After the dough has rested, turn it out onto a lightly floured or greased surface. Gently flatten the dough to remove air, then tuck in the sides and roll it up tightly into a log shape. Place the log of dough seam-side down into a greased 8 ½-inch by 4 ½-inch (or 1 lb) loaf pan. Cover the pan with a tea towel and let it rise again in a warm place until it has doubled in size and looks puffy, usually 45-60 minutes depending on your environment.
-
Bake to Golden Perfection: While the dough is completing its second rise, preheat your oven to 350 degrees F (175 degrees C). Once the oven is ready and the bread has doubled, place the loaf pan into the preheated oven. Bake for 15-20 minutes, or until the crust is beautifully golden brown and the internal temperature reaches 190-210 degrees F (88-99 degrees C).
-
Cool and Serve: Remove the bread from the oven and let it cool in the pan for 5 minutes. This allows it to firm up slightly. Then, carefully remove the loaf from the pan and transfer it to a wire rack to cool completely before slicing and serving. This prevents the bottom from becoming soggy.
Notes
