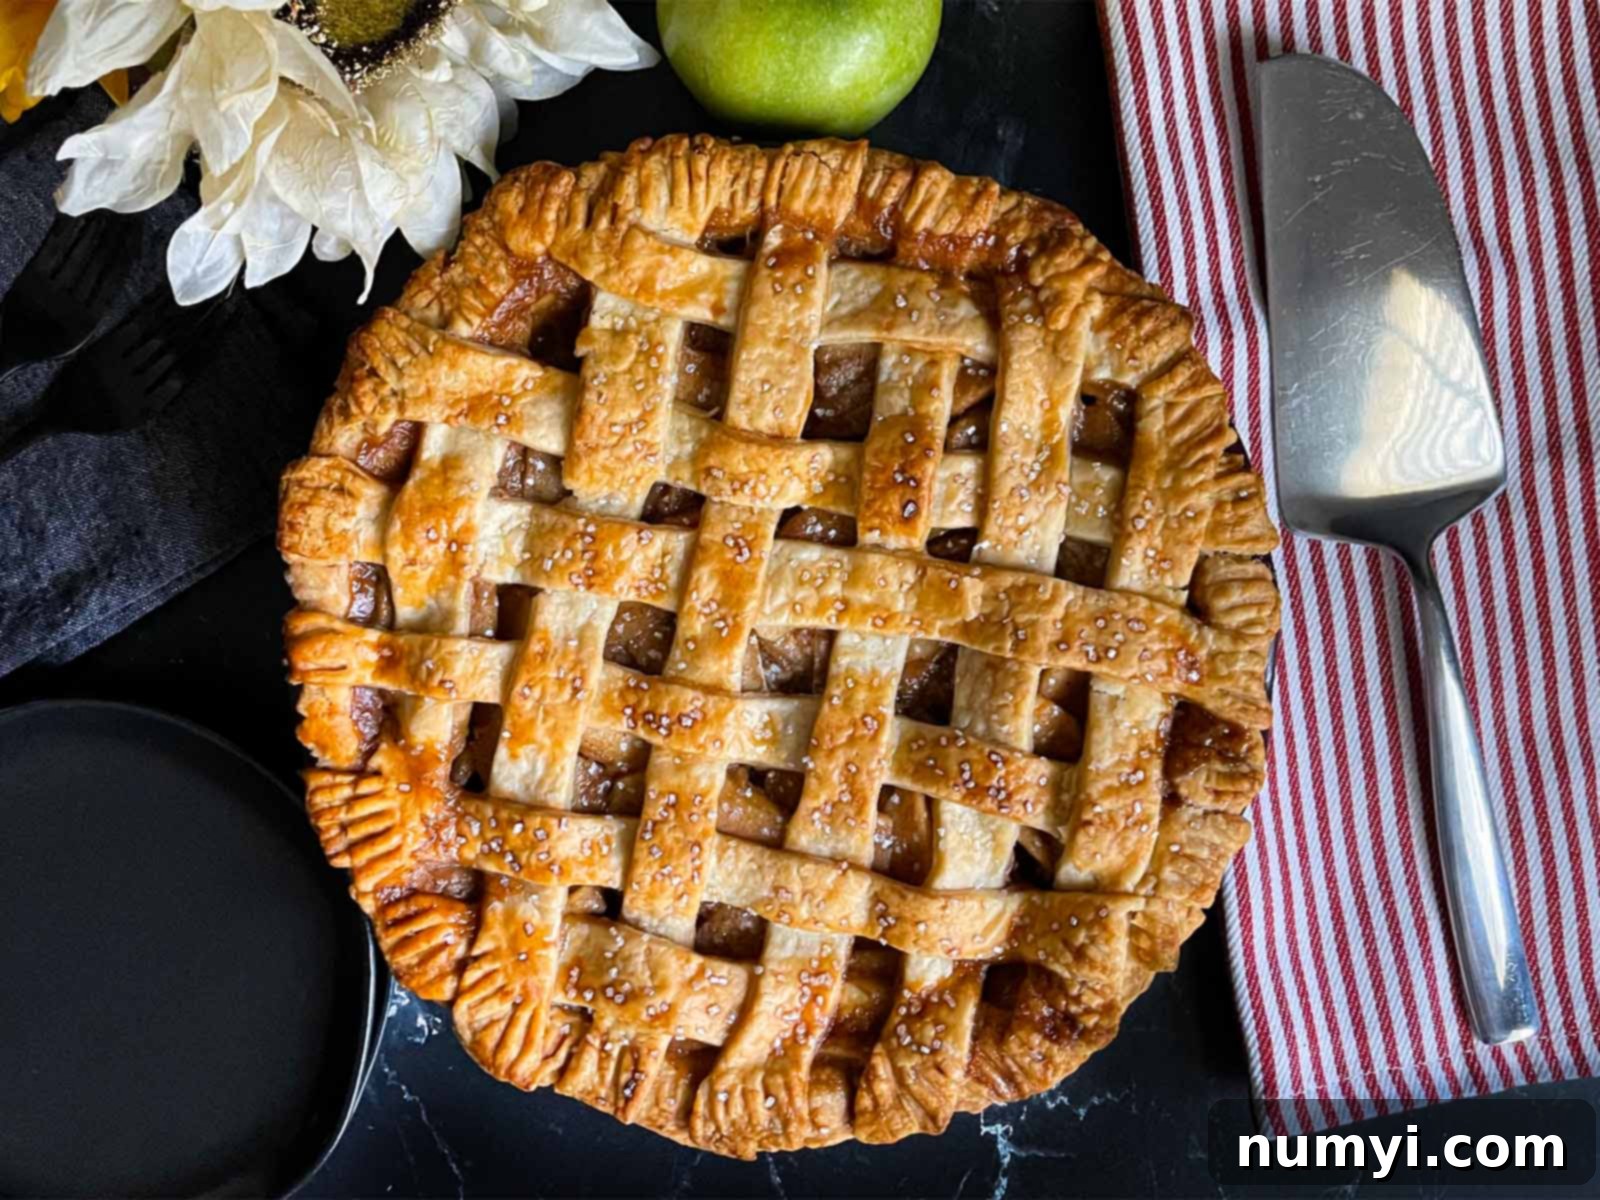
Classic Homemade Apple Pie with Flaky Lattice Crust: A Sweet & Tart Fall Delight
There’s nothing quite like the comforting aroma and taste of a freshly baked apple pie, especially as the crisp autumn air settles in. This easy-to-follow recipe brings together the perfect harmony of sweet and tart apples, creating that iconic, beloved apple pie flavor. Encased in a truly exceptional, buttery, and irresistibly flaky pie crust, this dessert promises a culinary experience that no one can resist. Whether it’s a holiday centerpiece or a simple family treat, this homemade apple pie will surely become a cherished tradition.
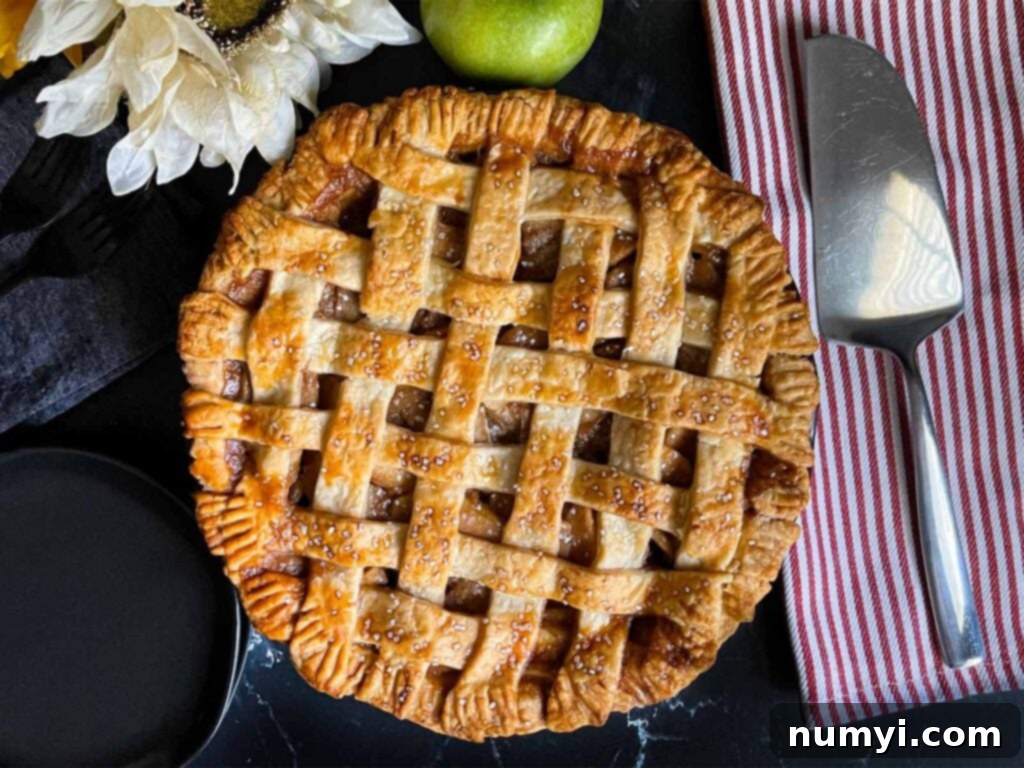
Why You’ll Adore This Easy Apple Pie Recipe
This classic apple pie recipe is a culmination of years of baking experience, refined to perfection. What makes it truly stand out is the crucial step of precooking the apple filling. This simple technique is a game-changer, effectively preventing the dreaded “undercooked and watery apples” dilemma that can plague homemade pies. Furthermore, it eliminates the unsightly gap that often forms between the tender top crust and the filling, ensuring a beautifully structured and consistently delicious pie every time.
With every bite, you’ll experience a symphony of textures and flavors: a flaky, tender, all-butter crust that melts in your mouth, generously embracing a filling bursting with the quintessential warmth of fall apple spices. This isn’t just an apple pie; it’s a celebration of seasonal comfort, making it the ideal dessert for gatherings or a cozy evening in.
As baking season unfolds, don’t forget to explore our other delightful fall treats. Indulge in the creamy richness of Pumpkin Cheesecake Bars, savor the moist sweetness of an Apple Dapple Cake, enjoy the delightful crunch of Butterscotch Pretzel Cookies, or opt for the effortless elegance of Easy Pecan Pie Bars!
The Best Apples for Apple Pie: Crafting the Perfect Blend
The secret to an outstanding apple pie lies in selecting the right apples. For this recipe, we champion a thoughtful blend of tart and sweet varieties, which creates a complex and balanced flavor profile that truly sings. Our preferred combination uses an even mixture of Granny Smith and Honeycrisp, offering both structure and sweetness.
- Granny Smith: These apples are a baker’s best friend. Known for their distinctly tart flavor and remarkably firm texture, they hold their shape beautifully during baking, preventing a mushy filling. Their tartness also provides a wonderful counterpoint to the sweetness of the pie.
- Honeycrisp: As their name suggests, Honeycrisp apples are incredibly crisp and naturally sweet. They contribute a juicy, vibrant sweetness that complements the tartness of the Granny Smiths, and their texture remains satisfyingly firm even after baking.
- Braeburn: Another excellent choice, Braeburn apples are crisp and offer a delightful balance of sweet and tart notes. They are prized for their ability to maintain their texture, ensuring your pie filling isn’t watery or overly soft.
- Jonagold: These apples are unique in that they actually become sweeter and more flavorful when baked. They offer a good balance of firmness and sweetness, adding depth to the overall apple mixture.
- Golden Delicious: A versatile apple, Golden Delicious provides a lovely balance of sweet and mildly tart flavors. While softer than Granny Smith, they still bake well and add a tender quality to the filling.
Combining two or three varieties ensures a dynamic flavor experience and prevents the pie from being one-note. Feel free to experiment with these suggestions to find your ultimate apple pie blend!
Crafting the Perfect Pie Crust for Your Apple Pie
A truly magnificent apple pie is only as good as its crust. Over the years, I’ve experimented with countless homemade pie crust recipes, searching for that elusive perfect balance of flakiness, tenderness, and robust flavor. The all-butter crust featured in this recipe consistently delivers on all fronts, earning its title as “the best.”
What makes an all-butter crust superior? Unlike crusts made with shortening, butter imparts an unparalleled richness and a delicate, melt-in-your-mouth texture. When cold butter is worked into the flour, it creates tiny pockets of steam during baking, which expand and separate the layers of dough, resulting in that coveted flaky consistency. Furthermore, this specific butter-rich recipe is designed to prevent the dreaded soggy bottom crust – a common affliction of many homemade pies. I’ll share an additional ingenious tip later to ensure your bottom crust remains beautifully crisp and golden, providing the perfect foundation for your luscious apple filling.
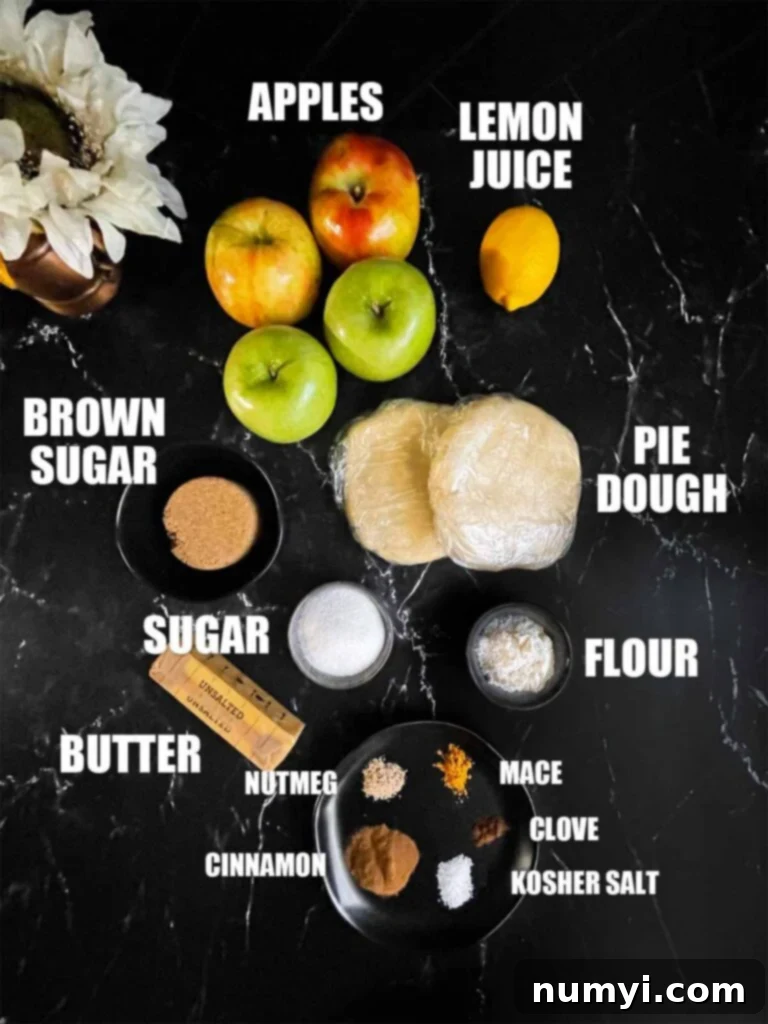
Key Ingredients for an Unforgettable Apple Pie
Each ingredient in this recipe plays a crucial role in developing the complex flavors and perfect texture of our classic apple pie. Here’s a closer look at what you’ll need and why:
- Apples: As discussed, a blend is key! You’ll need approximately four large Granny Smith apples for their tartness and firm texture, and four large Honeycrisp apples for their sweetness and crispness. This combination ensures a well-balanced and texturally appealing filling.
- Granulated Sugar and Dark Brown Sugar: These two sugars work in tandem. Granulated sugar provides a clean sweetness, while dark brown sugar adds a deep, molasses-rich caramel note that enhances the apple flavor and contributes to a richer, more complex filling.
- Cinnamon, Nutmeg, Mace, and Cloves: This harmonious blend of warm spices is the heart and soul of classic apple pie. Cinnamon provides warmth, nutmeg adds earthy sweetness, mace (from the same plant as nutmeg) contributes a delicate, refined spice, and cloves offer a pungent, aromatic depth that ties all the flavors together beautifully.
- Salt: A pinch of kosher salt is essential in baking, acting as a flavor enhancer. It balances the sweetness, sharpens the spice notes, and brings out the natural flavors of the apples, preventing the pie from tasting flat.
- Fresh Lemon Juice: Don’t skip this! A touch of fresh lemon juice not only brightens the flavors of the apples and spices but also helps to prevent the apples from browning too quickly during preparation and cooking. Its acidity also balances the sweetness.
- Flour: All-purpose flour is used as a thickening agent for the apple juices. It helps to create a luscious, saucy filling that isn’t overly runny, ensuring a sliceable pie with a perfect consistency. The exact amount can vary based on the juiciness of your apples.
- Unsalted Butter: Beyond the crust, a small amount of unsalted butter dotted over the filling adds an extra layer of richness and a silky mouthfeel. It melts into the apples, creating a decadent, flavorful sauce.
- Egg Wash: A simple egg beaten with a tablespoon of water is brushed over the top crust. This creates a beautiful, golden-brown, shiny finish that adds to the pie’s visual appeal. Crucially, it also acts as a moisture barrier, helping to prevent the bottom crust from becoming soggy by creating a slight seal.
- Turbinado Sugar or Sparkling Sugar: A final sprinkle of turbinado or sparkling sugar on the top crust before baking adds a delightful textural crunch and an extra whisper of sweetness. It also makes the pie look professionally finished and incredibly inviting.
How to Make This Easy Apple Pie Recipe: Step-by-Step Perfection
Creating this magnificent apple pie is a joyful process, and with these clear steps, you’ll achieve perfection every time. Remember, good planning makes for a relaxed baking experience!
-
Prepare the pie crust dough and allow it to chill. Begin by preparing your homemade all-butter pie dough. After it’s mixed, gently form it into two disks, wrap them securely in plastic wrap, and refrigerate for a minimum of one hour. This chilling time is crucial for developing flakiness and making the dough easier to handle. Alternatively, for a quick and convenient option, feel free to use a high-quality store-bought pie crust.
-
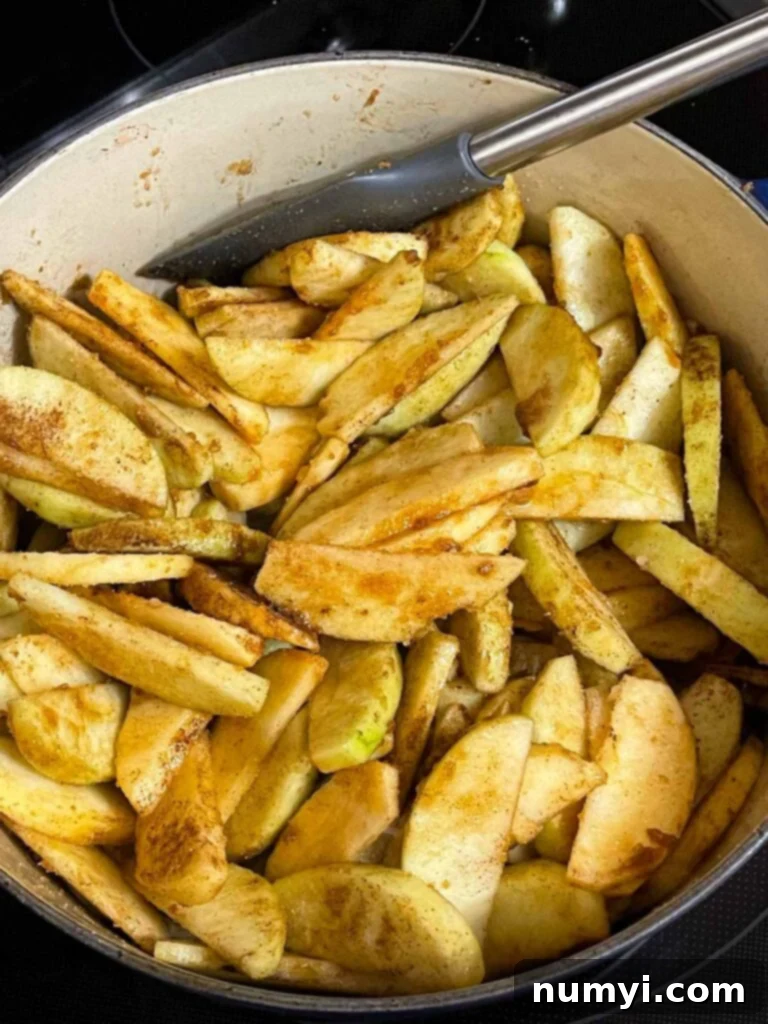
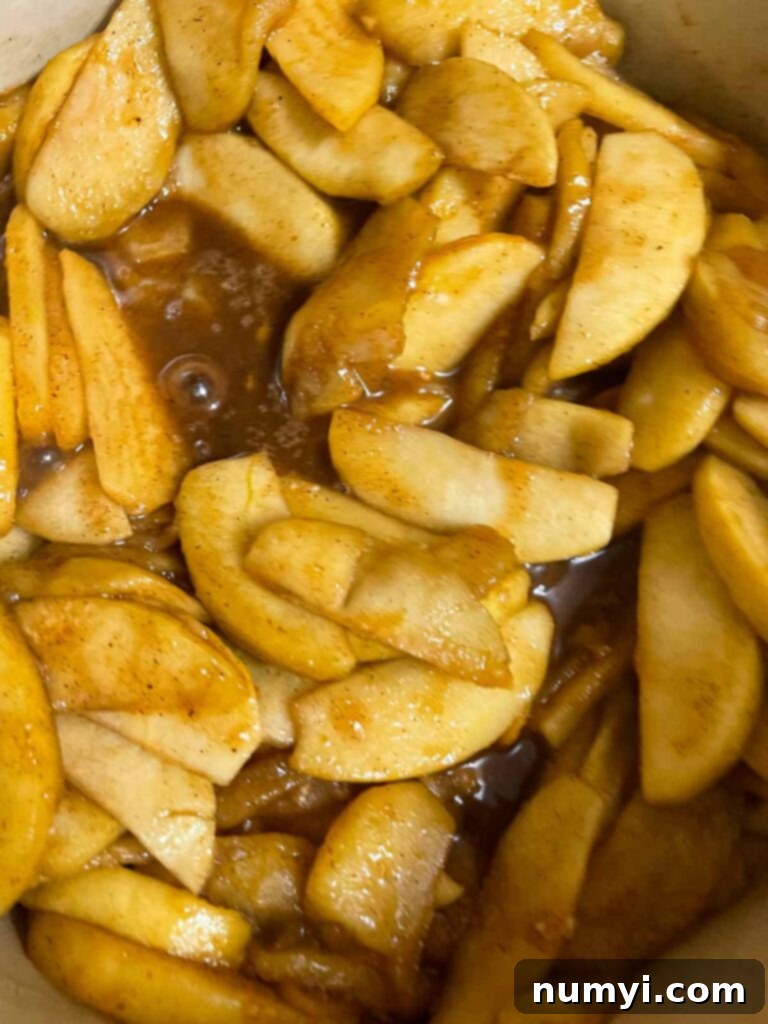
Precook the apple filling to perfection. In a substantial Dutch oven or a large, heavy-bottomed pot, combine the thinly sliced apples with your chosen blend of spices, a splash of fresh lemon juice, and a sprinkle of flour. Cook this mixture over medium heat, stirring regularly, until the apples begin to soften slightly and release their juices, which will then thicken into a luxurious sauce. This precooking step is vital: it ensures your apples are tender, prevents them from becoming watery, and allows the flavors to meld beautifully. It also offers the advantage of letting you taste and adjust the sweetness level before baking – an important consideration, as natural apple sweetness can vary. Once cooked, transfer the filling to a large bowl (if baking the same day) to cool more rapidly to room temperature. This prevents the hot filling from melting your pie crust.
-
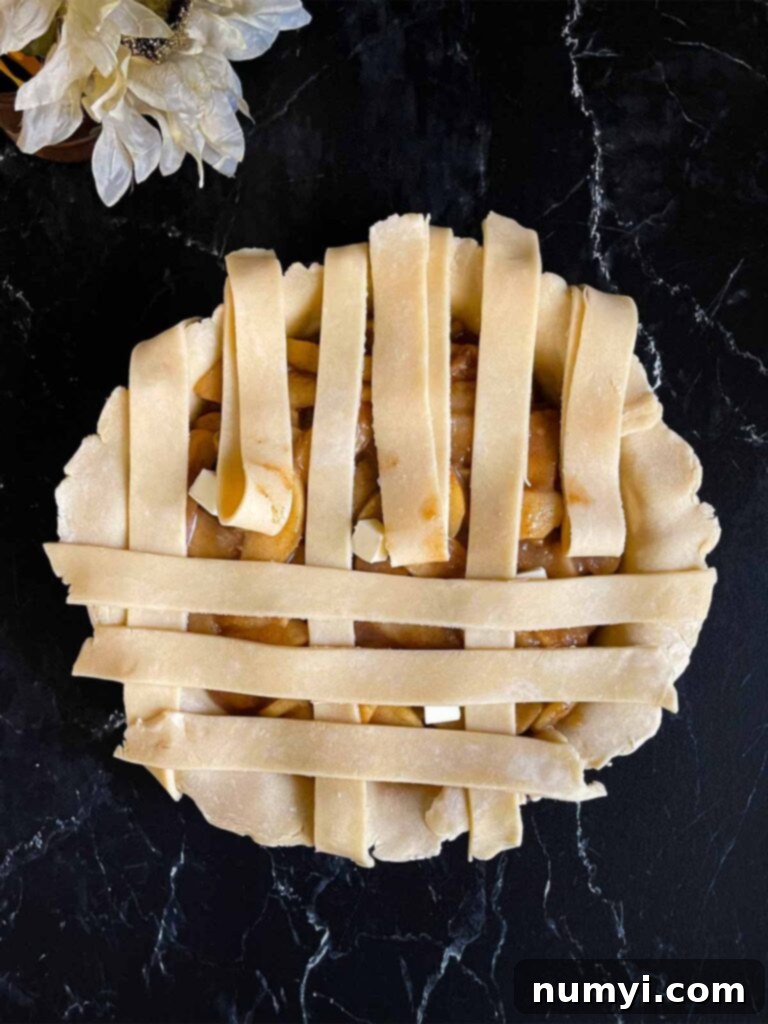
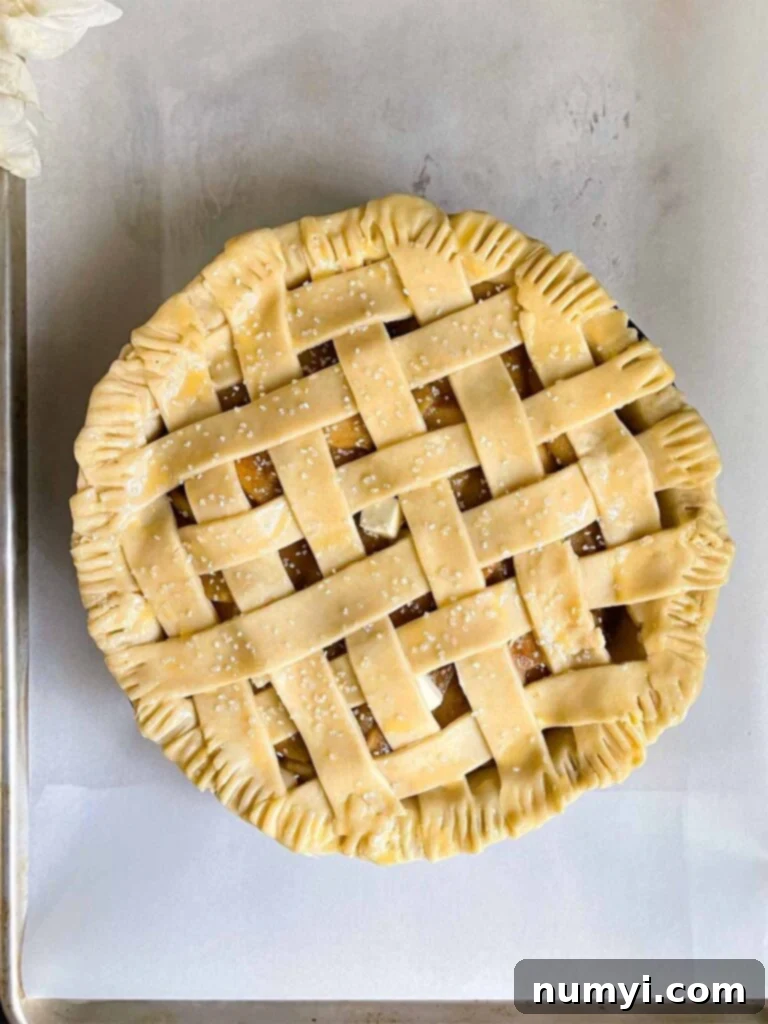
Assemble the pie with care and prepare for baking. Once both your pie dough and apple filling are properly cooled, it’s time for assembly. Follow the detailed instructions provided in the recipe card below for rolling out the dough, carefully transferring it to your pie pan, and creating that beautiful lattice top (if desired). Before baking, a crucial step for a crisp crust is to freeze the assembled pie for 30 minutes. This quick chill helps the butter in the crust firm up, resulting in maximum flakiness. While it chills, preheat your oven. Just before baking, brush the top crust generously with the egg wash to achieve a golden sheen, and then sprinkle it with turbinado sugar for an extra sparkle and sweet crunch.
-
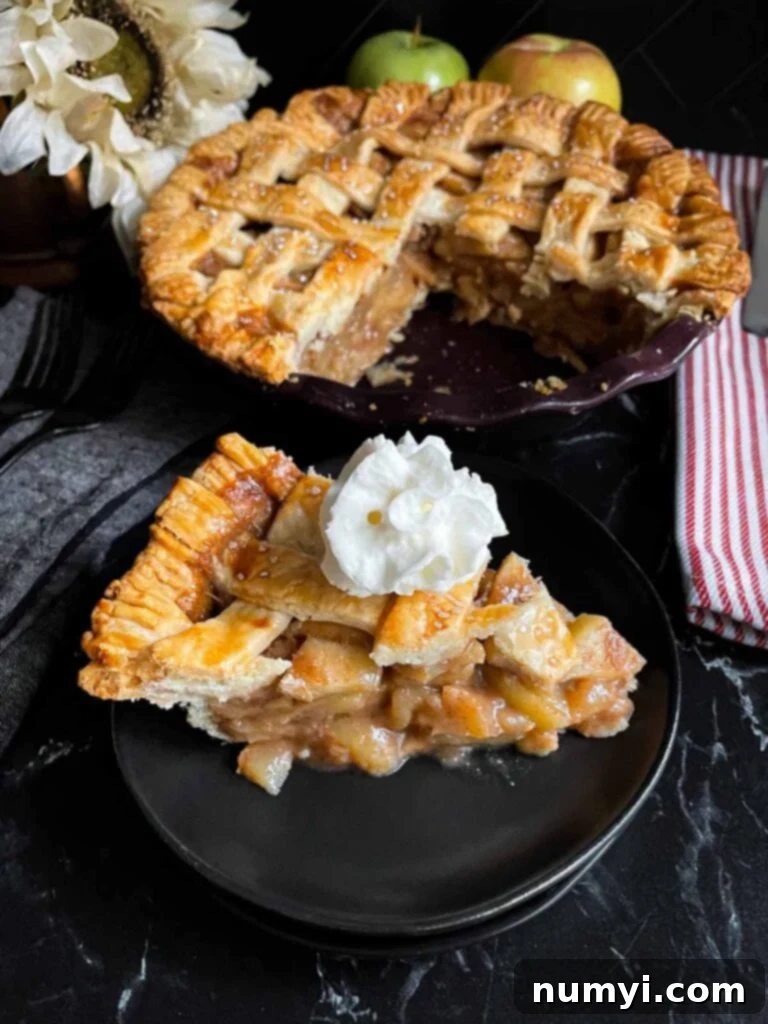
Bake to golden perfection and cool completely. Place the chilled pie on a baking sheet (lined with parchment paper to catch any potential drips) and bake at a high temperature of 425 degrees F for the initial 20 minutes. This high heat helps to set the crust and create that beautiful flakiness. Then, reduce the oven temperature to 375 degrees F and continue baking for another 40 to 45 minutes, or until the crust is a deep golden brown and the filling is visibly bubbling. To prevent the crust edges from over-browning, you can loosely cover them with a pie shield or aluminum foil halfway through the baking process. Once baked, transfer the pie to a wire rack and resist the urge to slice it immediately! It’s crucial to let it cool for at least 4 hours. This allows the filling to set properly and thicken, ensuring perfect slices.
How to Make a Lattice Pie Crust: A Step-by-Step Guide
A lattice pie crust not only adds an elegant, professional touch to your homemade apple pie but also allows steam to escape, preventing a soggy top. Here’s how to weave one:
- Prepare the Bottom Crust: Start with a 9-inch pie pan. Take one disk of your chilled pie dough and let it stand at room temperature for about 15 minutes to make it more pliable. On a lightly floured surface, roll out this dough disk into a 12-inch circle, aiming for an even 1/8 inch thickness. Carefully transfer the rolled dough into your pie pan, gently easing it down to fit the contours without stretching. Trim any excess dough around the rim. Lightly brush some of your prepared egg wash over the bottom crust – this creates a barrier against the apple juices. Refrigerate this while you prepare the top dough.
- Cut the Lattice Strips: Take your second chilled dough disk and roll it out to another 12-inch circle, also 1/8 inch thick. Using a ruler and a sharp knife or a pastry wheel, cut the dough into even one-inch wide strips. The consistency in width is key for a neat lattice.
- Fill the Pie: Remove the chilled bottom crust from the refrigerator. Pour the cooled apple filling into the bottom pie crust, spreading it evenly. Now, cut the remaining tablespoon of cold butter into small cubes and dot them uniformly over the top of the filling. This extra butter will melt and enrich the apple mixture.
- Weave the Lattice:
- Lay half of your dough strips vertically across the filling, spacing them evenly (e.g., 4 or 5 strips, depending on width).
- Carefully fold back every other vertical strip about halfway.
- Place one horizontal strip across the center of the pie, laying it over the unfolded vertical strips and under the folded-back strips.
- Unfold the folded vertical strips back over the horizontal strip.
- Now, fold up the *other* set of vertical strips (the ones that were previously unfolded) about halfway.
- Lay a second horizontal strip across the pie, parallel to the first, again over the unfolded strips and under the folded-back ones.
- Unfold the vertical strips back into place.
- Continue this weaving pattern, alternating which vertical strips you fold back, until you have formed a complete lattice top across the entire pie.
Trim any excess dough from the edges of the pie plate. For a decorative finish, crimp the edges of the pie using your fingers or the tines of a fork.
- Final Touches Before Baking: Freeze the assembled pie for 30 minutes to ensure the crust holds its shape and flakiness during baking. Brush the entire top crust (including the lattice strips and crimped edges) generously with the egg wash, and then sprinkle turbinado sugar evenly over the top for a beautiful, sparkling finish.
Make Ahead Apple Pie Instructions for Ultimate Convenience
Preparing components of your apple pie in advance is a fantastic way to spread out the work and make baking day less stressful, especially during busy holidays. Here’s how to get ahead:
- Apple Pie Filling: The apple pie filling can be prepared up to one day in advance. After cooking the filling according to the recipe, allow it to cool completely to room temperature. Then, cover it tightly and refrigerate overnight. This not only saves time but also ensures the filling is perfectly chilled, preventing any undesirable softening of your pie crust during assembly.
- Pie Dough: The homemade pie dough is also ideal for making ahead. Prepare the dough, shape it into disks, wrap it tightly in plastic wrap, and refrigerate it overnight. This extended chill time further develops the butter pockets, contributing to an even flakier crust.
- Assembly and Baking: On baking day, simply retrieve your chilled dough and filling from the refrigerator, allow the dough to sit at room temperature for 15-20 minutes for easier rolling, assemble your pie, and proceed with baking as directed. This method allows you to enjoy the fresh aroma of a baking pie without the hustle of starting from scratch.
How to Freeze an Entire Apple Pie for Future Enjoyment
Freezing an apple pie is a wonderful way to prepare for future cravings or holiday meals. You have the option to freeze an entire pie either unbaked or baked, each with its own advantages:
To Freeze an Unbaked Pie: This is a fantastic option for preserving that “freshly baked” taste. Assemble your entire pie, including the bottom and top crust (lattice or full top), but *do not* brush it with the egg wash. Place the assembled pie directly into the freezer for about an hour to flash freeze it. Once firm, wrap the pie thoroughly with plastic wrap, ensuring it’s airtight, then wrap it again with a second layer of plastic wrap or aluminum foil. This double-layer protection prevents freezer burn. Label with the date and freeze for up to 3 months. When ready to bake, remove the pie from the freezer, unwrap, brush with egg wash and turbinado sugar, and bake directly from frozen, adding about 20-30 minutes to the total baking time. You may need to shield the crust earlier to prevent over-browning.
To Freeze a Baked Pie: If you prefer to have a ready-to-reheat option, you can freeze a baked pie. Allow the pie to cool completely to room temperature after baking. Once cooled, wrap it tightly first in plastic wrap, then in aluminum foil, ensuring no air can get in. Freeze for up to 1 month. To reheat, thaw the pie at room temperature for approximately 3 hours. Then, reheat it in a 425 degrees F oven for about 15-20 minutes, or until it’s warmed through and the crust is crisp again.
Making this homemade apple pie recipe ahead of time is perfect for Thanksgiving, Christmas, or any special occasion, allowing you to focus on enjoying time with loved ones. Serve it warm with a dollop of freshly whipped cream or a generous scoop of vanilla bean ice cream for an ultimate dessert experience!
Baking Tips for the Perfect Apple Pie
Achieving pie perfection is easier than you think with these helpful tips:
- Don’t Hesitate to Use Store-Bought Crust: While homemade is fantastic, there’s no shame in opting for a good quality store-bought pie crust, especially if you’re short on time. It can still result in a delicious pie!
- Monitor Crust Browning: Keep a close eye on your pie, especially after the initial high-heat baking. If the edges of the crust start to darken too quickly, loosely tent them with a pie shield or a piece of aluminum foil to prevent over-browning while the filling continues to cook.
- Prevent Oven Messes: Always bake your pie on a baking sheet lined with parchment paper or aluminum foil. This simple step will catch any juices that might bubble over during baking, saving you from a sticky oven cleanup.
- Patience is Key for Cooling: It’s tempting to cut into a warm pie, but patience truly pays off. Allow the pie to cool on a wire rack for at least 3-4 hours before slicing. This cooling period is essential for the filling to fully set and thicken, ensuring clean, beautiful slices rather than a runny mess.
- Slice Apples Uniformly: When preparing your apples, aim for slices of consistent thickness (about 1/4 inch). Uniform slices will cook more evenly, ensuring a consistent texture throughout your filling.
FAQs: Your Apple Pie Questions Answered
Yes, absolutely! Precooking the apples is a crucial step that offers several benefits. Firstly, it prevents the apples from shrinking excessively during baking, thus eliminating the common problem of an empty space or “gap” between the apples and the top crust. Secondly, it allows the apples to soften slightly and release their juices, which then thicken into a delicious sauce. This also gives you the opportunity to taste the filling and adjust the sweetness and spice levels to your preference before the pie goes into the oven. Always be certain to slice the apples all the same size for even cooking. Cook the apples with the spices, lemon juice, and flour in a Dutch oven or large heavy-bottomed pot until slightly softened. Let it cool completely to room temperature before assembling your pie. If you’re baking the pie the same day, transfer the warm filling into a large bowl to help it cool faster.
For a perfectly baked apple pie, begin by baking it at a higher temperature of 425 degrees F for the first 20 minutes. This initial burst of heat helps to set the crust and create a wonderfully flaky texture. After 20 minutes, reduce the oven temperature to 375 degrees F and continue to bake for an additional 40 to 45 minutes. You’ll know it’s done when the crust is a beautiful golden brown and you can see the apple filling bubbling through the vents or lattice top, indicating it’s thoroughly cooked and thickened. If you notice the crust browning too quickly, especially around the edges, cover it loosely with a pie shield or aluminum foil to prevent burning.
To maintain the best quality and flavor, store your baked apple pie loosely covered with aluminum foil or plastic wrap at room temperature for up to 4 days. It’s important not to wrap the pie too tightly, as the crust needs to “breathe” to retain its crispy texture. An airtight seal can trap moisture, making the crust soggy over time. If your kitchen is particularly warm, or if you plan to keep it longer, refrigeration is an option, though it may slightly alter the crust’s texture.
If you wish to freeze a baked apple pie, ensure it has cooled completely to room temperature first. Once cool, wrap the entire pie tightly in several layers of plastic wrap, followed by a layer of aluminum foil. This double wrapping is essential to prevent freezer burn and preserve its quality. It can be frozen for up to 1 month. To reheat, remove the pie from the freezer and let it thaw at room temperature for approximately 3 hours. Then, place it in a 425 degrees F oven for about 15-20 minutes, or until the filling is warmed through and the crust is crisp. Freezing is a great way to enjoy homemade pie long after it’s baked!
More Fall Baking Recipes to Savor!
As the leaves turn and the air cools, there’s no better time to embrace the warmth of your kitchen with more delightful fall baking. Explore these additional recipes that celebrate the flavors of the season and are perfect for sharing:
Blueberry Pie
Gingersnap Crust Pumpkin Pie (From Scratch)
Homemade Coconut Cream Pie
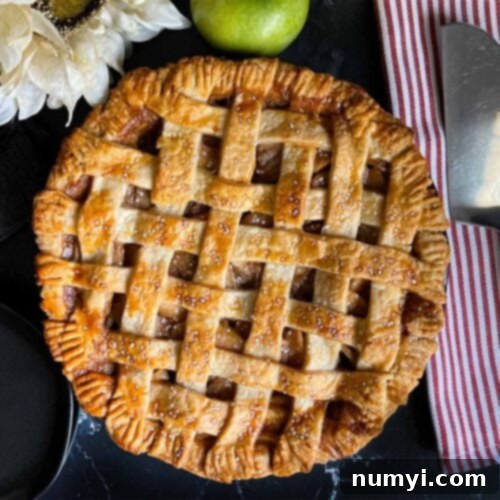
Lattice Crust Easy Apple Pie Recipe
Print
Pin
Rate
Ingredients
Double Pie Crust
- 3 cups All-purpose flour
- 1 tablespoon Granulated sugar
- 1/2 teaspoon Kosher salt
- 1 cup Unsalted butter cold, cut into 1/2 inch cubes
- 1 1/2 teaspoons Apple cider vinegar
- 5-6 tablespoons Ice water
Apple Pie Filling
- 4 lbs Apples 8-9 large apples, a mixture of sweet and tart (e.g., Granny Smith & Honeycrisp)
- 2 tablespoons Unsalted butter, cold divided, 1 tbsp for cooking apples, 1 tbsp for dotting filling
- 1/2 cup Dark brown sugar packed
- 1/4 cup Granulated sugar
- 1 1/2 teaspoons Ground cinnamon
- 1/2 teaspoon Ground nutmeg (fresh ground makes a remarkable difference)
- 1/4 teaspoon Mace
- 1/8 teaspoon Ground cloves
- 1/4 teaspoon Kosher salt
- 1 tablespoon Fresh lemon juice
- 1-2 tablespoons All-purpose flour
Egg Wash & Topping
- 1 large Egg
- 1 tablespoon Water
- Turbinado sugar or sparkling sugar, for sprinkling the top
Instructions
Pie Crust Preparation
-
In the bowl of a food processor, combine the all-purpose flour, granulated sugar, and kosher salt. Pulse a few times until just combined. Add the cold unsalted butter cubes and pulse until the mixture resembles coarse crumbs, with some pea-sized pieces of butter remaining. Drizzle in the apple cider vinegar, then add the ice water two tablespoons at a time, pulsing briefly after each addition, until the mixture starts to come together and looks like a streusel. The mixture will still appear dry, but when you pinch it between your fingers, it should stick together. Be careful NOT to overmix, as this will result in a tough crust.3 cups All-purpose flour, 1 tablespoon Granulated sugar, 1/2 teaspoon Kosher salt, 1 cup Unsalted butter, cold, cut into 1/2 inch cubes, 1 1/2 teaspoons Apple cider vinegar, 5-6 tablespoons Ice water
-
Transfer the dough mixture onto a clean surface. Divide the dough into two equal halves. Gently shape each half into a flat, ½-inch thick disk. Wrap each disk tightly in plastic wrap to prevent drying and refrigerate for a minimum of 1 hour, or preferably overnight. This chilling step is essential for a flaky crust.
-
Once chilled, remove one dough disk from the refrigerator and let it sit at room temperature for about 15 minutes. On a lightly floured surface, roll it out into a 12-inch circle with an even ⅛-inch thickness. Carefully transfer the rolled dough into a 9-inch deep-dish pie pan, gently fitting it into the bottom and sides without stretching. Trim any excess dough from the edges. Brush the bottom crust with a light layer of egg wash (prepared in step 2.1) and then refrigerate the pie shell while you prepare the filling and the top crust.
Apple Filling Preparation
-
Peel, core, and then cut your chosen apples into consistent ¼-inch slices. Uniform slices ensure even cooking and a pleasant texture in the final pie.4 lbs Apples
-
In a large Dutch oven or a deep, heavy-bottomed skillet, melt 1 tablespoon of unsalted butter over medium heat. Add the sliced apples, dark brown sugar, granulated sugar, ground cinnamon, ground nutmeg, mace, ground cloves, kosher salt, and fresh lemon juice. Cook, stirring frequently, for approximately 10-15 minutes, or until the apples have just begun to soften slightly and have released some of their juices. This precooking step is essential for texture and flavor.1 tablespoon Unsalted butter, cold, 1/2 cup Dark brown sugar, 1/4 cup Granulated sugar, 1 1/2 teaspoons Ground cinnamon, 1/2 teaspoon Ground nutmeg, 1/4 teaspoon Mace, 1/8 teaspoon Ground cloves, 1/4 teaspoon Kosher salt, 1 tablespoon Fresh lemon juice
-
Sprinkle 1 tablespoon of all-purpose flour over the apple mixture and stir well to combine. Continue to simmer for another 4-5 minutes, allowing the juices to thicken into a rich sauce. (Depending on how much liquid your apples released, you may need to add an additional tablespoon of flour to achieve the desired consistency.)1-2 tablespoons All-purpose flour
-
Remove the apple filling from the heat and allow it to cool completely to room temperature. If you plan to bake the pie on the same day, transfer the filling into a large, shallow bowl to help it cool down more quickly and prevent it from melting your cold pie crust.
Assemble the Pie
-
Preheat your oven to 425 degrees F (220 degrees C). Position an oven rack in the lower-middle part of the oven.
-
In a small bowl, whisk together the large egg and 1 tablespoon of water to create the egg wash. Set this aside.1 large Egg, 1 tablespoon Water
-
Remove the second pie dough disk to your counter and let it sit for about 15 minutes to become slightly more pliable. On a lightly floured surface, roll it out to an ⅛-inch thickness, creating a circle approximately 12 inches in diameter. Cut this dough into about 8 one-inch wide strips for your lattice top.
-
Take the chilled bottom crust from the fridge and pour the cooled apple mixture into it, spreading it out evenly. Cut the remaining 1 tablespoon of cold butter into small cubes and dot these cubes over the top of the filling for added richness.
-
Now, construct the lattice top: Lay half of the dough strips vertically over the filling, spaced evenly. Fold back every other vertical strip about halfway. Place one of the remaining strips horizontally across the center of the pie, laying it over the unfolded vertical strips and under the folded-back ones. Unfold the previously folded strips back into place. Next, fold up the *other* set of vertical strips (the ones that were previously left unfolded) about halfway. Lay another horizontal strip across the pie, parallel to the first. Unfold these strips back. Continue this weaving pattern with the remaining strips until you’ve formed a complete lattice. Trim any excess dough from the edges of the pie plate and crimp the edges decoratively with a fork or your fingers.
-
Place the assembled pie in the freezer for 30 minutes, or until the dough is firm. This ensures a super flaky crust. If desired, place the pie on a baking sheet lined with foil or parchment paper to catch any potential drips. Brush the entire top crust generously with the prepared egg wash and sprinkle with turbinado sugar for a sparkling, golden finish.Turbinado sugar
Bake the Pie to Perfection
-
Bake the pie in the preheated 425 degrees F oven for 20 minutes. After 20 minutes, reduce the oven temperature to 375 degrees F (190 degrees C) and continue to bake for another 40-45 minutes. The filling should be visibly bubbling throughout the pie, and the crust should be a rich, golden brown.
Throughout the baking process, keep a watchful eye on the crust. If the edges or the lattice start to brown too quickly, loosely cover them with a pie shield or a piece of aluminum foil to prevent burning.
-
Once baked, carefully remove the pie from the oven and transfer it to a wire rack. It is absolutely crucial to let the pie cool for at least 3-4 hours before attempting to slice it. This extended cooling time allows the hot, saucy filling to set and thicken properly. If you cut into the pie too soon, the juices will run out, resulting in a messy slice. Patience will reward you with perfect, firm slices!
Notes
- Precooking the apples is a vital step. It prevents the unsightly empty space that can form between the cooked apples and the top crust, ensuring a full, beautiful pie. Additionally, it allows you to taste and adjust the sweetness and spice levels of the filling to your personal preference before baking.
- This recipe is specifically designed to make enough filling for a standard 9-inch deep dish pie pan. If you are using a smaller or shallower pie dish, you may need to reduce the quantity of apples slightly to avoid overfilling.
- To prevent any potential spills or drips from bubbling over and creating a mess in your oven, always bake the pie on a sturdy baking sheet. Lining the baking sheet with parchment paper or aluminum foil makes cleanup even easier.
- For comprehensive details on Storing, Freezing, and Making Ahead your apple pie, please refer to the dedicated sections within the main blog post above for expert tips and instructions.
